BizCrush Event Host Setup Guide
5
min

BizCrush
Growth
Host global conferences and seminars seamlessly — with no expensive equipment or live interpreters required.
With just the BizCrush app, you can handle real-time translation, live subtitles, AI summaries, and instant sharing all at once.
This guide walks event hosts through the entire process — from pre-event setup to live execution — so your session runs flawlessly.
1. What BizCrush Offers at Your Event
BizCrush captures spoken audio in real time, converts it to text, translates it into your preferred language, and displays it as subtitles on screen.
For the Host (Presenter's Screen)
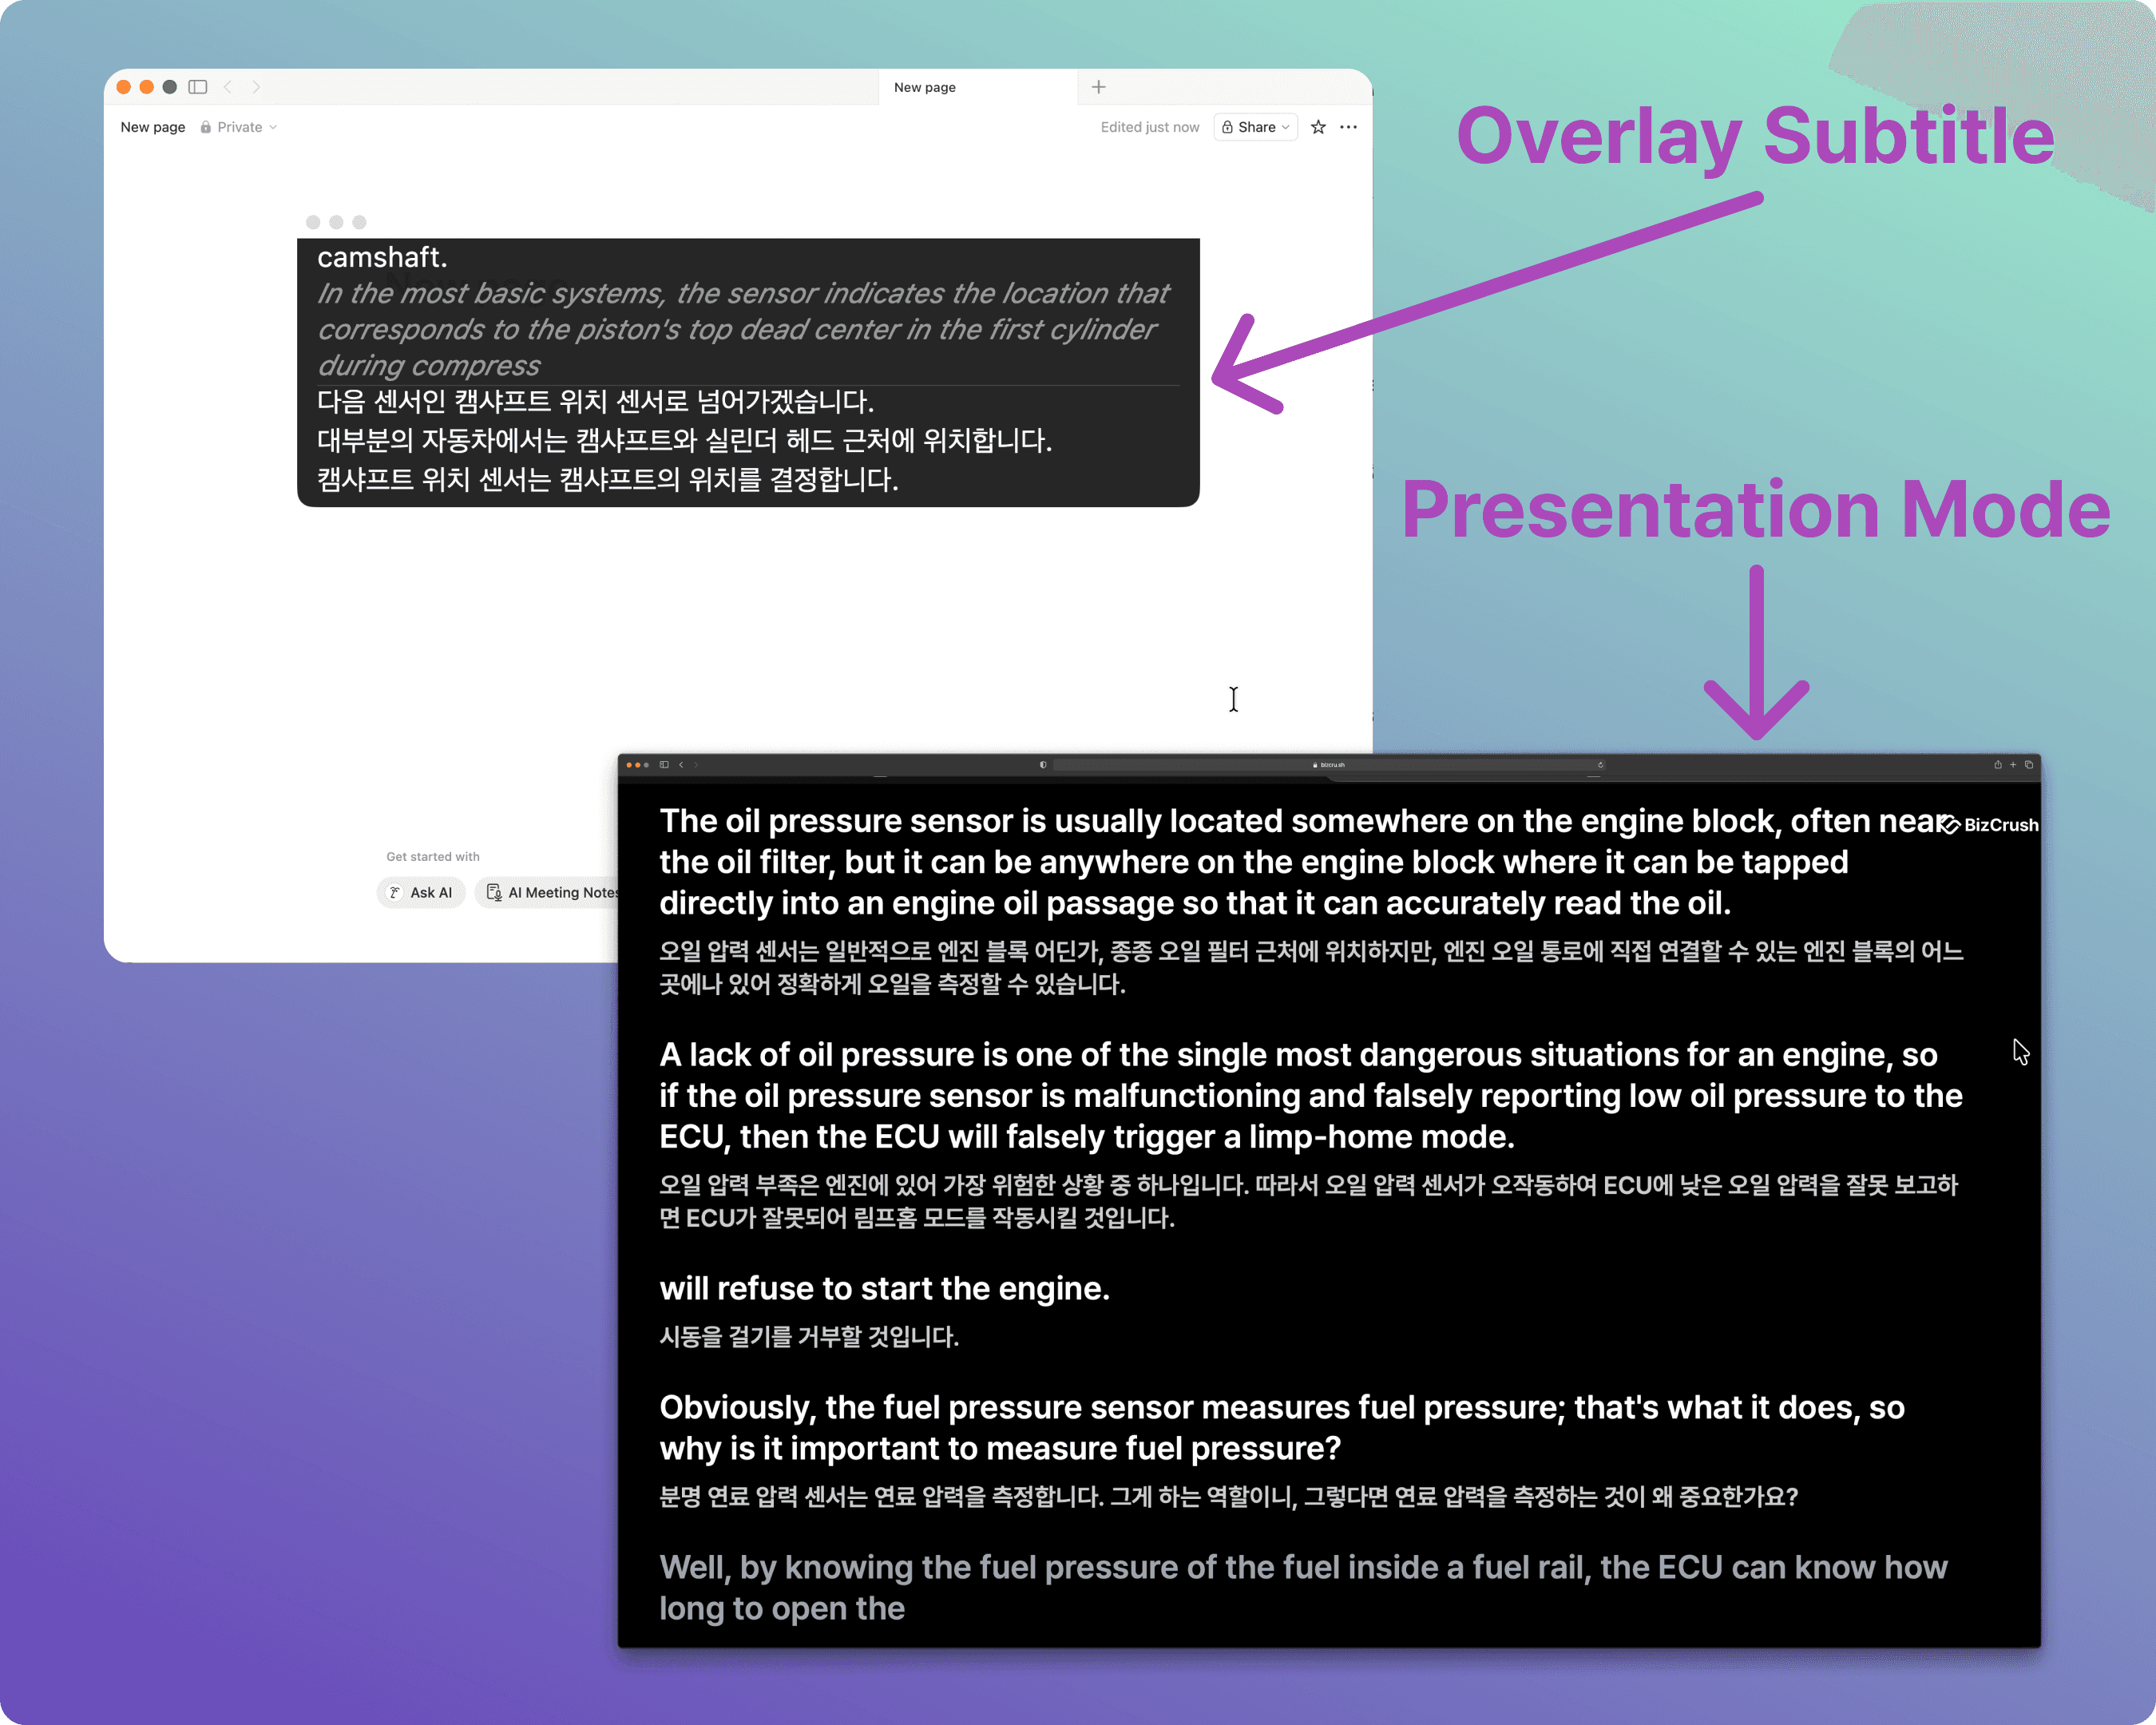
Display live subtitles directly over your presentation screen (Overlay Subtitle Mode).
Subtitles remain on top even when you switch between slides, browsers, or other apps.
Fully customizable subtitle display (Transcript + Translation, Transcript only, Translation only, font size, and number of lines).
For Attendees (Audience Devices)
Attendees simply scan a QR code or click a link to view live transcripts and translations on their own devices.
No app installation or sign-up required for attendees.
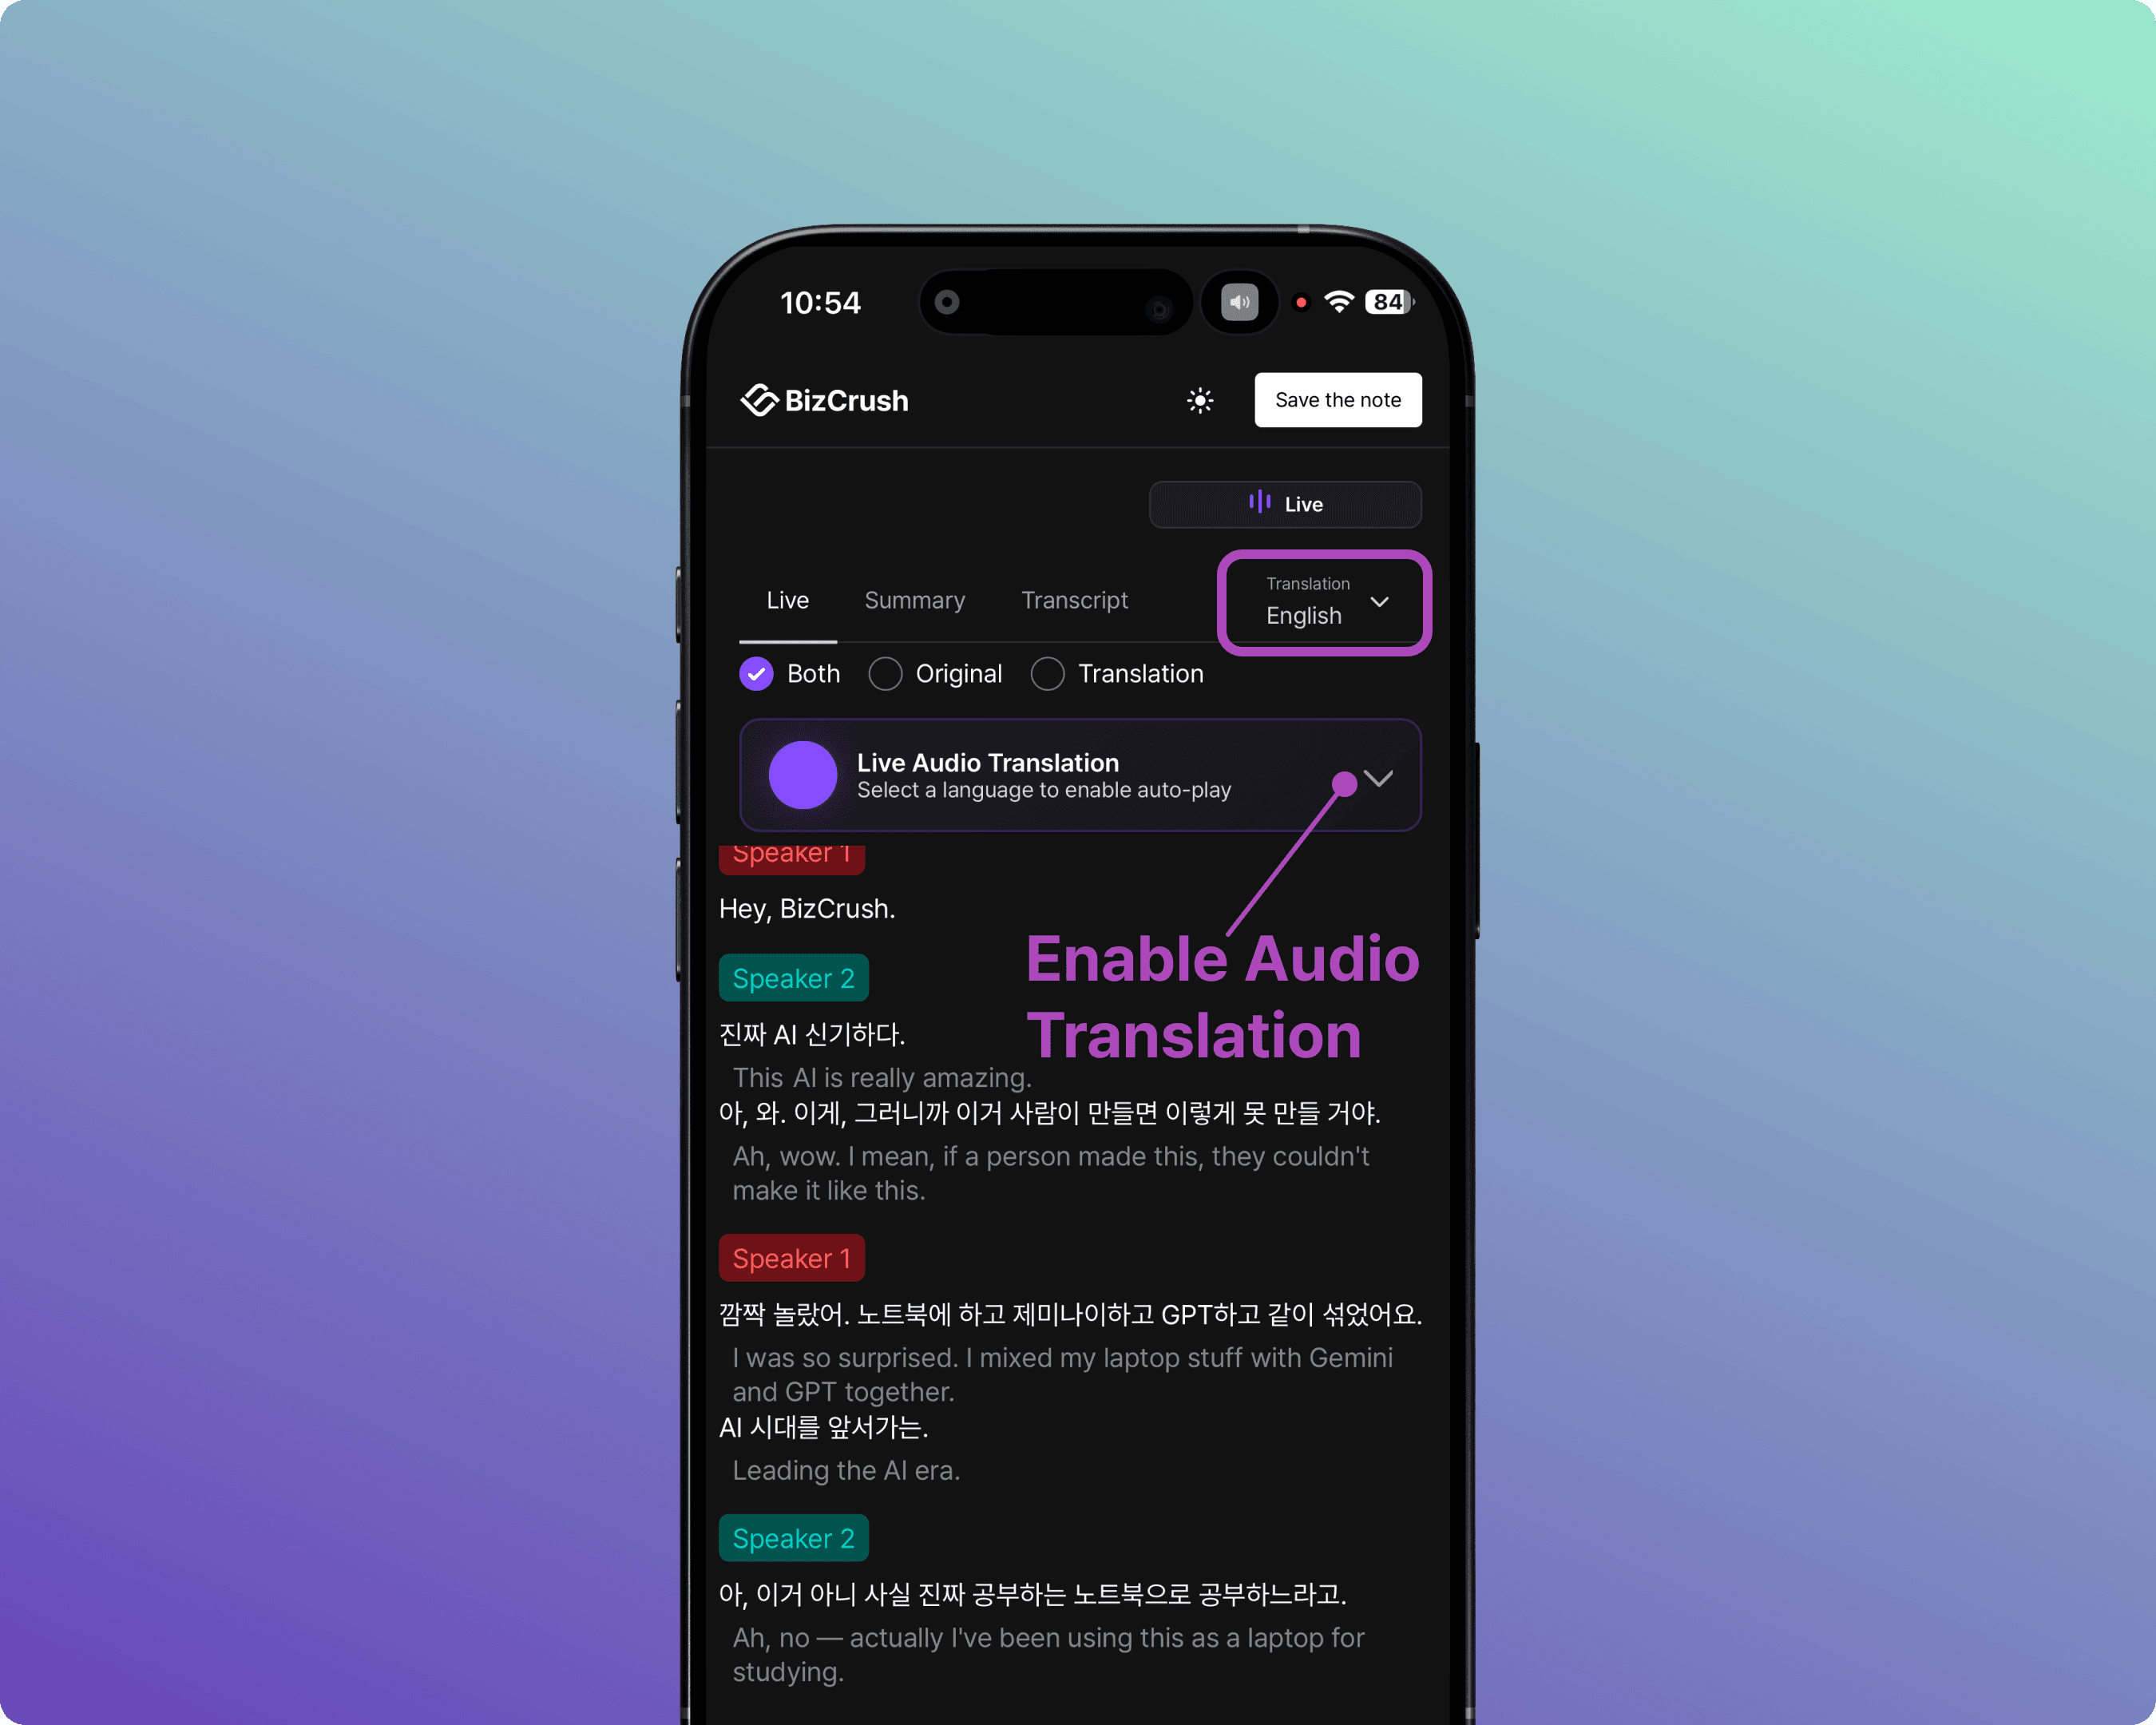
Live Audio Translation: Attendees can listen to the translated audio in real time (personal earphones strongly recommended).
Language Support
Supports 45 languages in total.
Speech Recognition: Recognizes up to 3 spoken languages simultaneously.
Real-time Translation: Outputs up to 2 translated languages simultaneously.
2. Pre-Event Preparation Checklist
To ensure a smooth event, please complete the following steps before event day.
Host's Preparation Checklist
Create a BizCrush account (both Host and Co-hosts)
Install the Desktop App (Windows or macOS)
Decide on your languages (Spoken Language + Translation Language)
Register Custom Keywords (add event-specific jargon and presentation materials → see Section 5)
Assign Co-hosts (if you have staff assisting you → see Section 4)
Do a Dry Run (test subtitle mode in advance)
Create an Account
Search for "BizCrush" on the App Store or Google Play and download the app. You can sign up using Google, Apple, or email.

Install the Desktop App
Go to bizcrush.ai and click [Download PC Version] (available for both Windows and macOS) to install the desktop app.
Note: Real-time Overlay Subtitles are only available on the Desktop App.
3. Setting Up Real-Time Subtitle Modes
First, choose the subtitle display method that best fits your venue's screen setup.
Feature | A. Overlay Subtitles | B. Presentation Mode |
|---|---|---|
What it is | A semi-transparent subtitle window floating over your slides. | A dedicated, full-screen subtitle view. |
Best for | Small events with only one main screen or projector. | Medium-to-large events with a separate, dedicated screen for subtitles. |
Requirements | BizCrush Desktop App must be running. | Any web browser (via a Share Link). |
Pros | Stays on top of everything; freely adjustable size and position. | No app installation needed on the display device — just open the link. |
Common Setup Steps
Complete these steps on the presenter's desktop computer on event day.
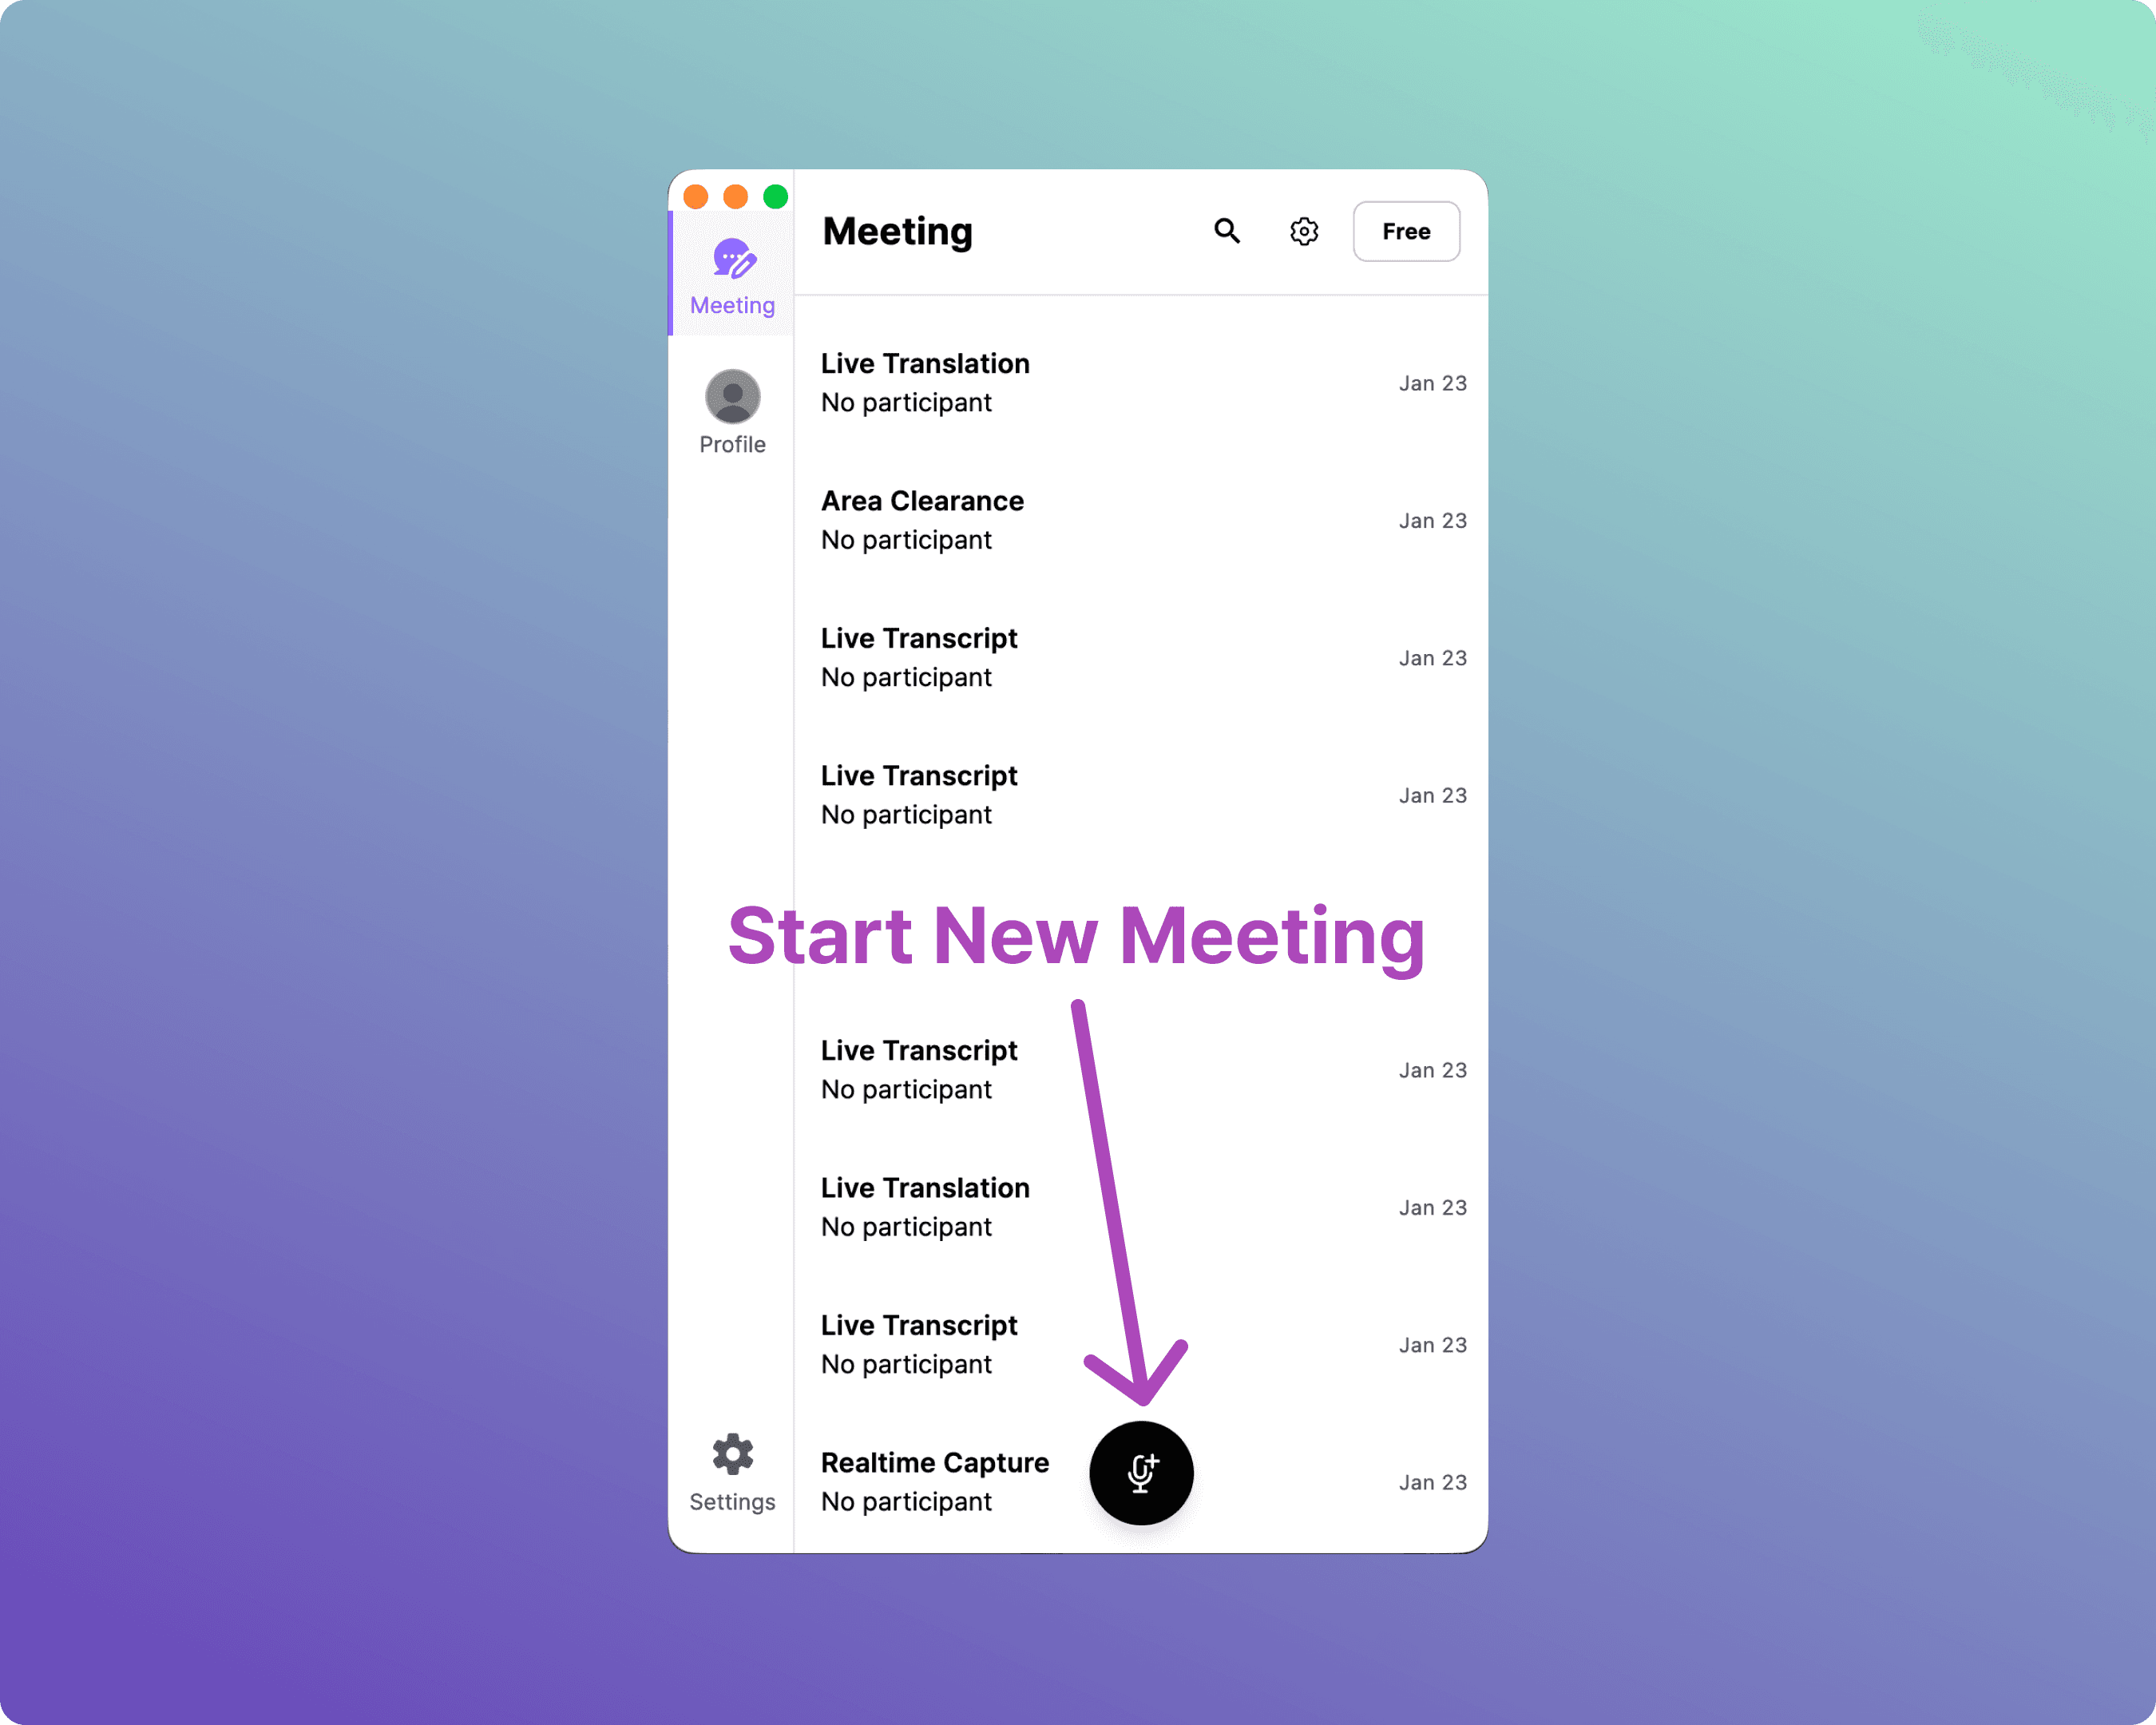
Step 1. Create a Meeting & Start Recording
From the home screen, click the Microphone icon to create a new meeting room and start recording.
Step 2. Open Language Settings
As soon as the meeting starts, the Live Transcript panel opens. Click the language icon at the top of the panel to open language settings.
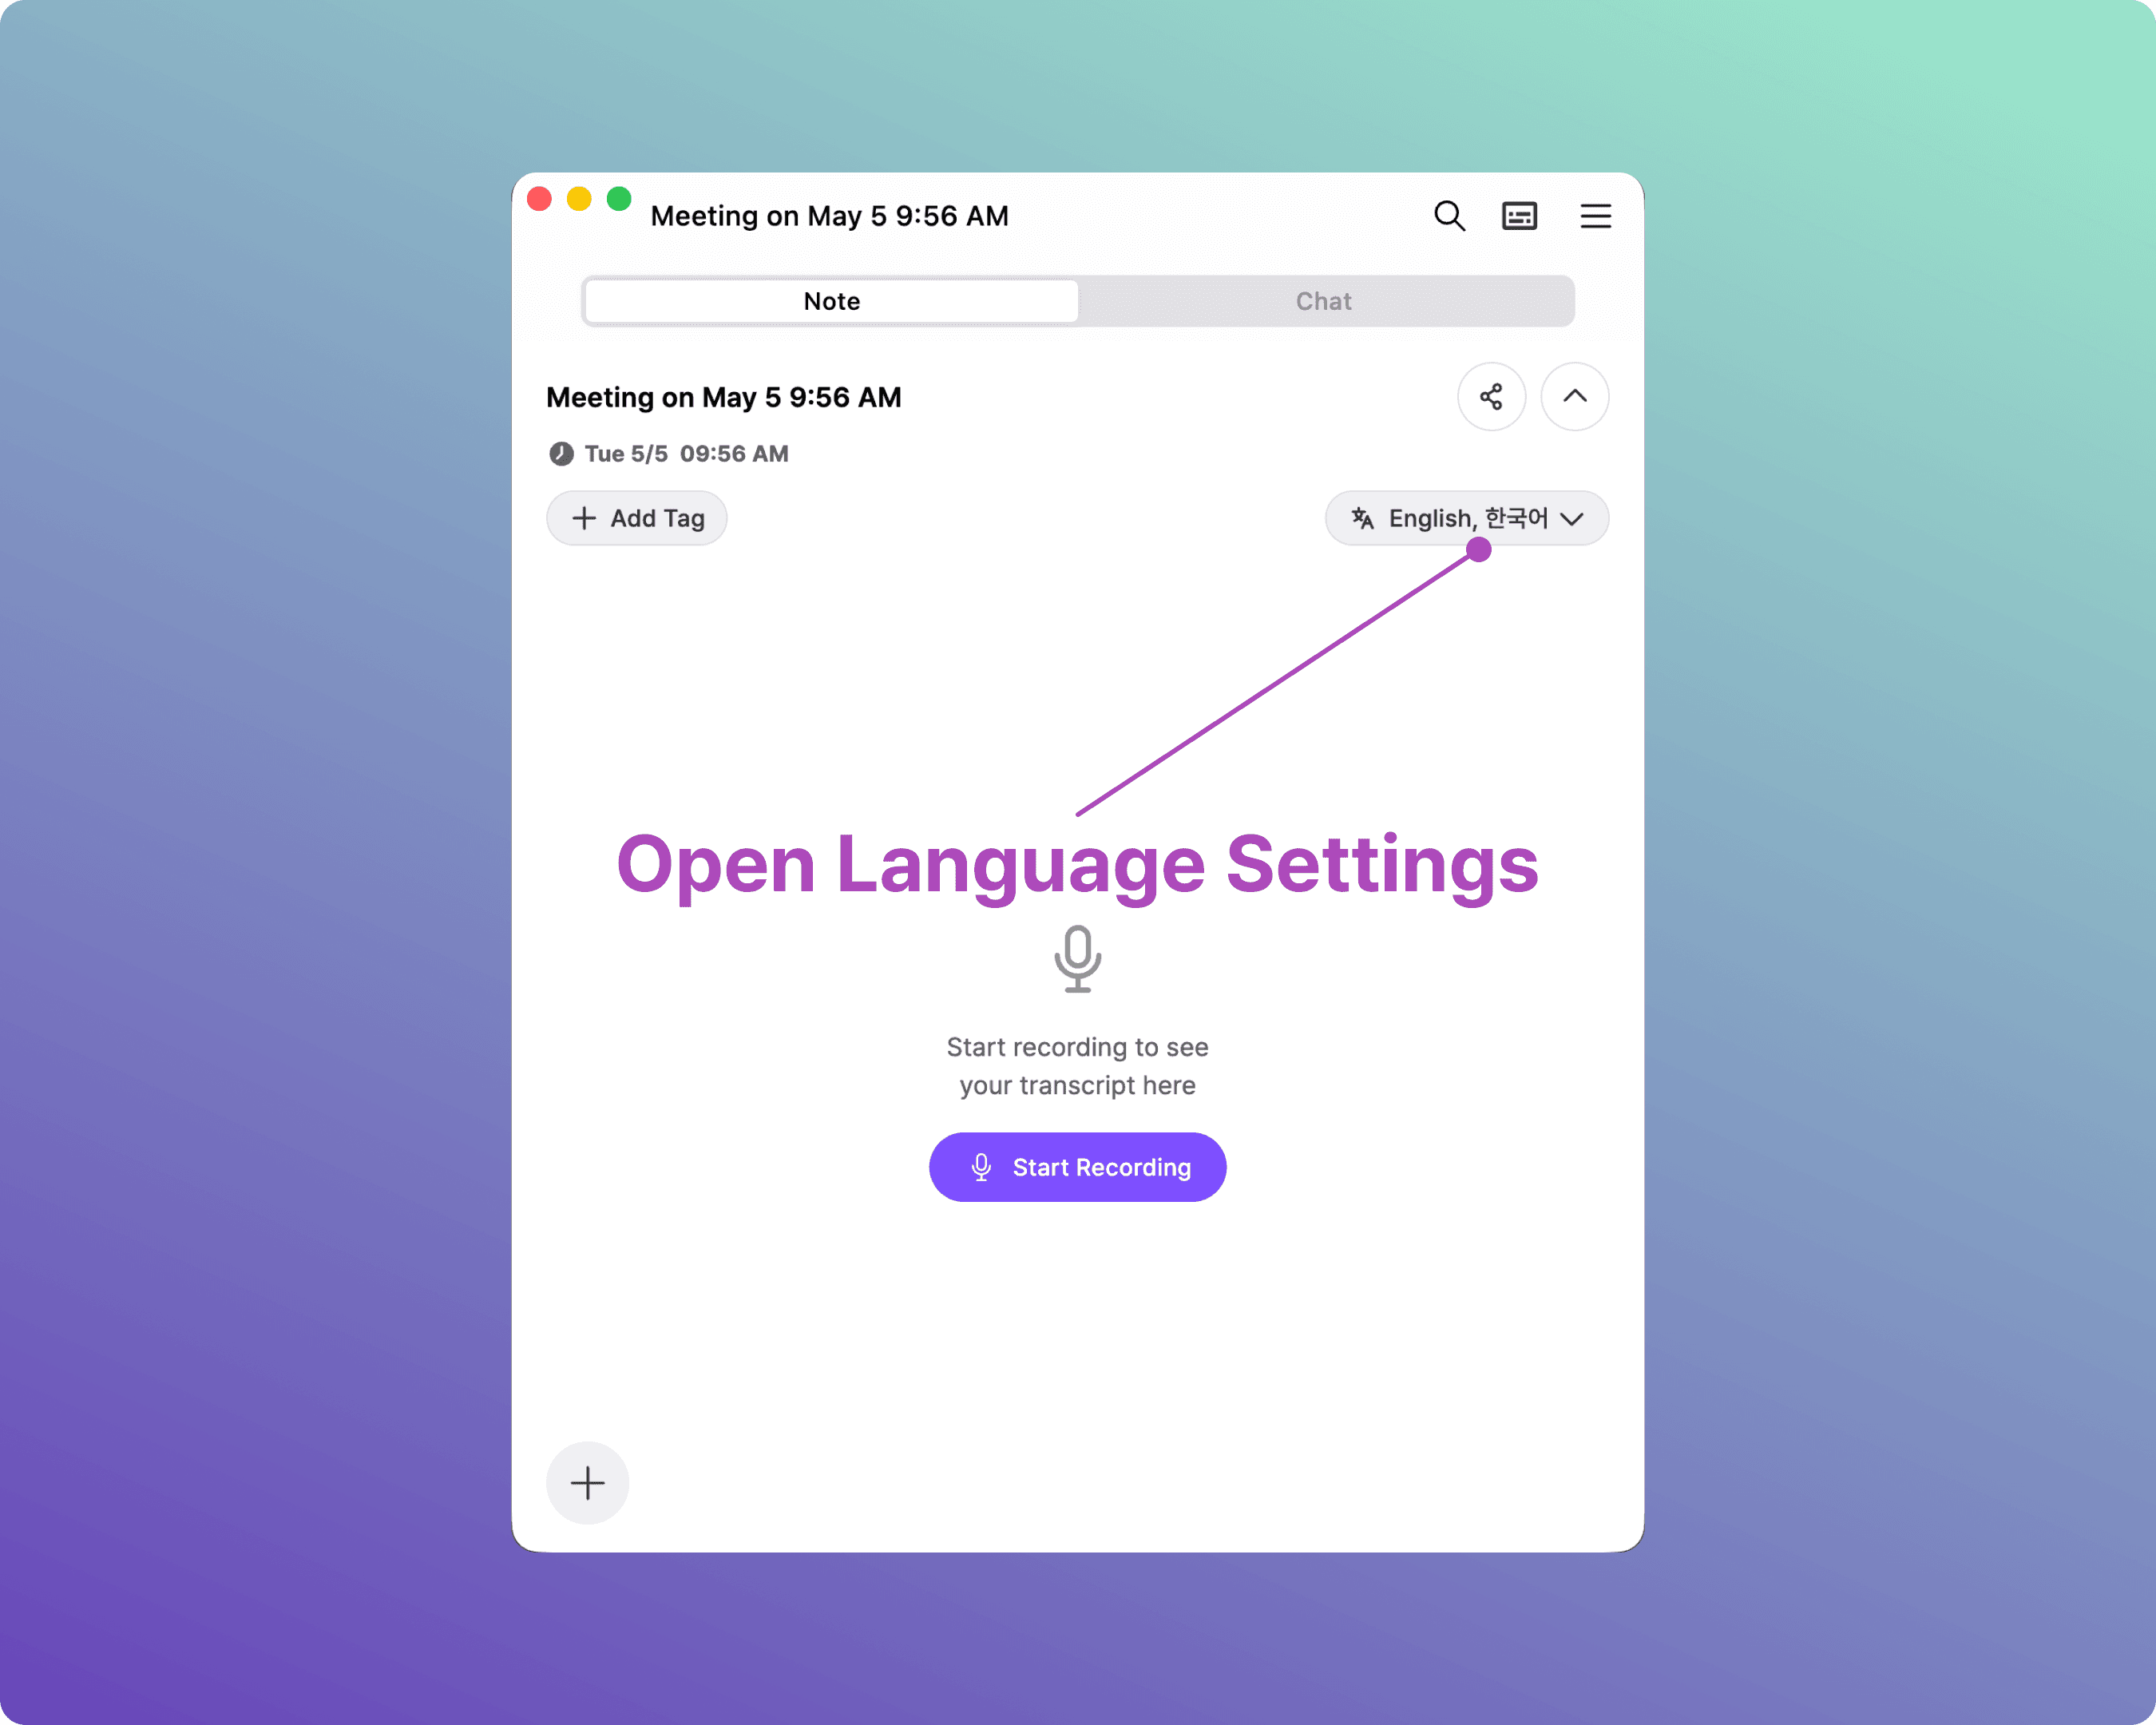
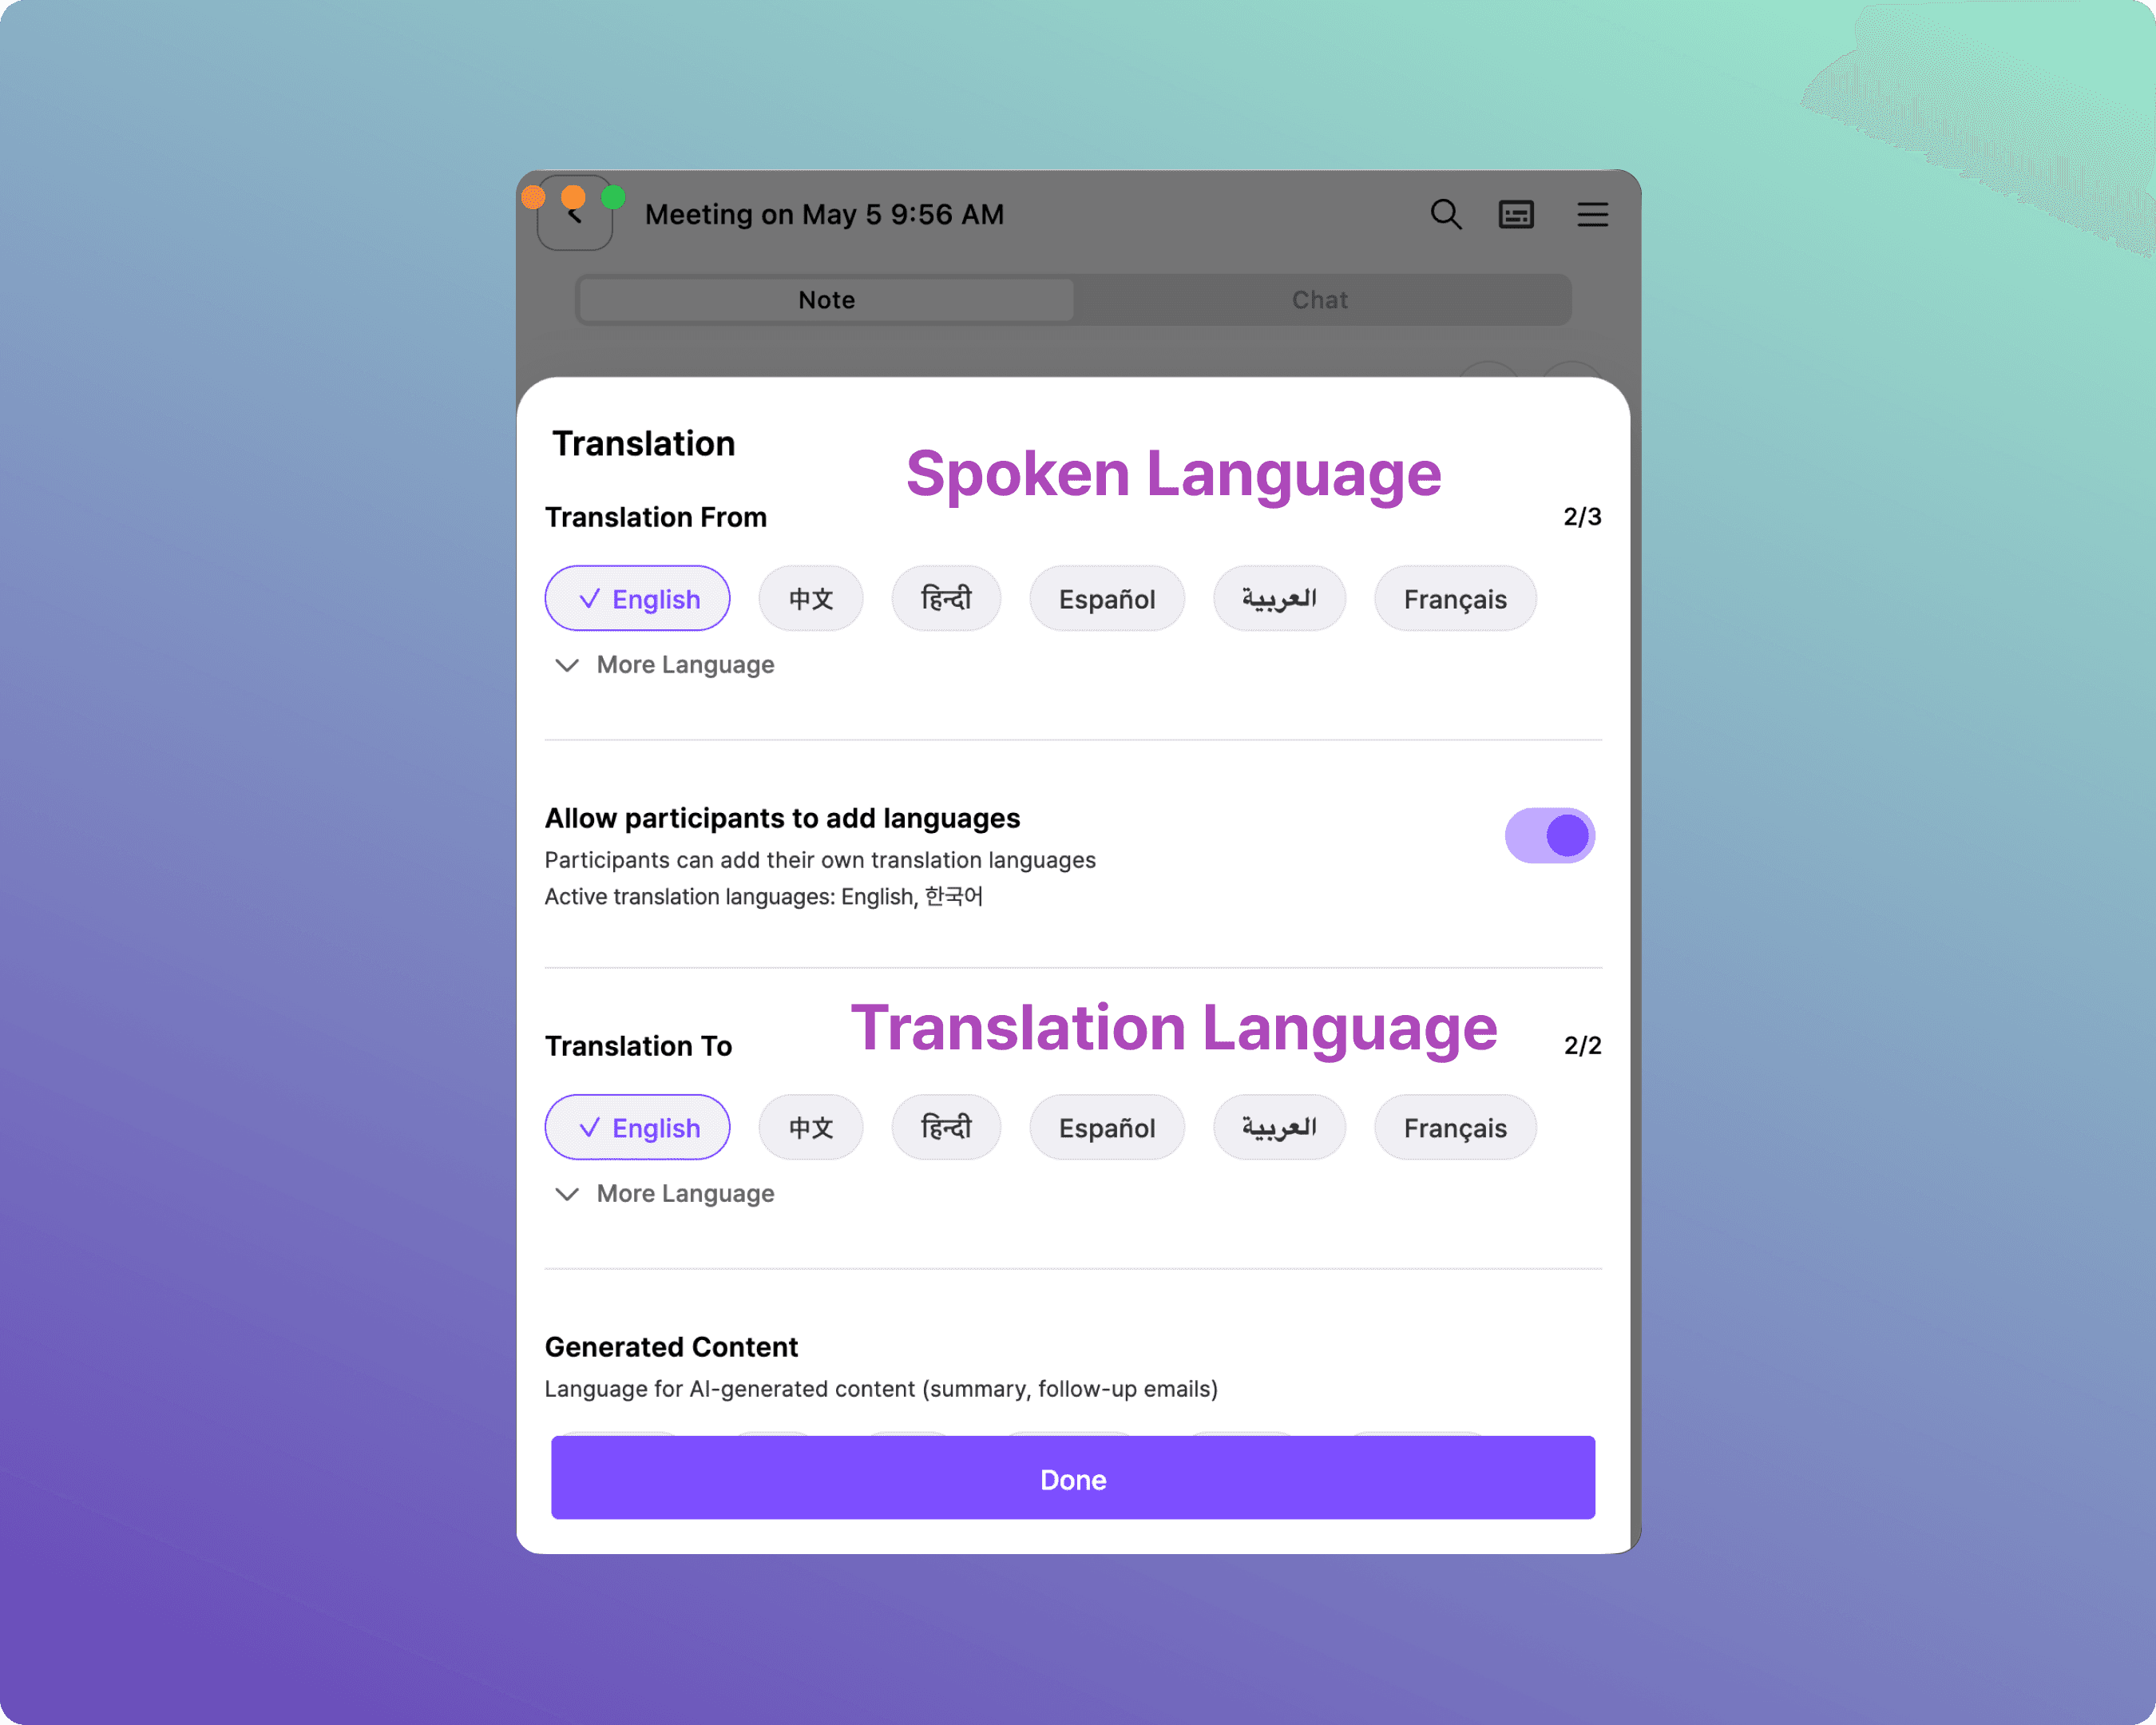
Step 3. Select Spoken & Translation Languages
Manage both transcription and translation settings here. Select the language the speaker will use, and the language you want to display on screen.
A. Overlay Subtitle Setup
Follow these steps if you want subtitles to float over your presentation slides.
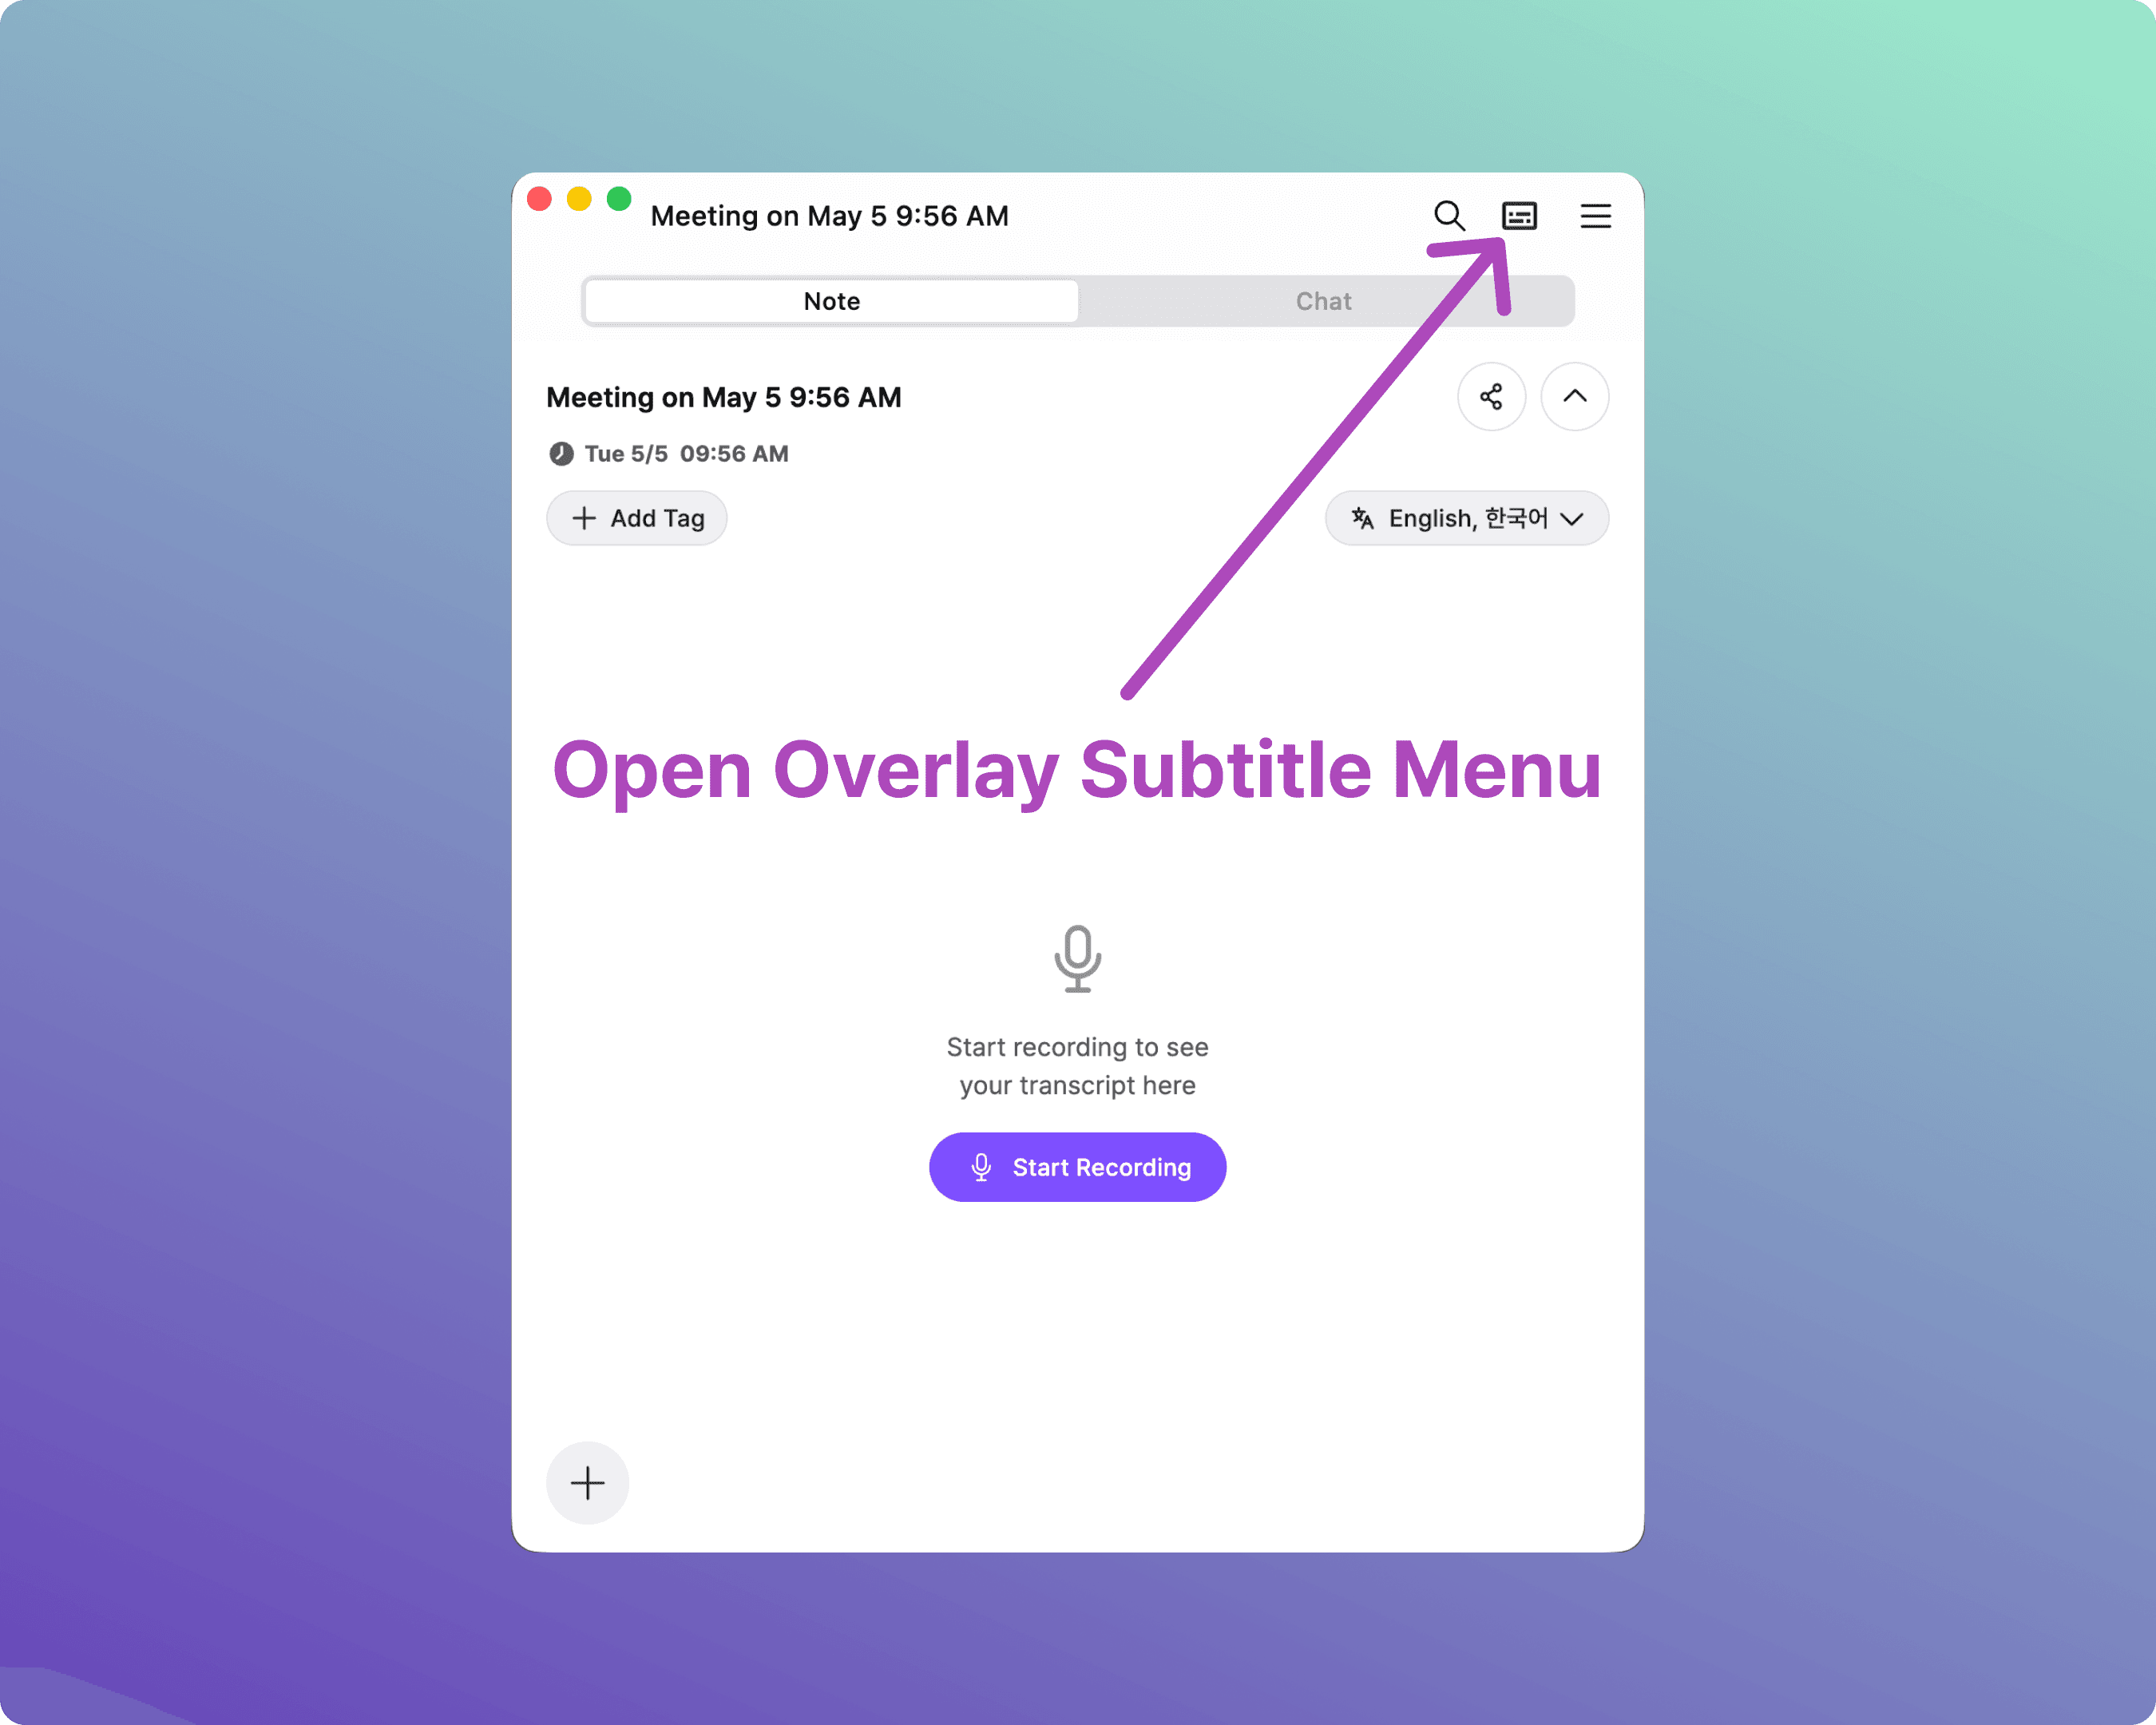
A-1. Open the Overlay Subtitle Menu
Click the Subtitle icon at the top right of the Live Transcript panel to open the Overlay options.
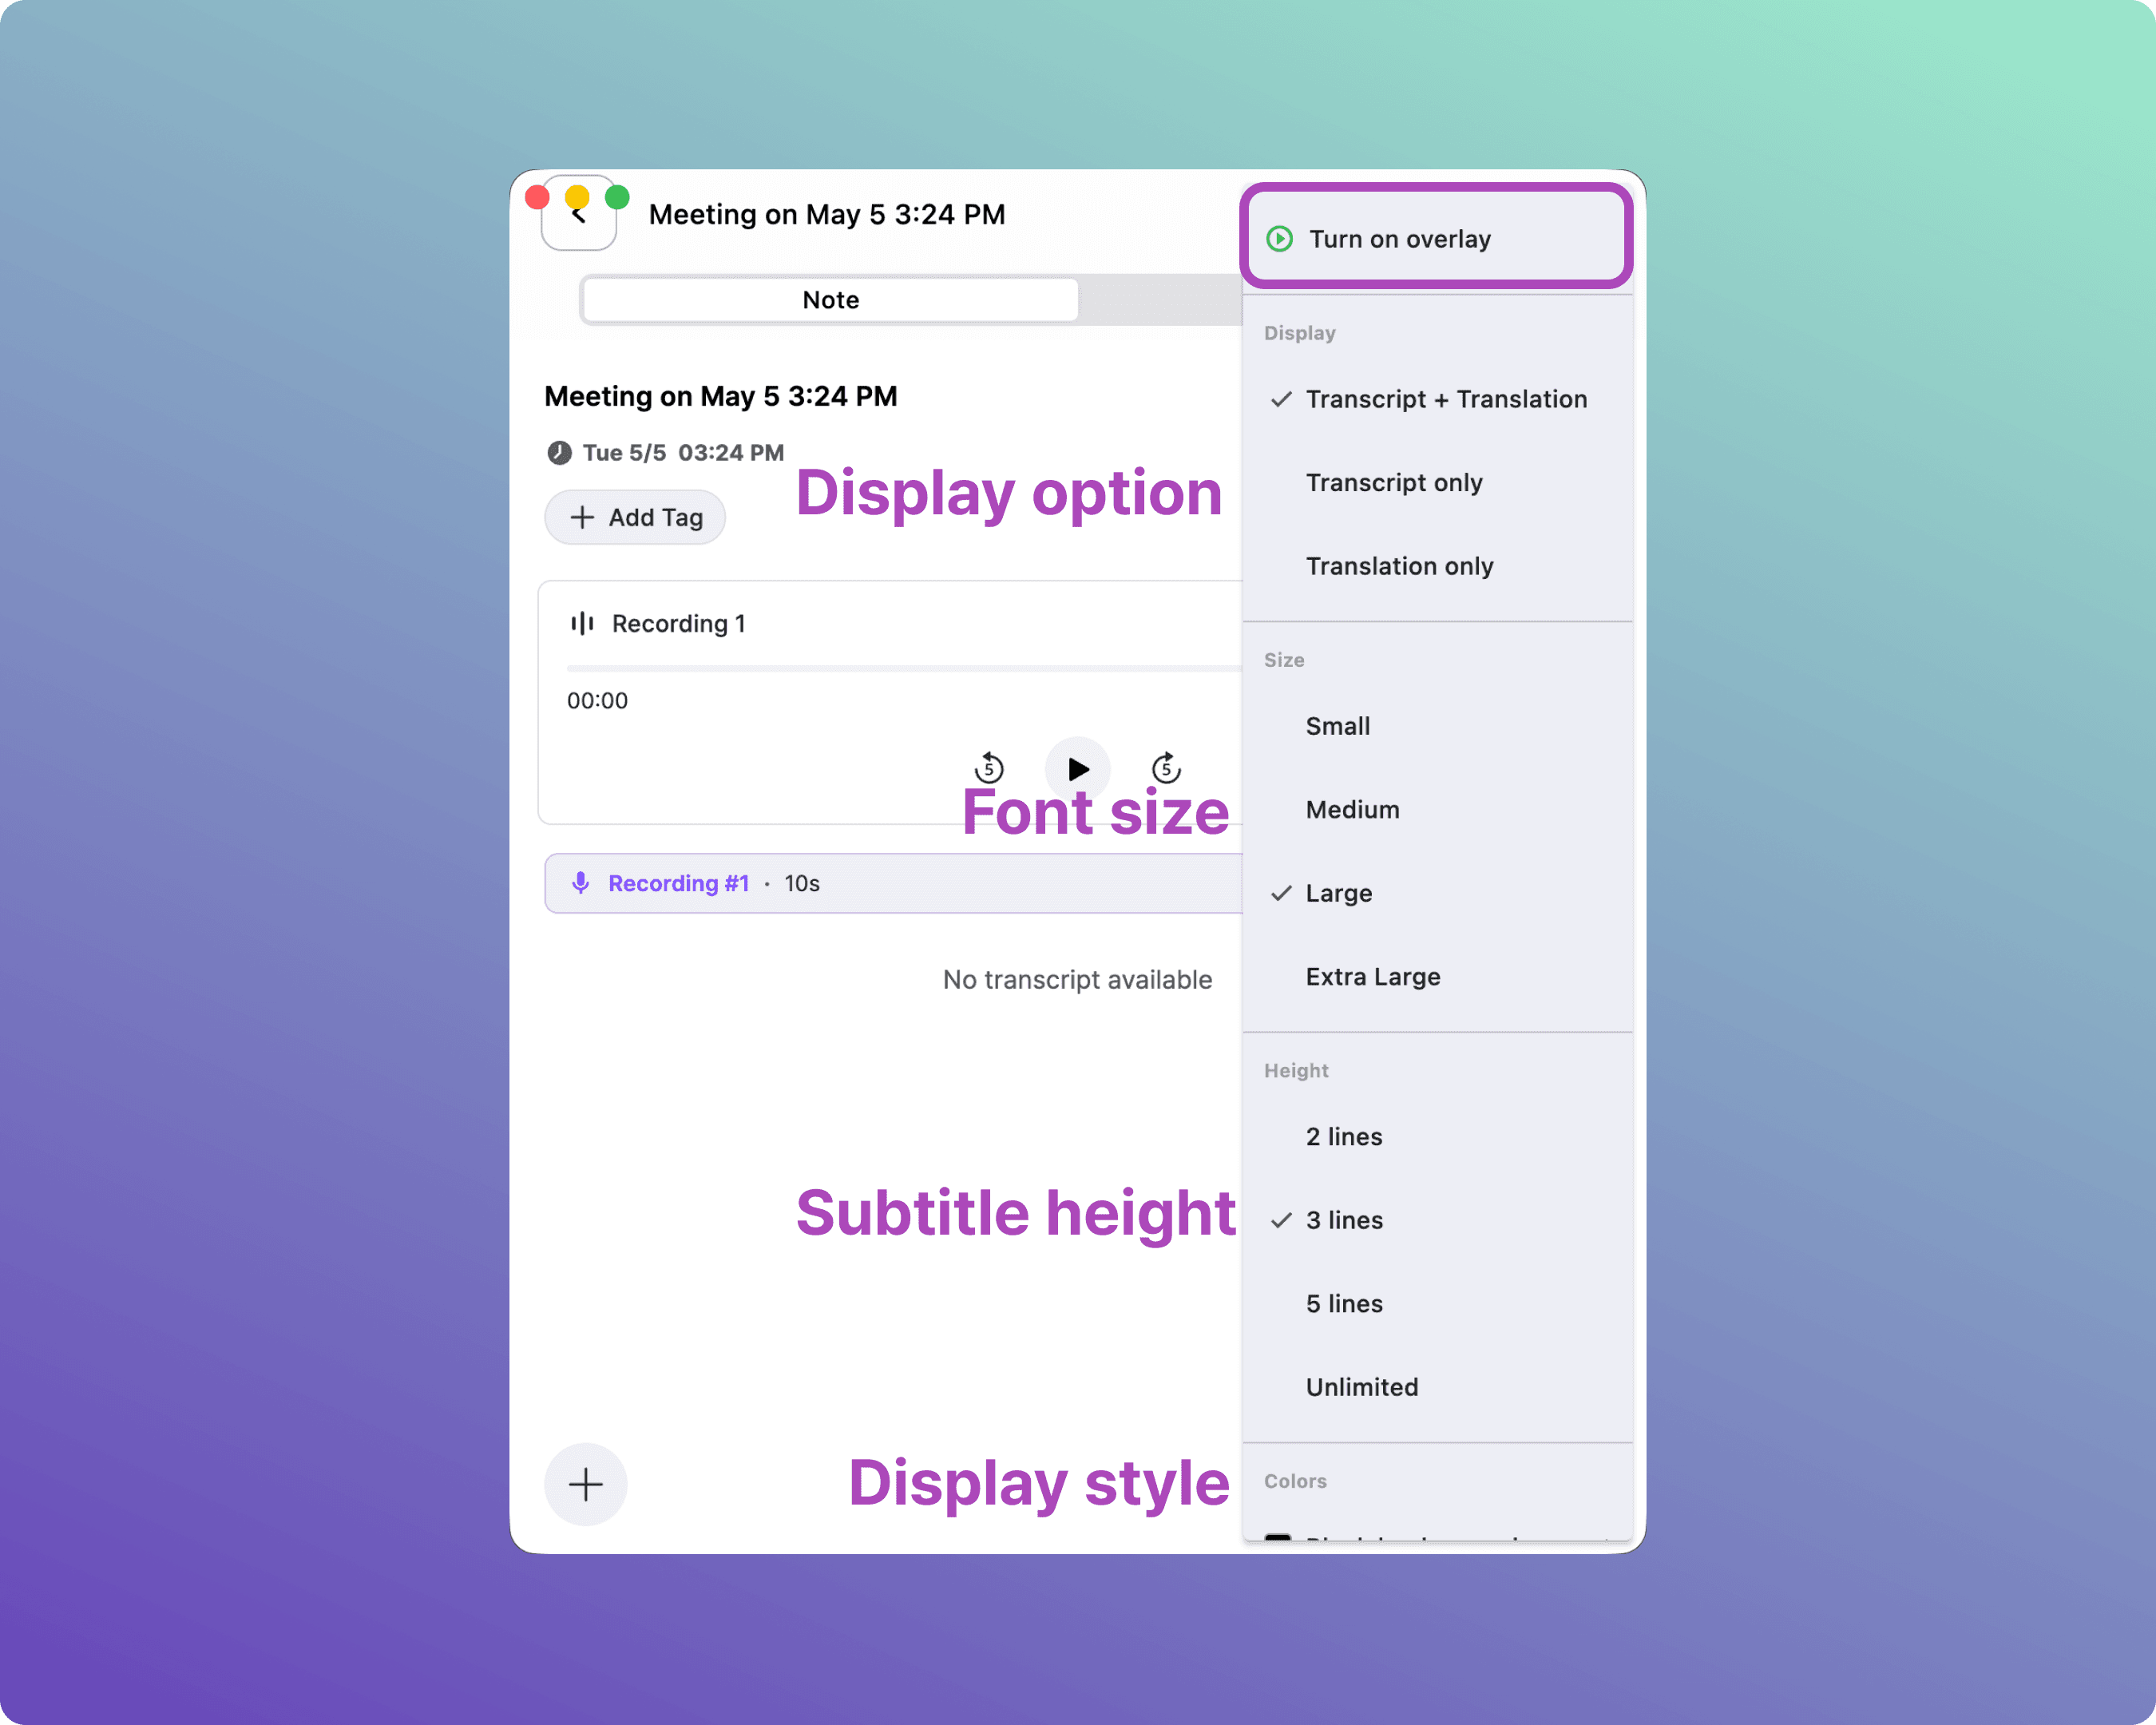
A-2. Customize Overlay Settings
Adjust the options below to fit your screen size and event environment:
Display: Transcript + Translation / Transcript only / Translation only
Size: Small / Medium / Large / Extra Large
Height: 2 lines / 3 lines / 5 lines / Unlimited
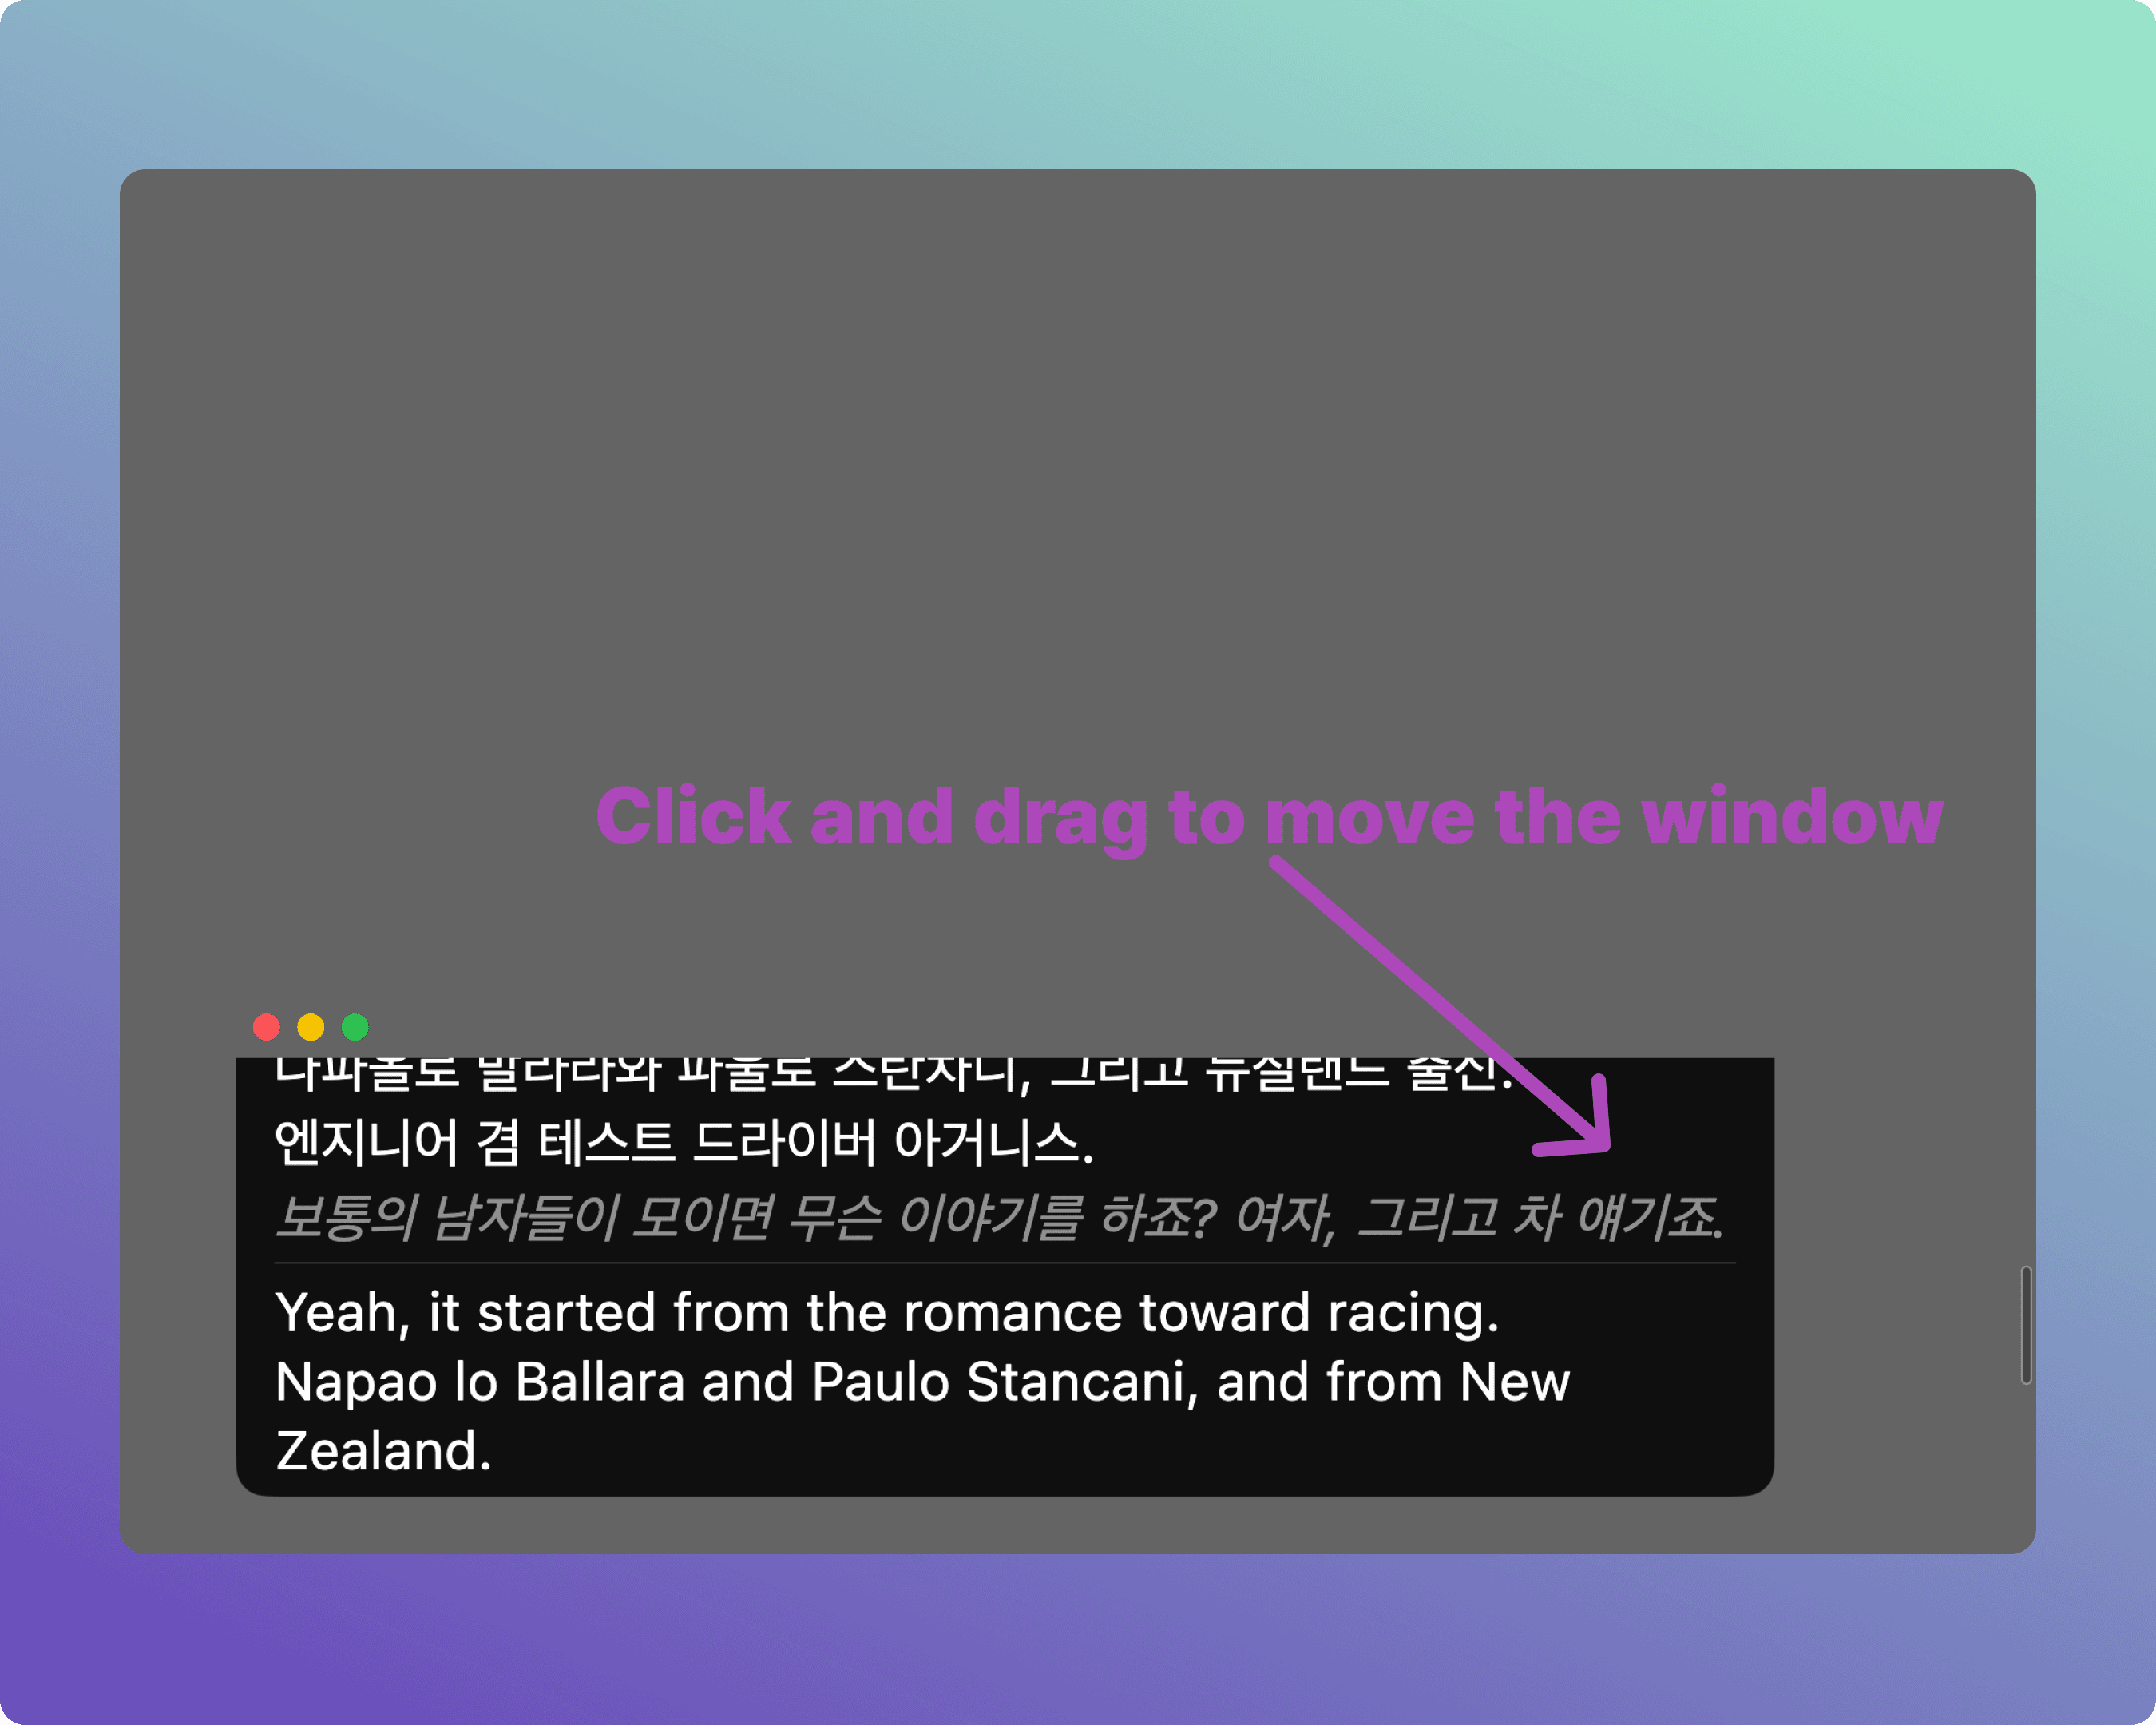
A-3. Adjust Overlay Position
Once configured, turn on the Overlay toggle. The subtitle window will appear on your screen — drag and drop it to any location.
Tip: For large projectors, we recommend Large text and 3 lines. For smaller monitors, Medium and 2 lines work best.
A-4. Close Subtitles
When you no longer need the subtitles, hover over the subtitle window and click the [X] button to close.

B. Presentation Mode Setup
Follow these steps if you have a separate, dedicated monitor or browser window just for subtitles.
B-1. Create a Meeting & Start Recording
As with Overlay mode, click the Microphone icon on the home screen to start a meeting.
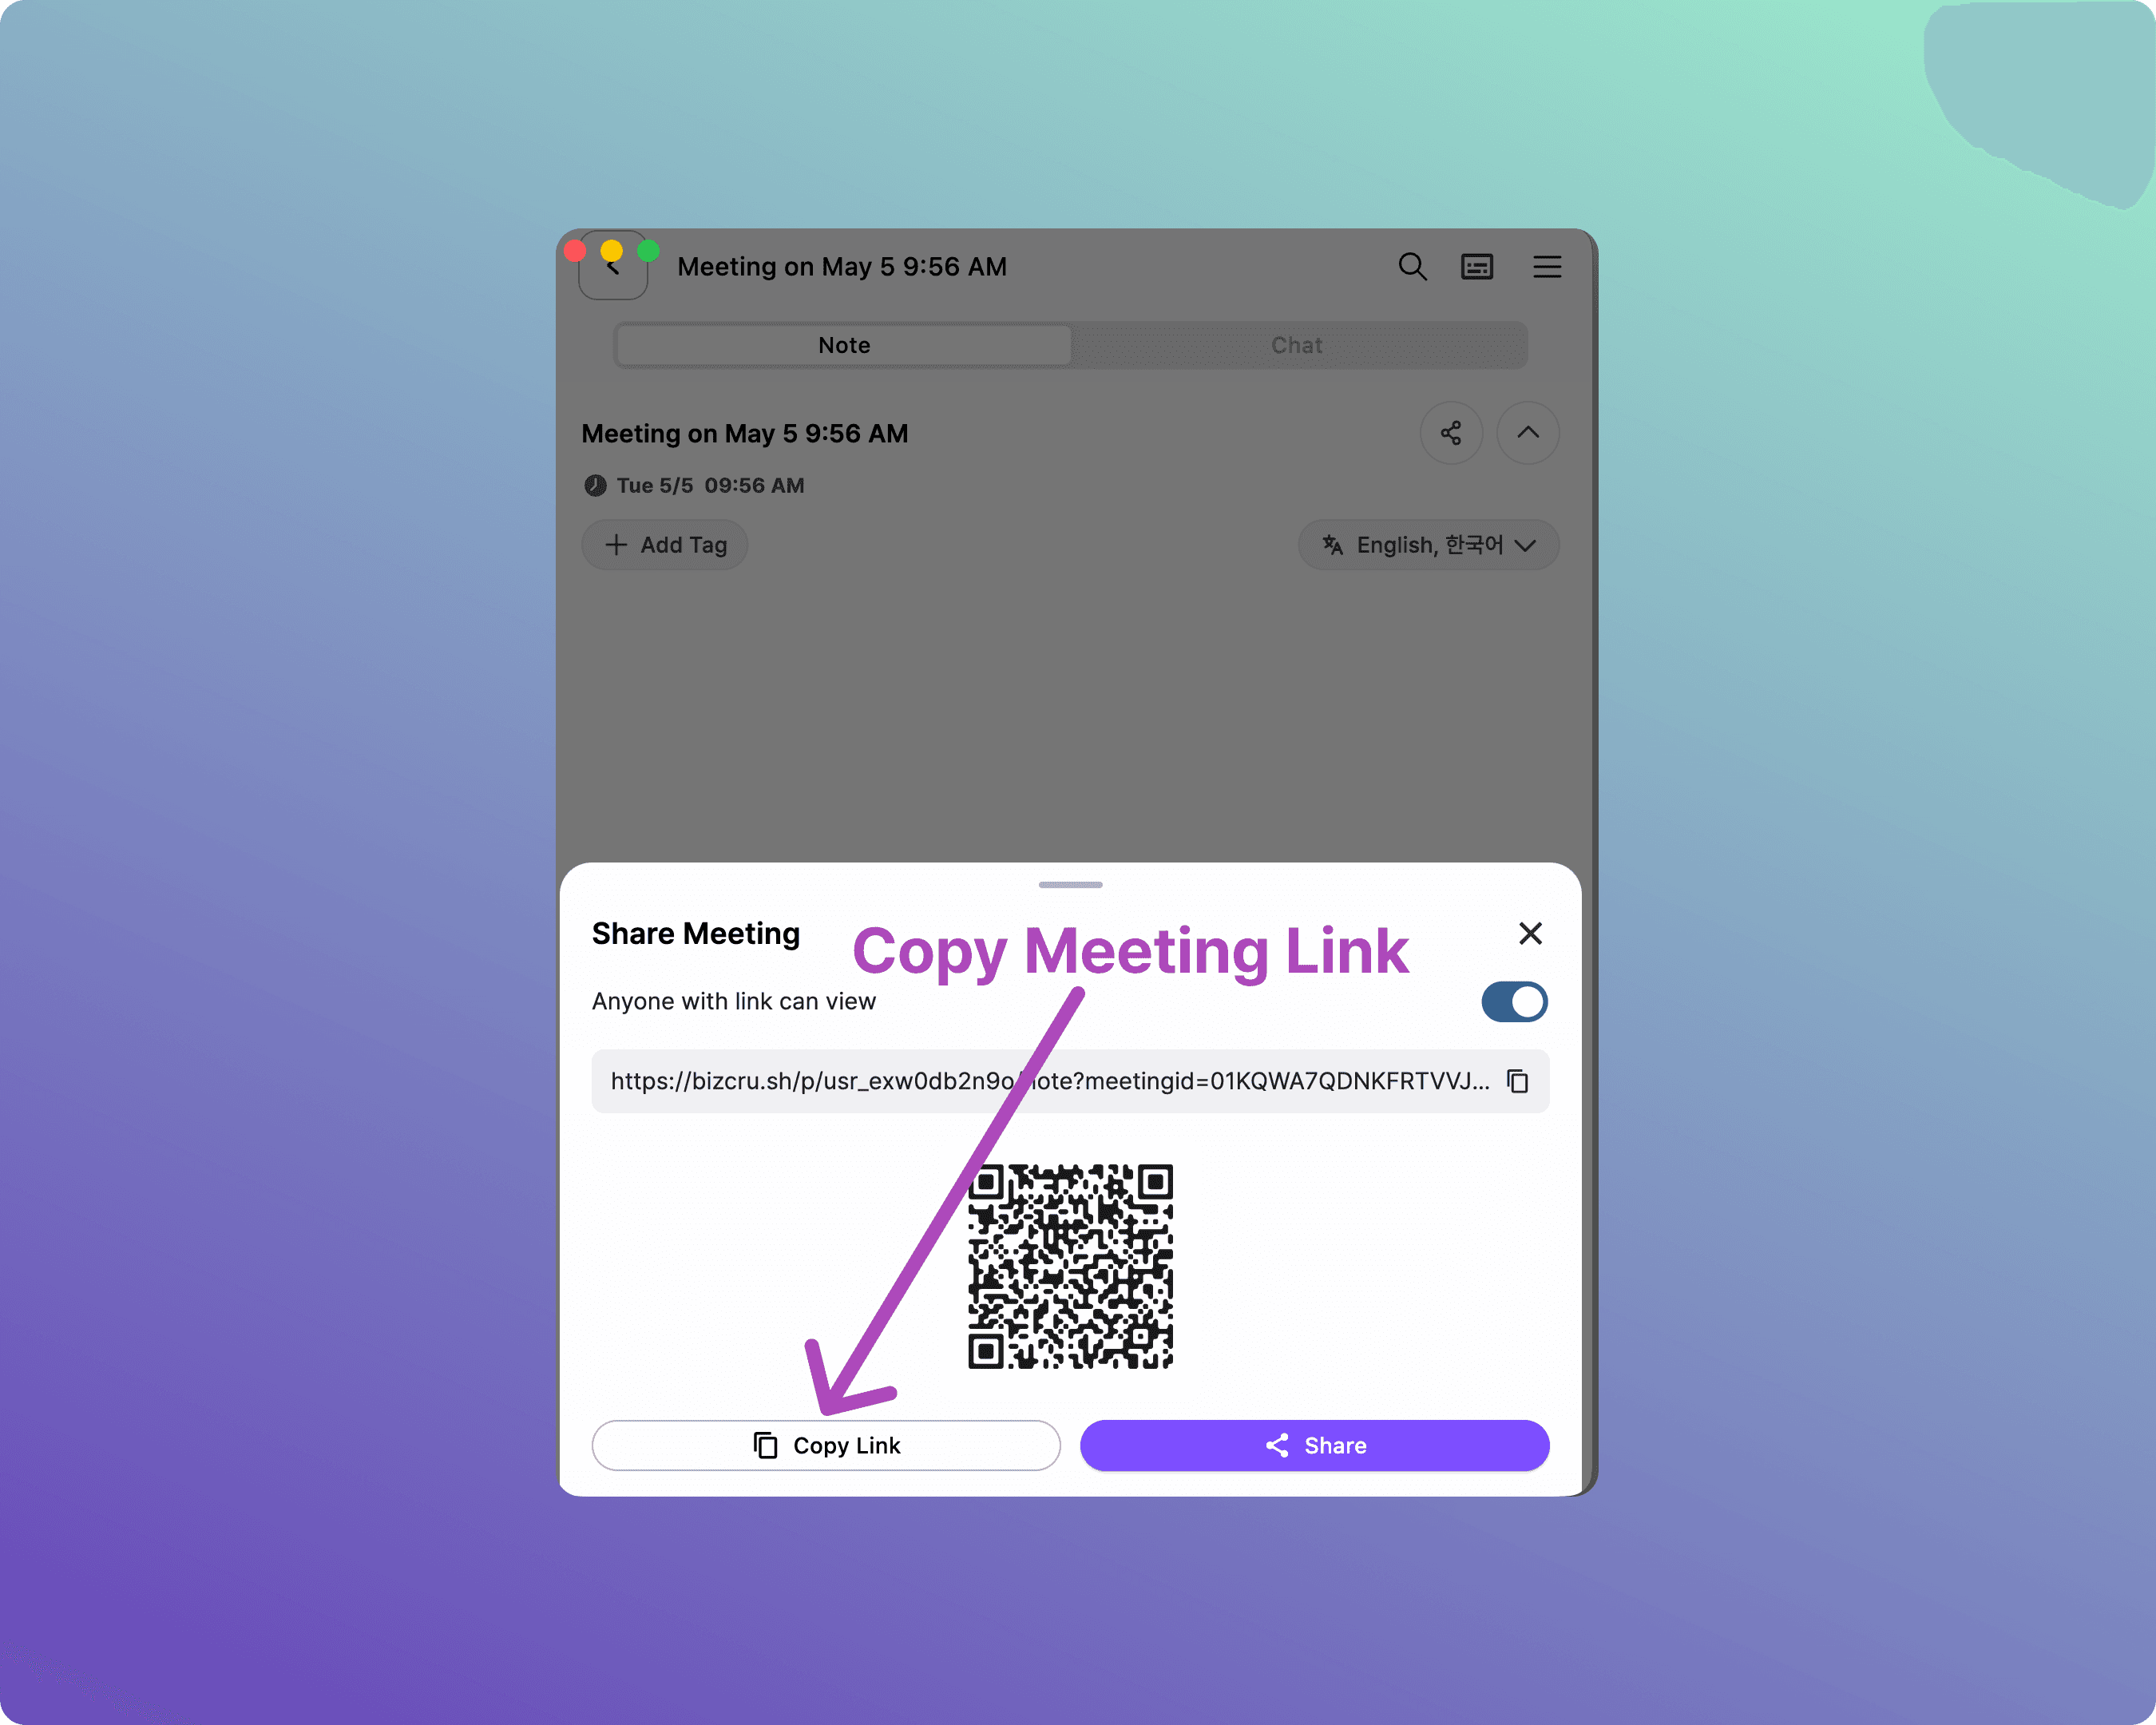
B-2. Copy the Share Link
Click [Share Meeting].

Then click [Copy Link].
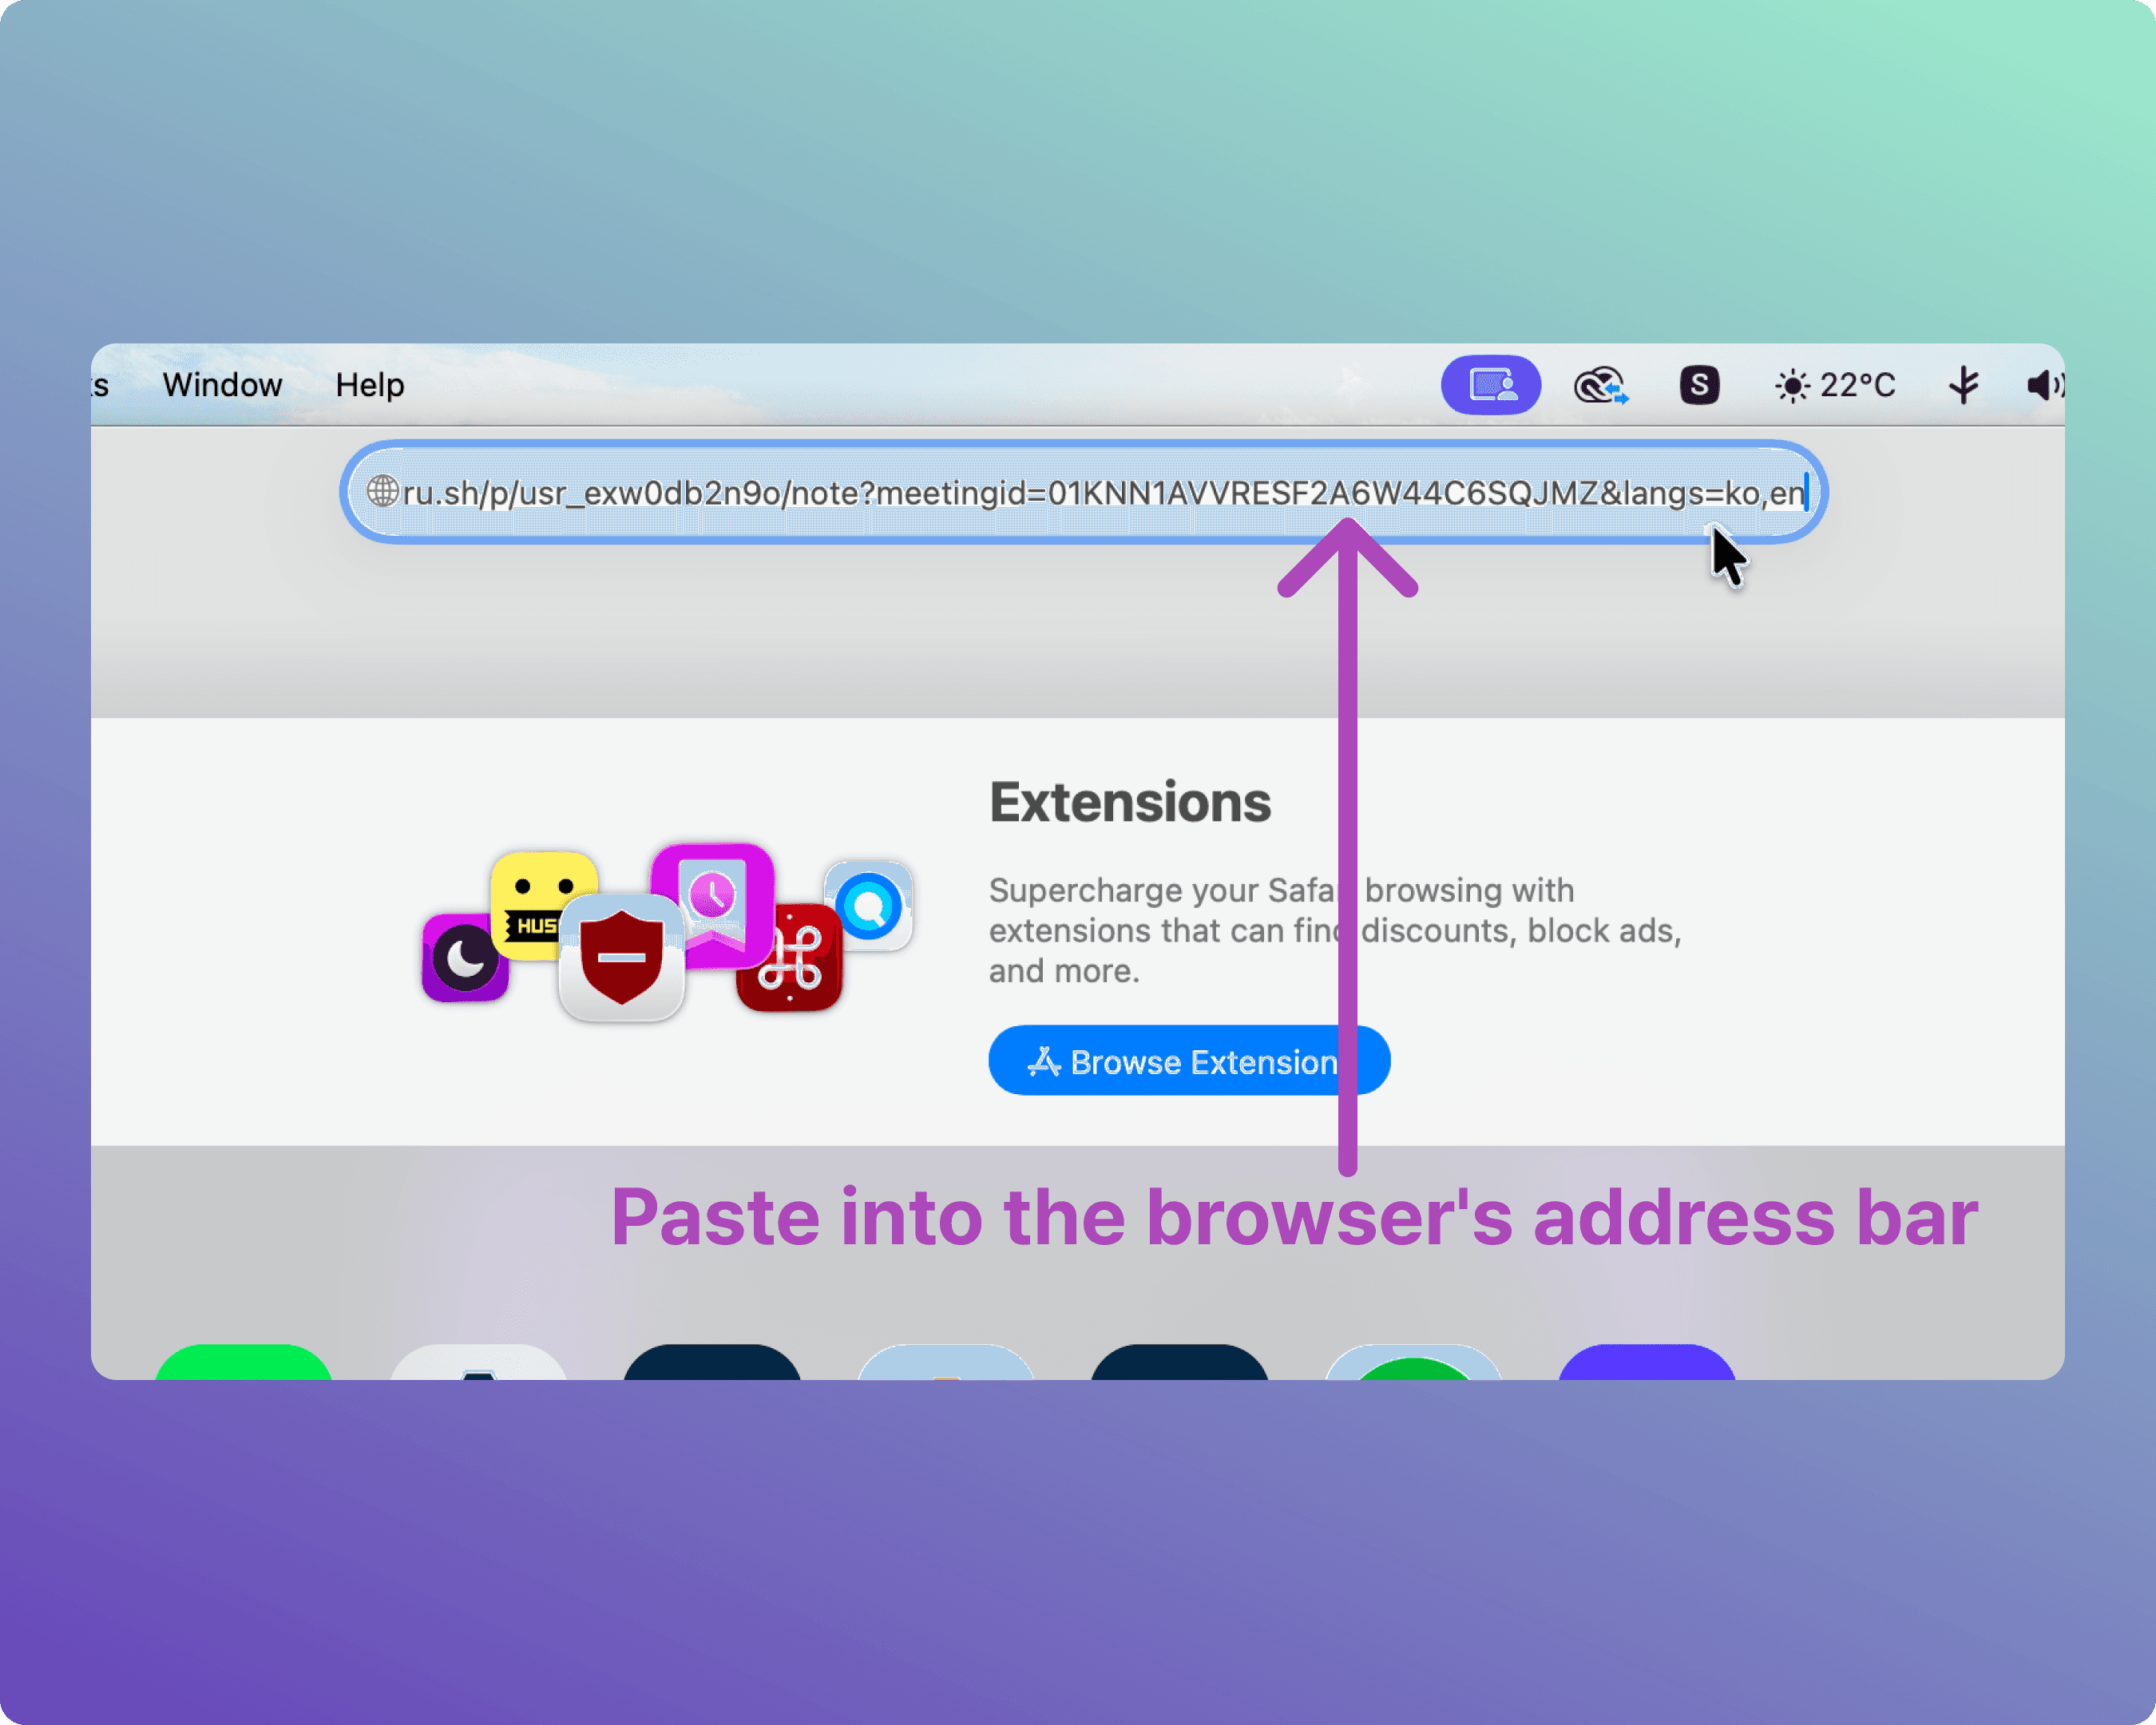
B-3. Open the Share Link in a Browser
Open a web browser on the device connected to your dedicated subtitle screen, and paste the copied link into the address bar.
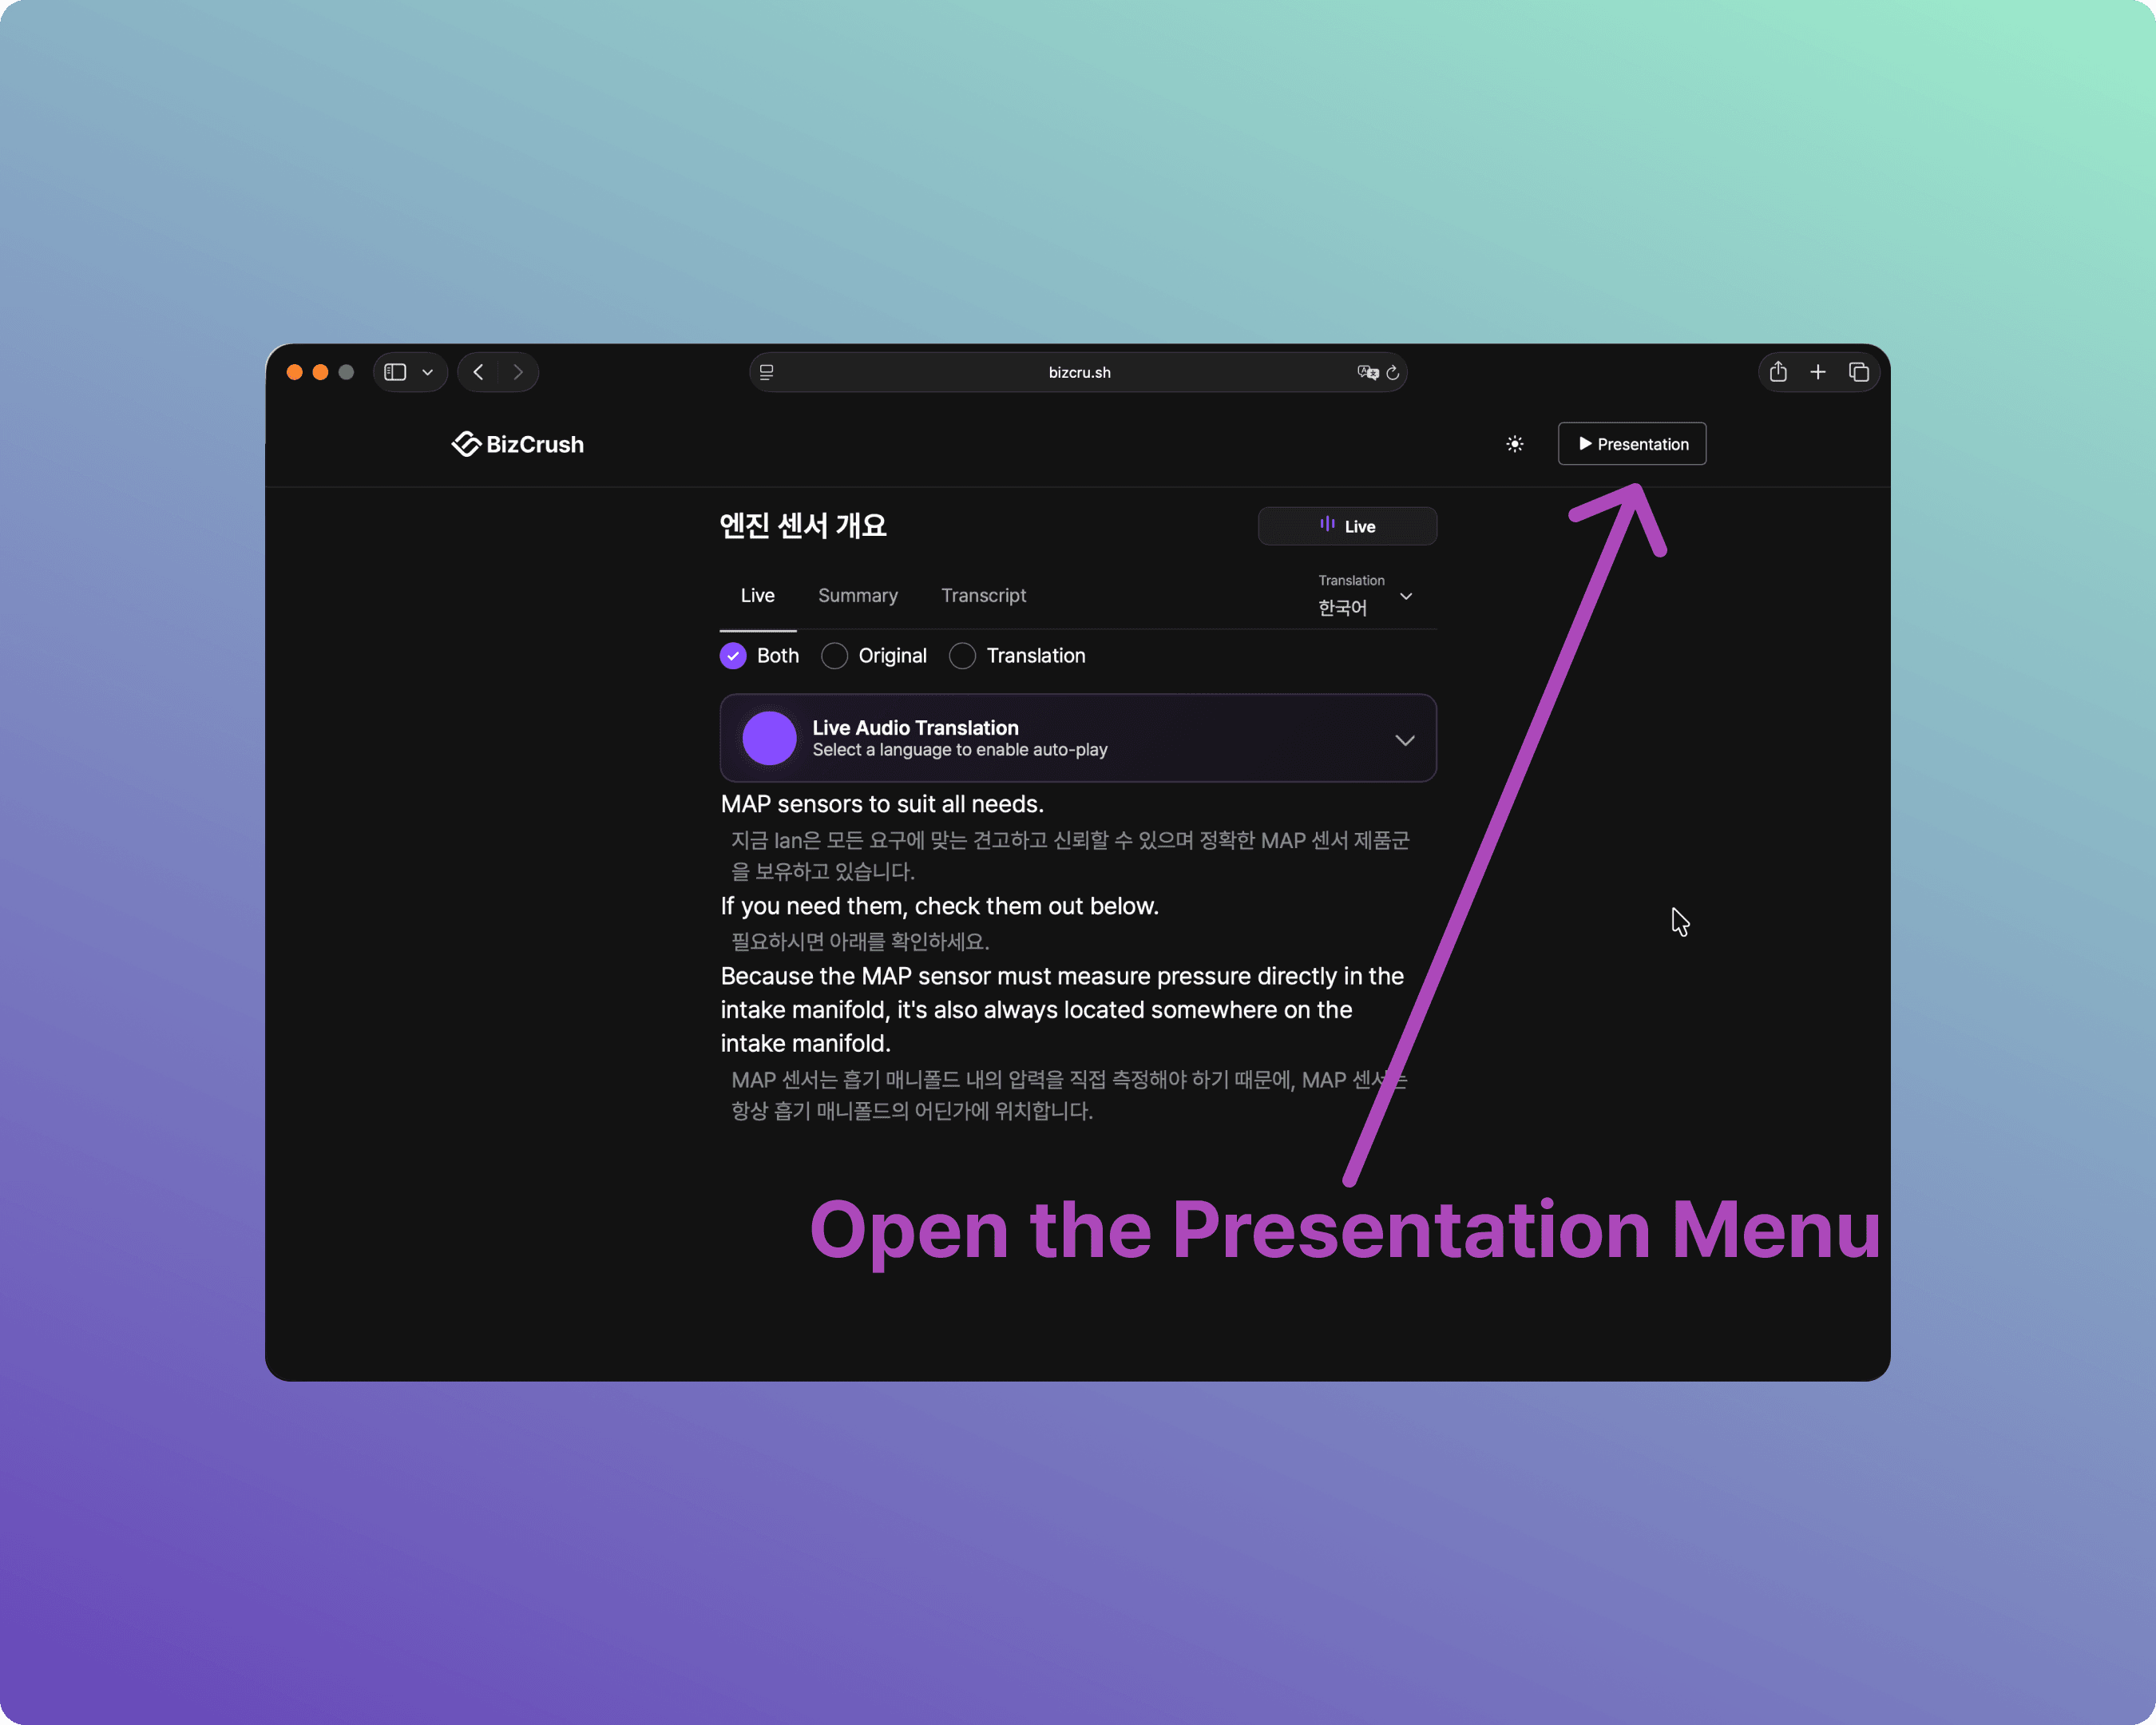
B-4. Open the Presentation Menu
Once the live transcript page loads, click the [▶ Presentation] button in the top right corner to open the settings panel.
B-5. Configure Subtitle Settings
Adjust display, size, and other options in the panel to fit your venue.
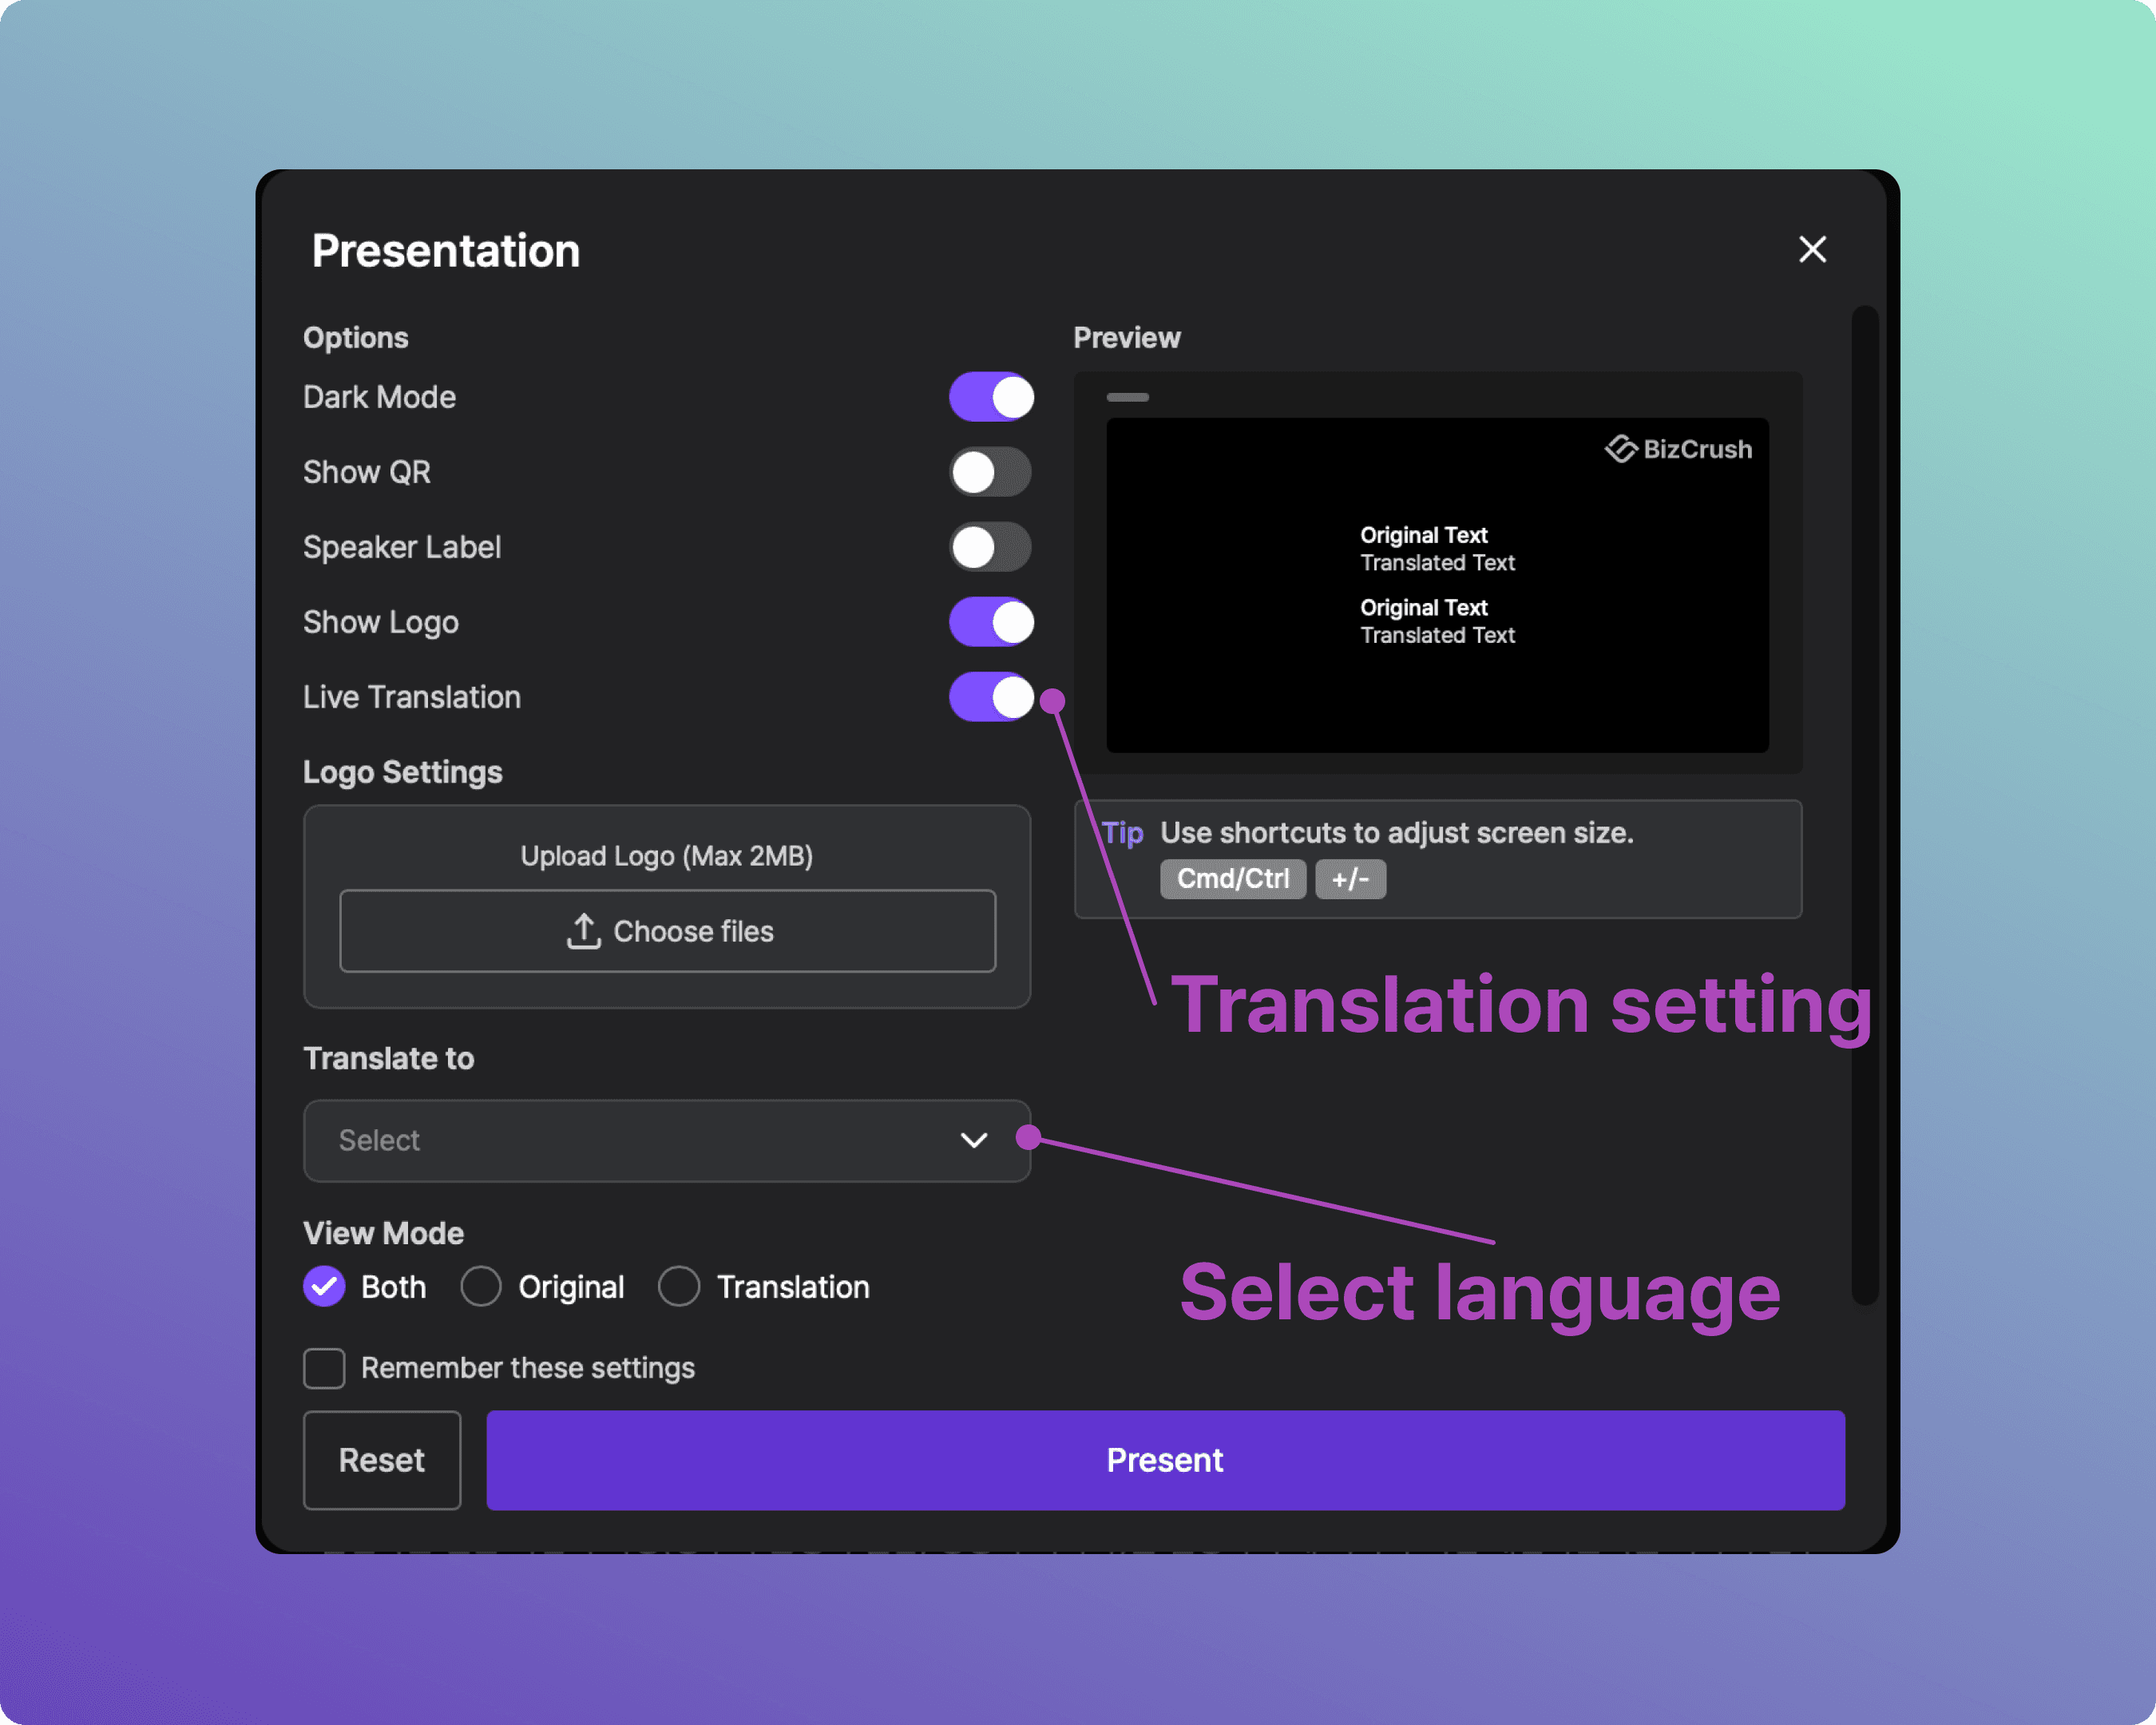
B-6. Launch Presentation Mode
Once you are done configuring, click the [Present] button at the bottom. A dedicated subtitle screen will launch, and real-time translated text will appear as soon as audio is recognized.
B-7. Enter Full-Screen Mode
For a clean look on the venue screen, switch your browser to full-screen mode so the address bar disappears.
Chrome (Windows): Press F11.
Chrome (macOS): Press Control + Command + F.
Safari (macOS): Press Control + Command + F. (Note: Uncheck "Always Show Toolbar in Full Screen" in the View menu so the top bar doesn't block subtitles.)


4. Assigning Co-hosts
If the host needs to focus purely on presenting, you can delegate meeting management to your staff by assigning them as Co-hosts.
Note: Co-hosts must create a BizCrush account before the event.
What Co-hosts Can Do
Edit live transcripts, start and stop recording, change meeting names, assign speaker labels, and generate and send follow-up emails.
How to Assign a Co-host
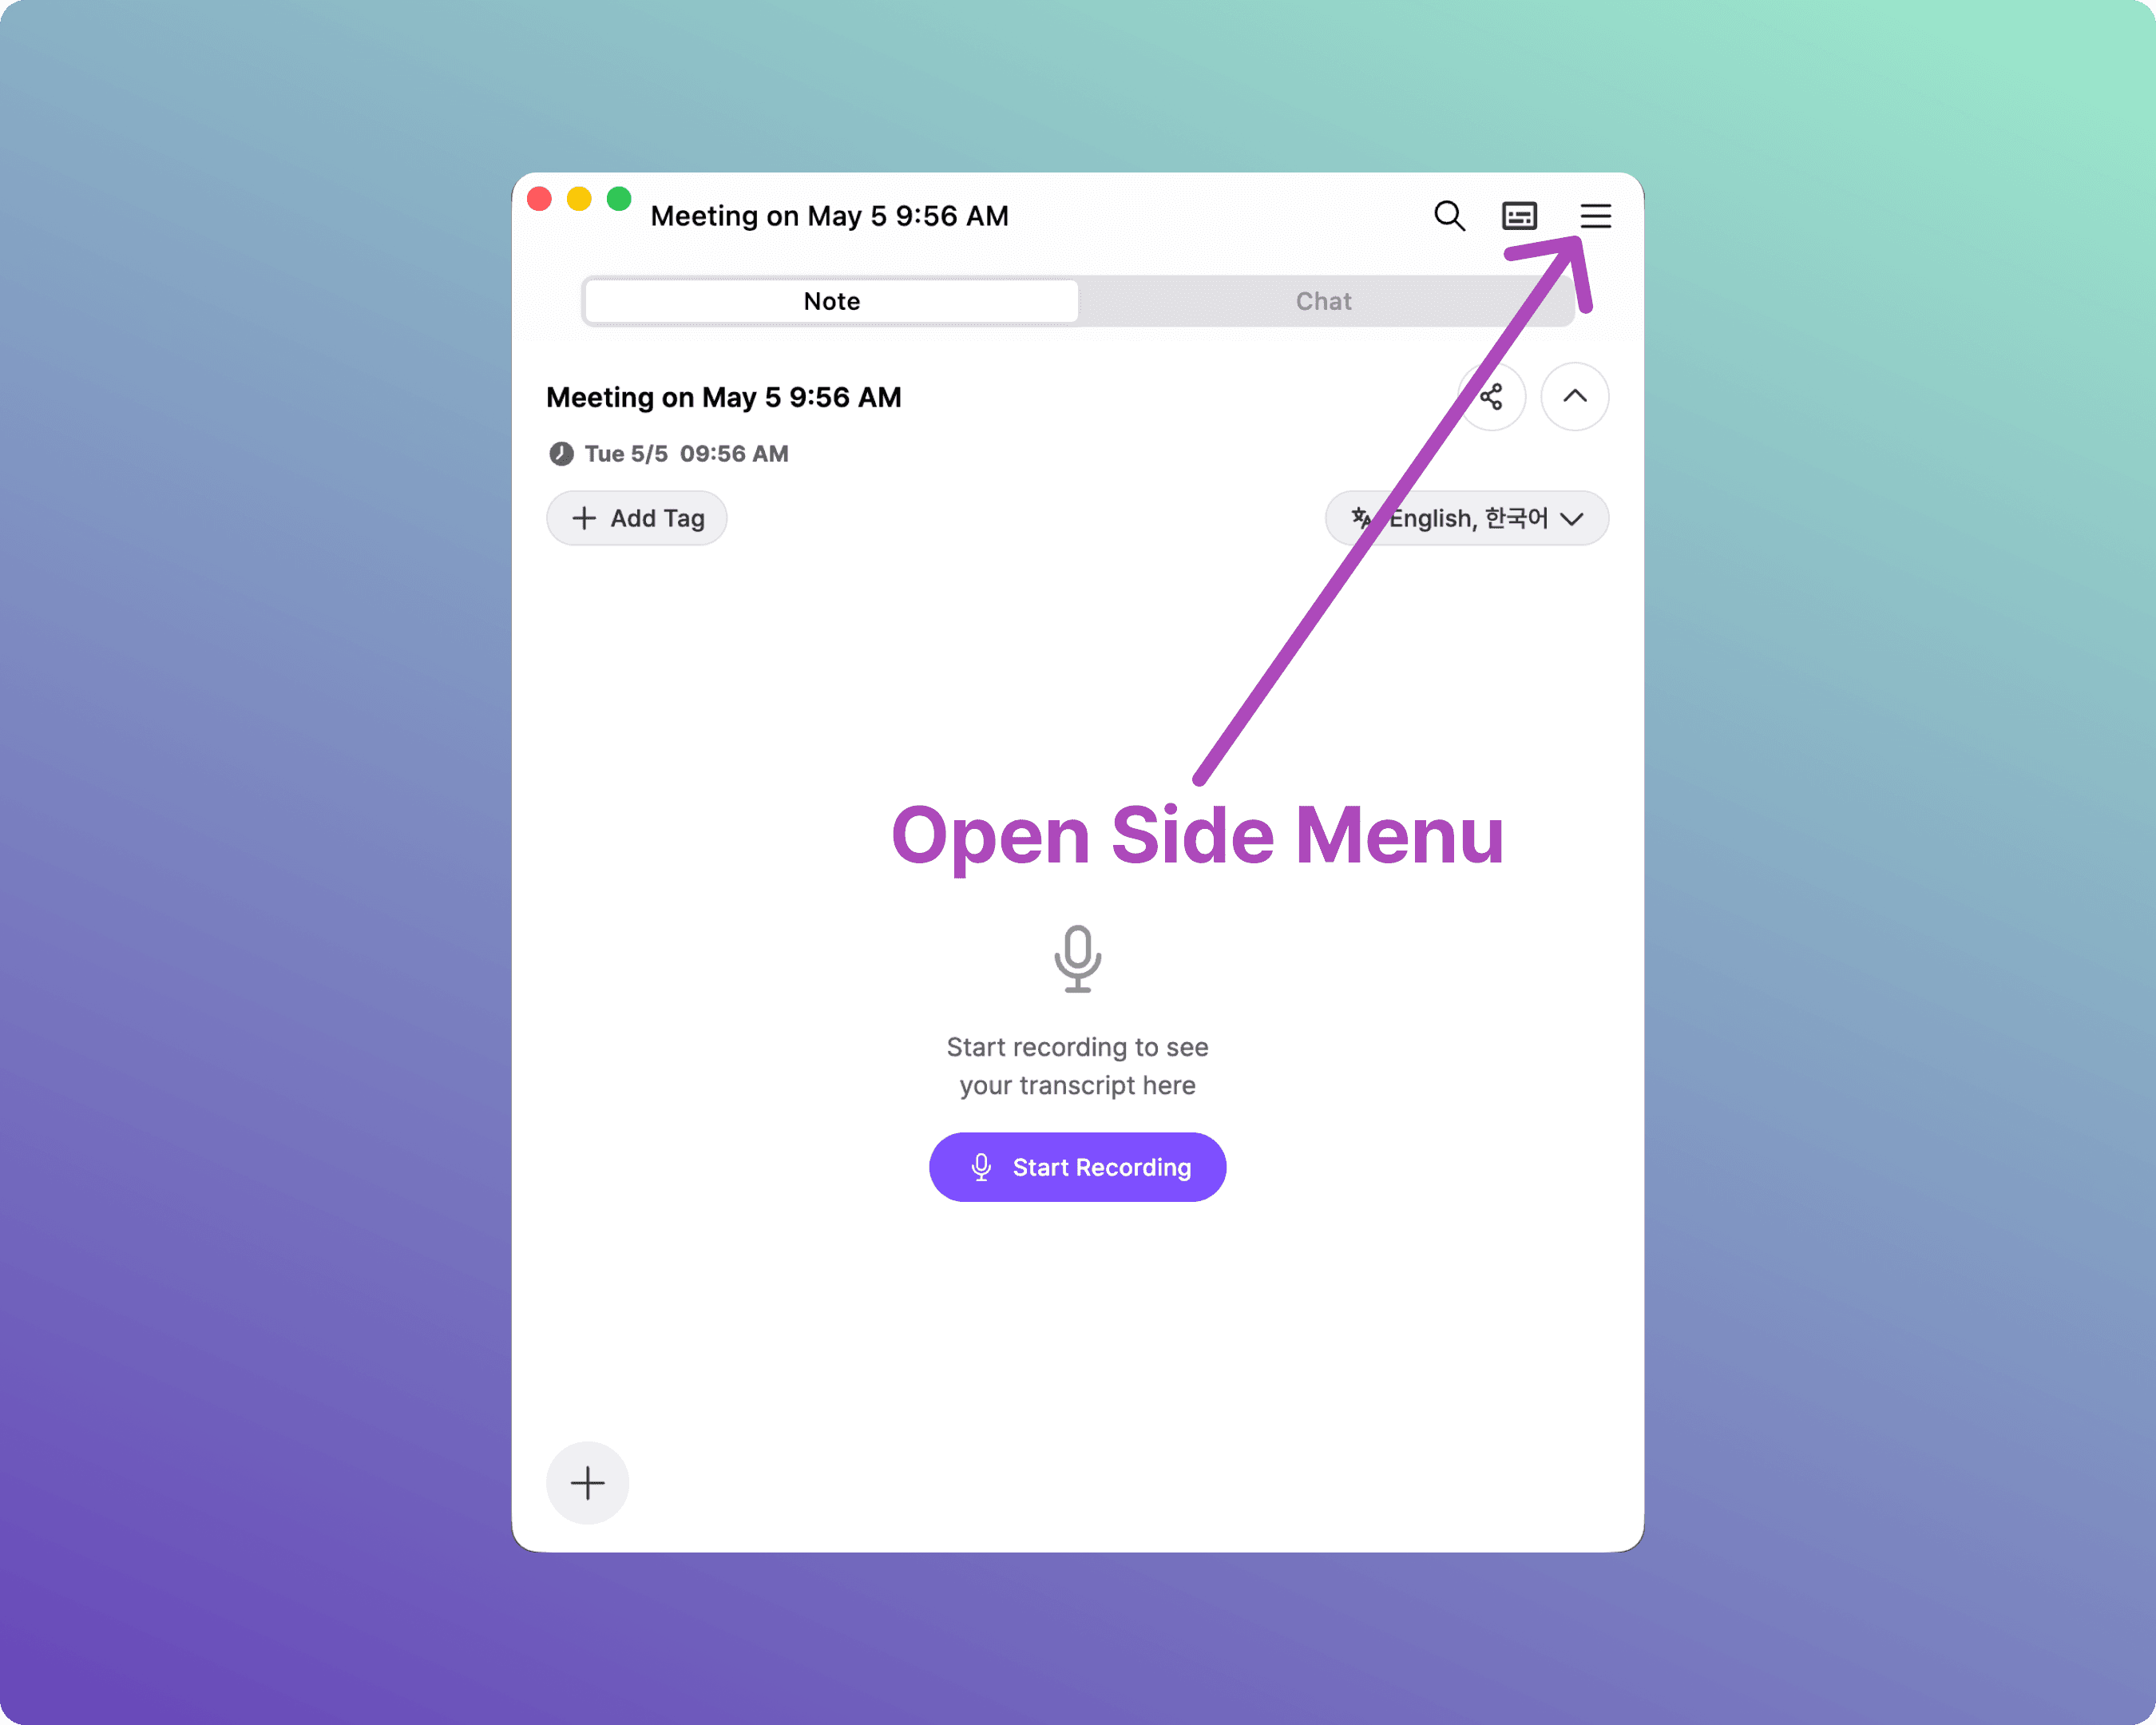
Open the [☰ Side Menu] in the top right corner.
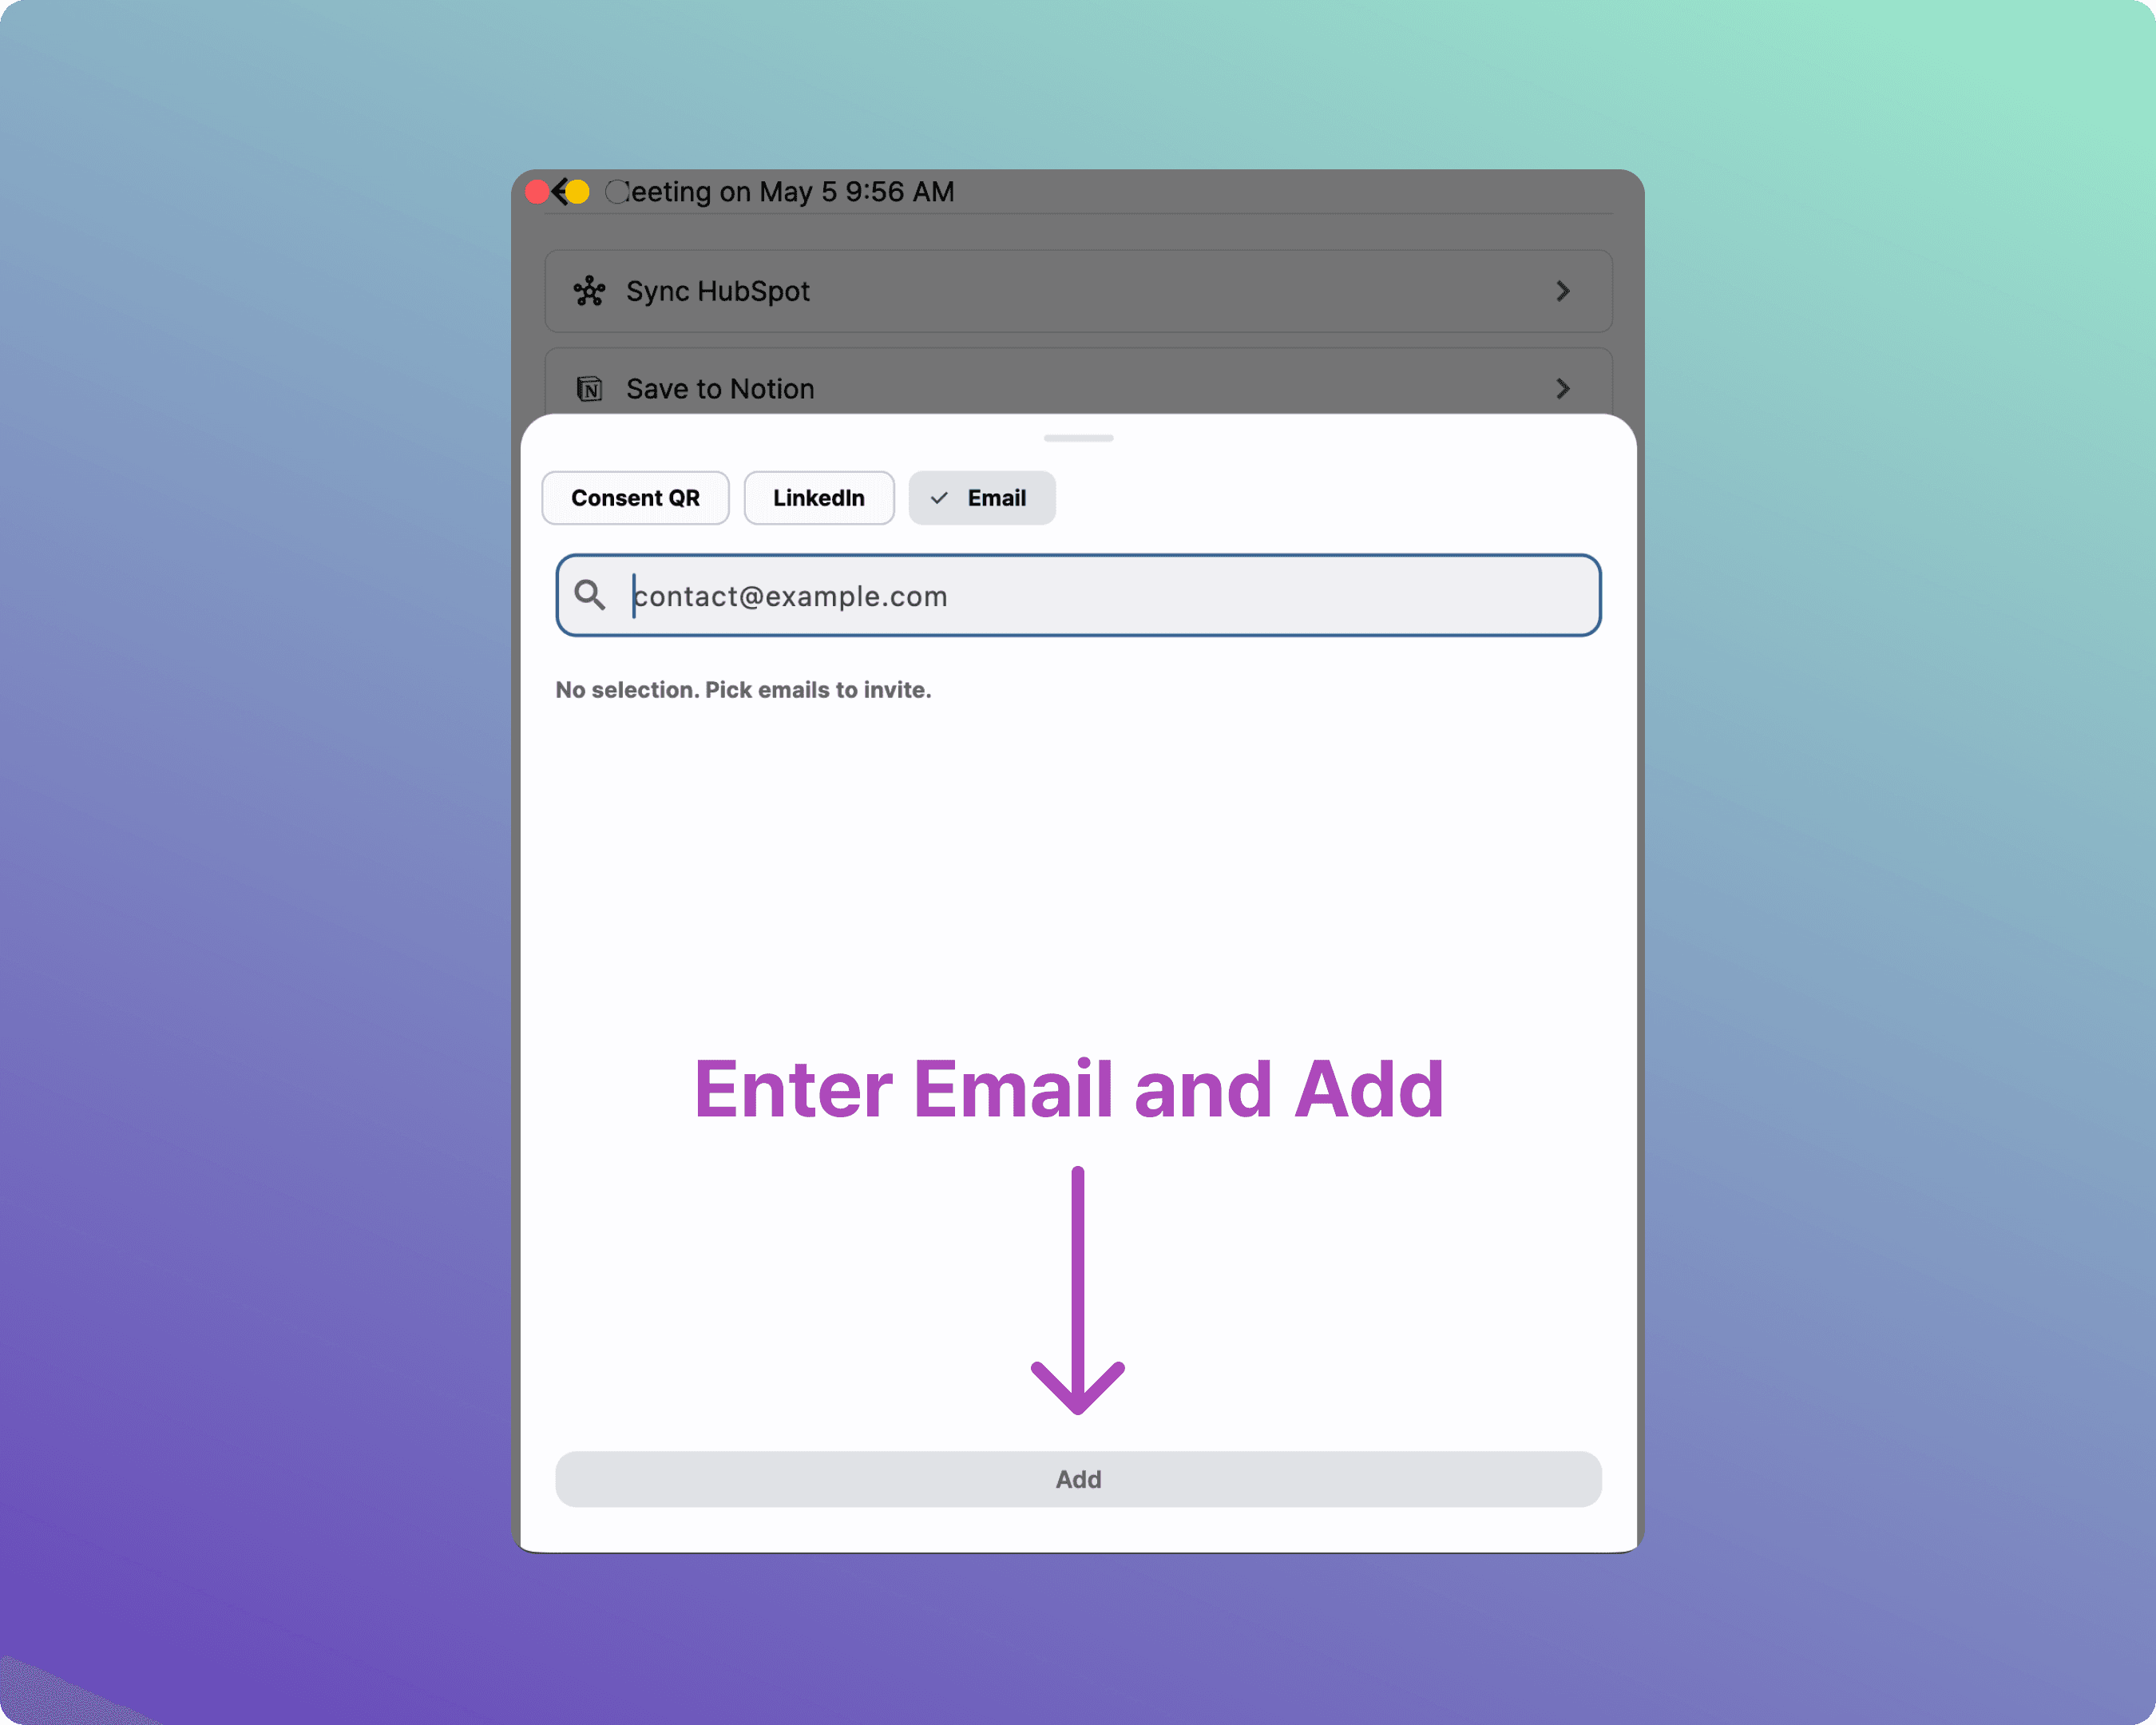
Select [+ Add Participant].

Enter your staff member's email address to invite them.
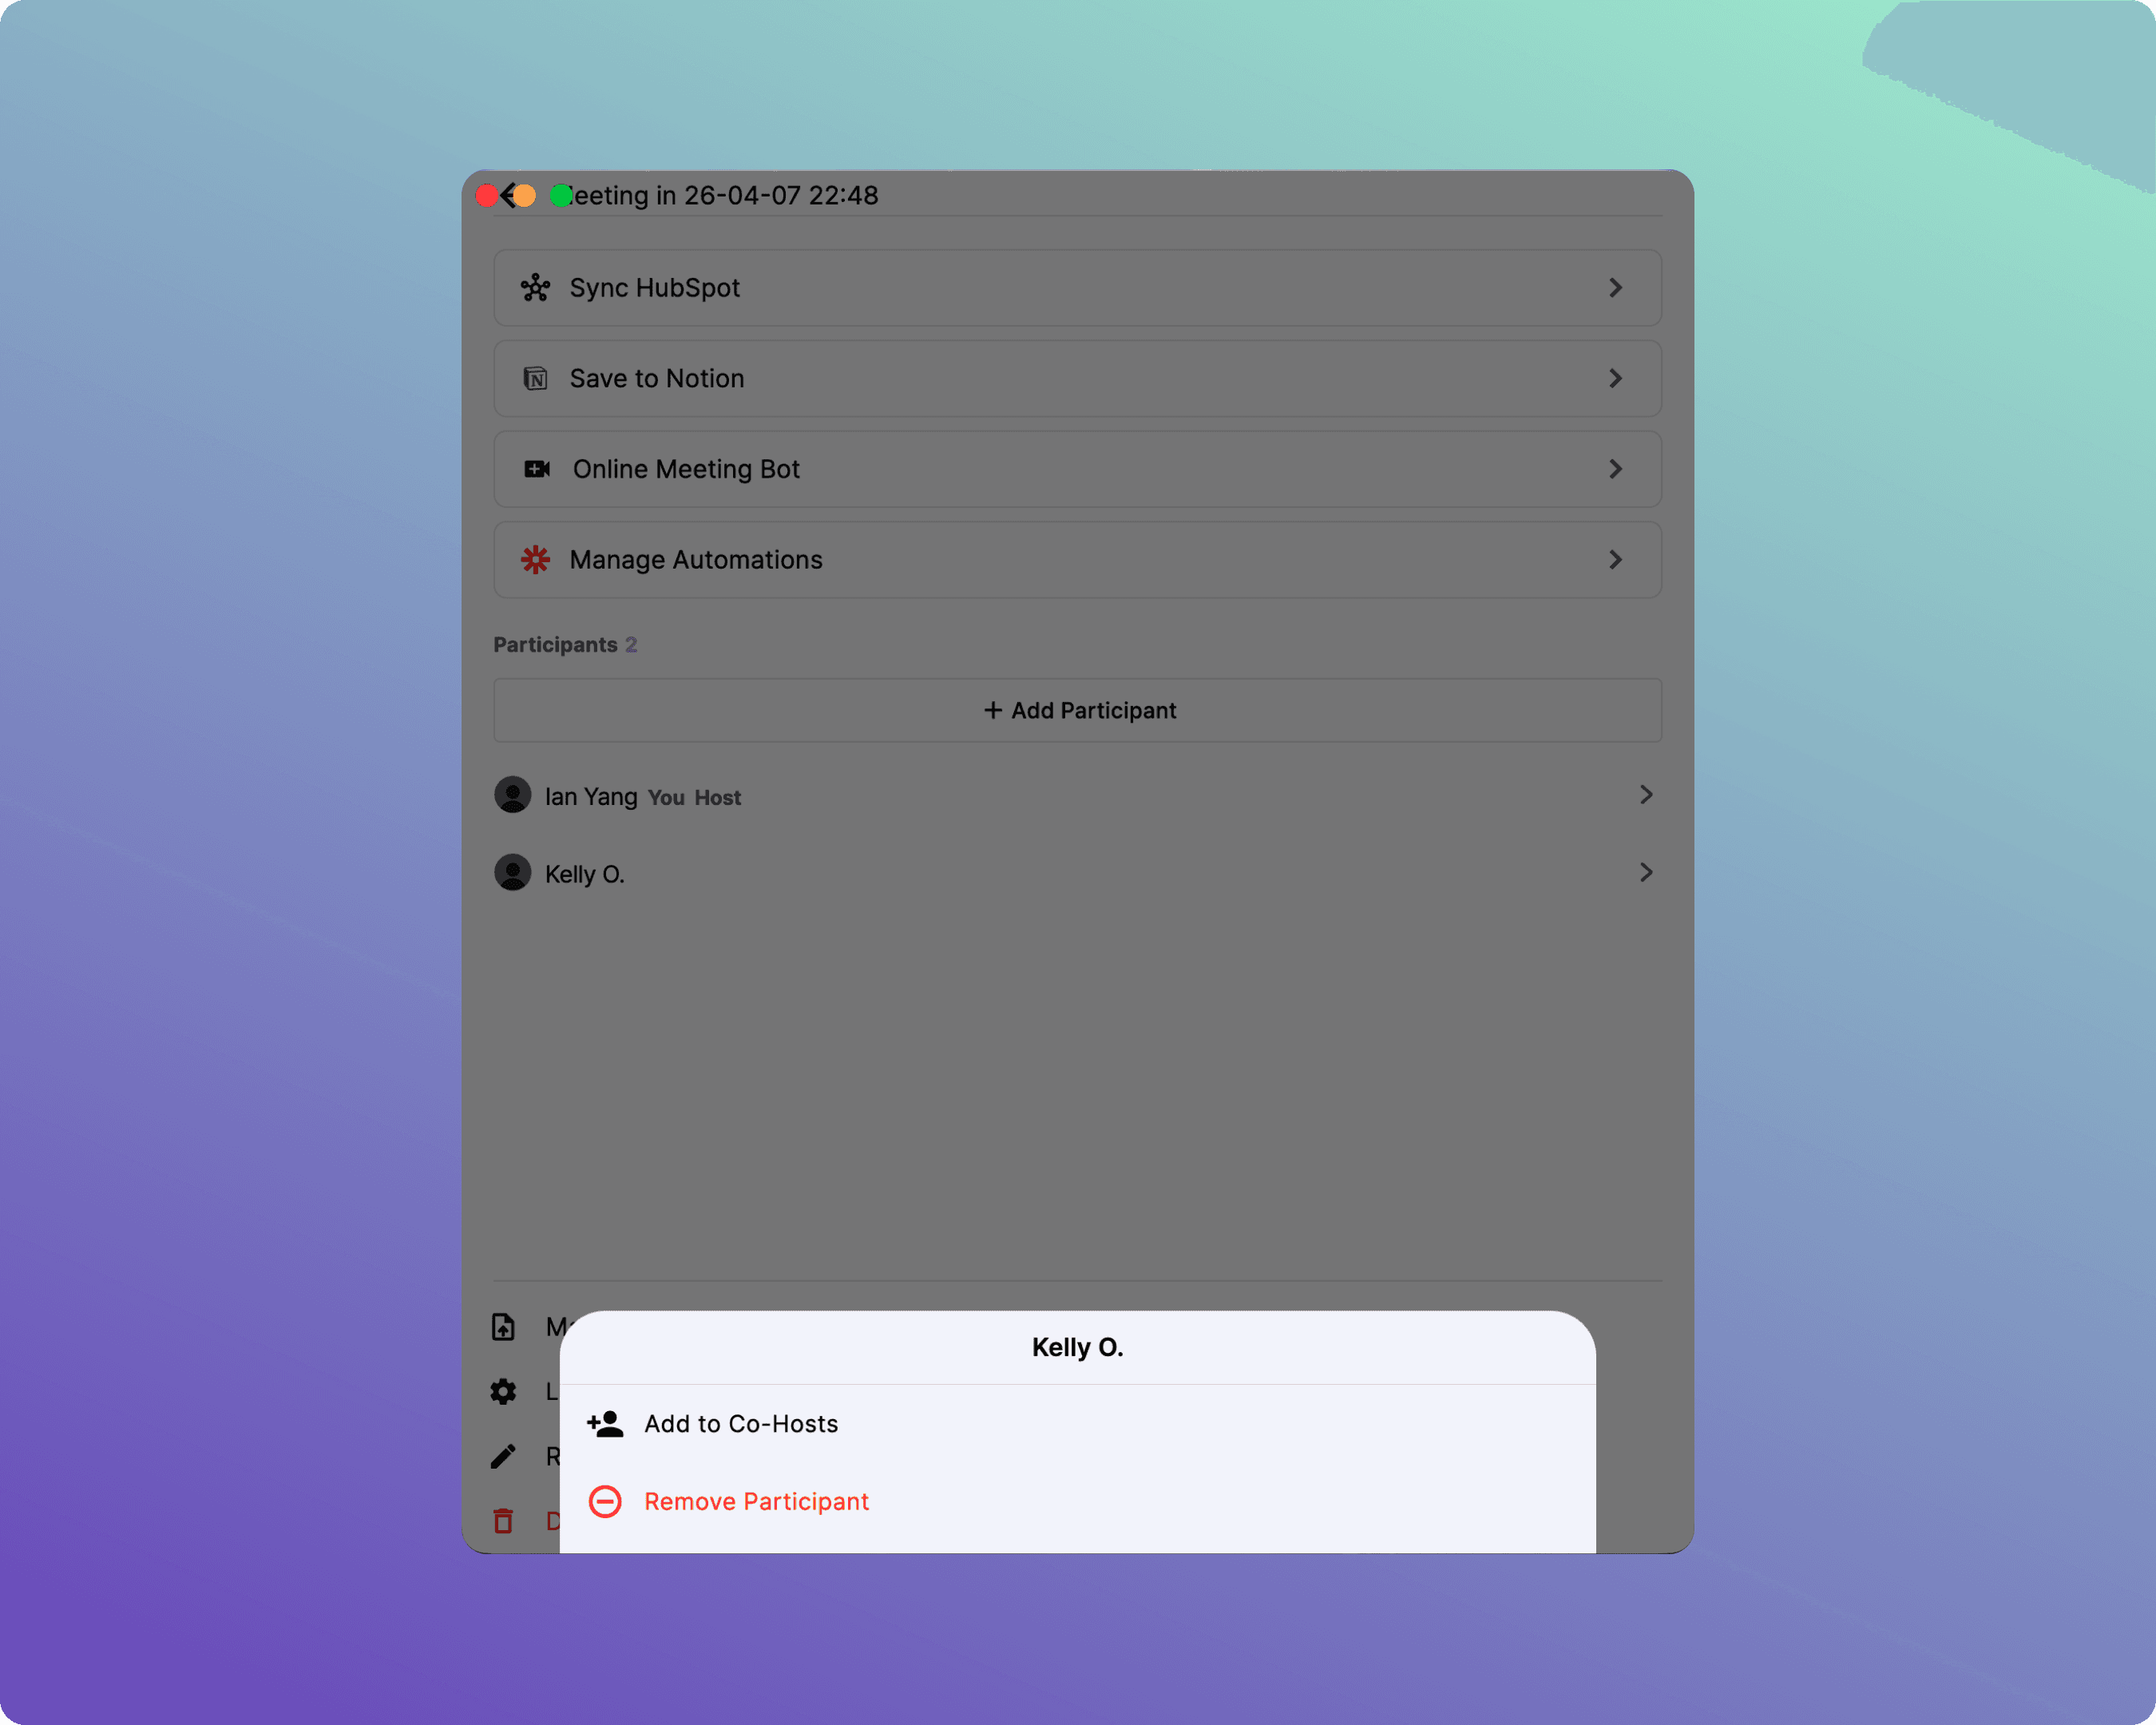
Long-press (click and hold for 3 seconds) on the invited user's name to open the Co-host menu.
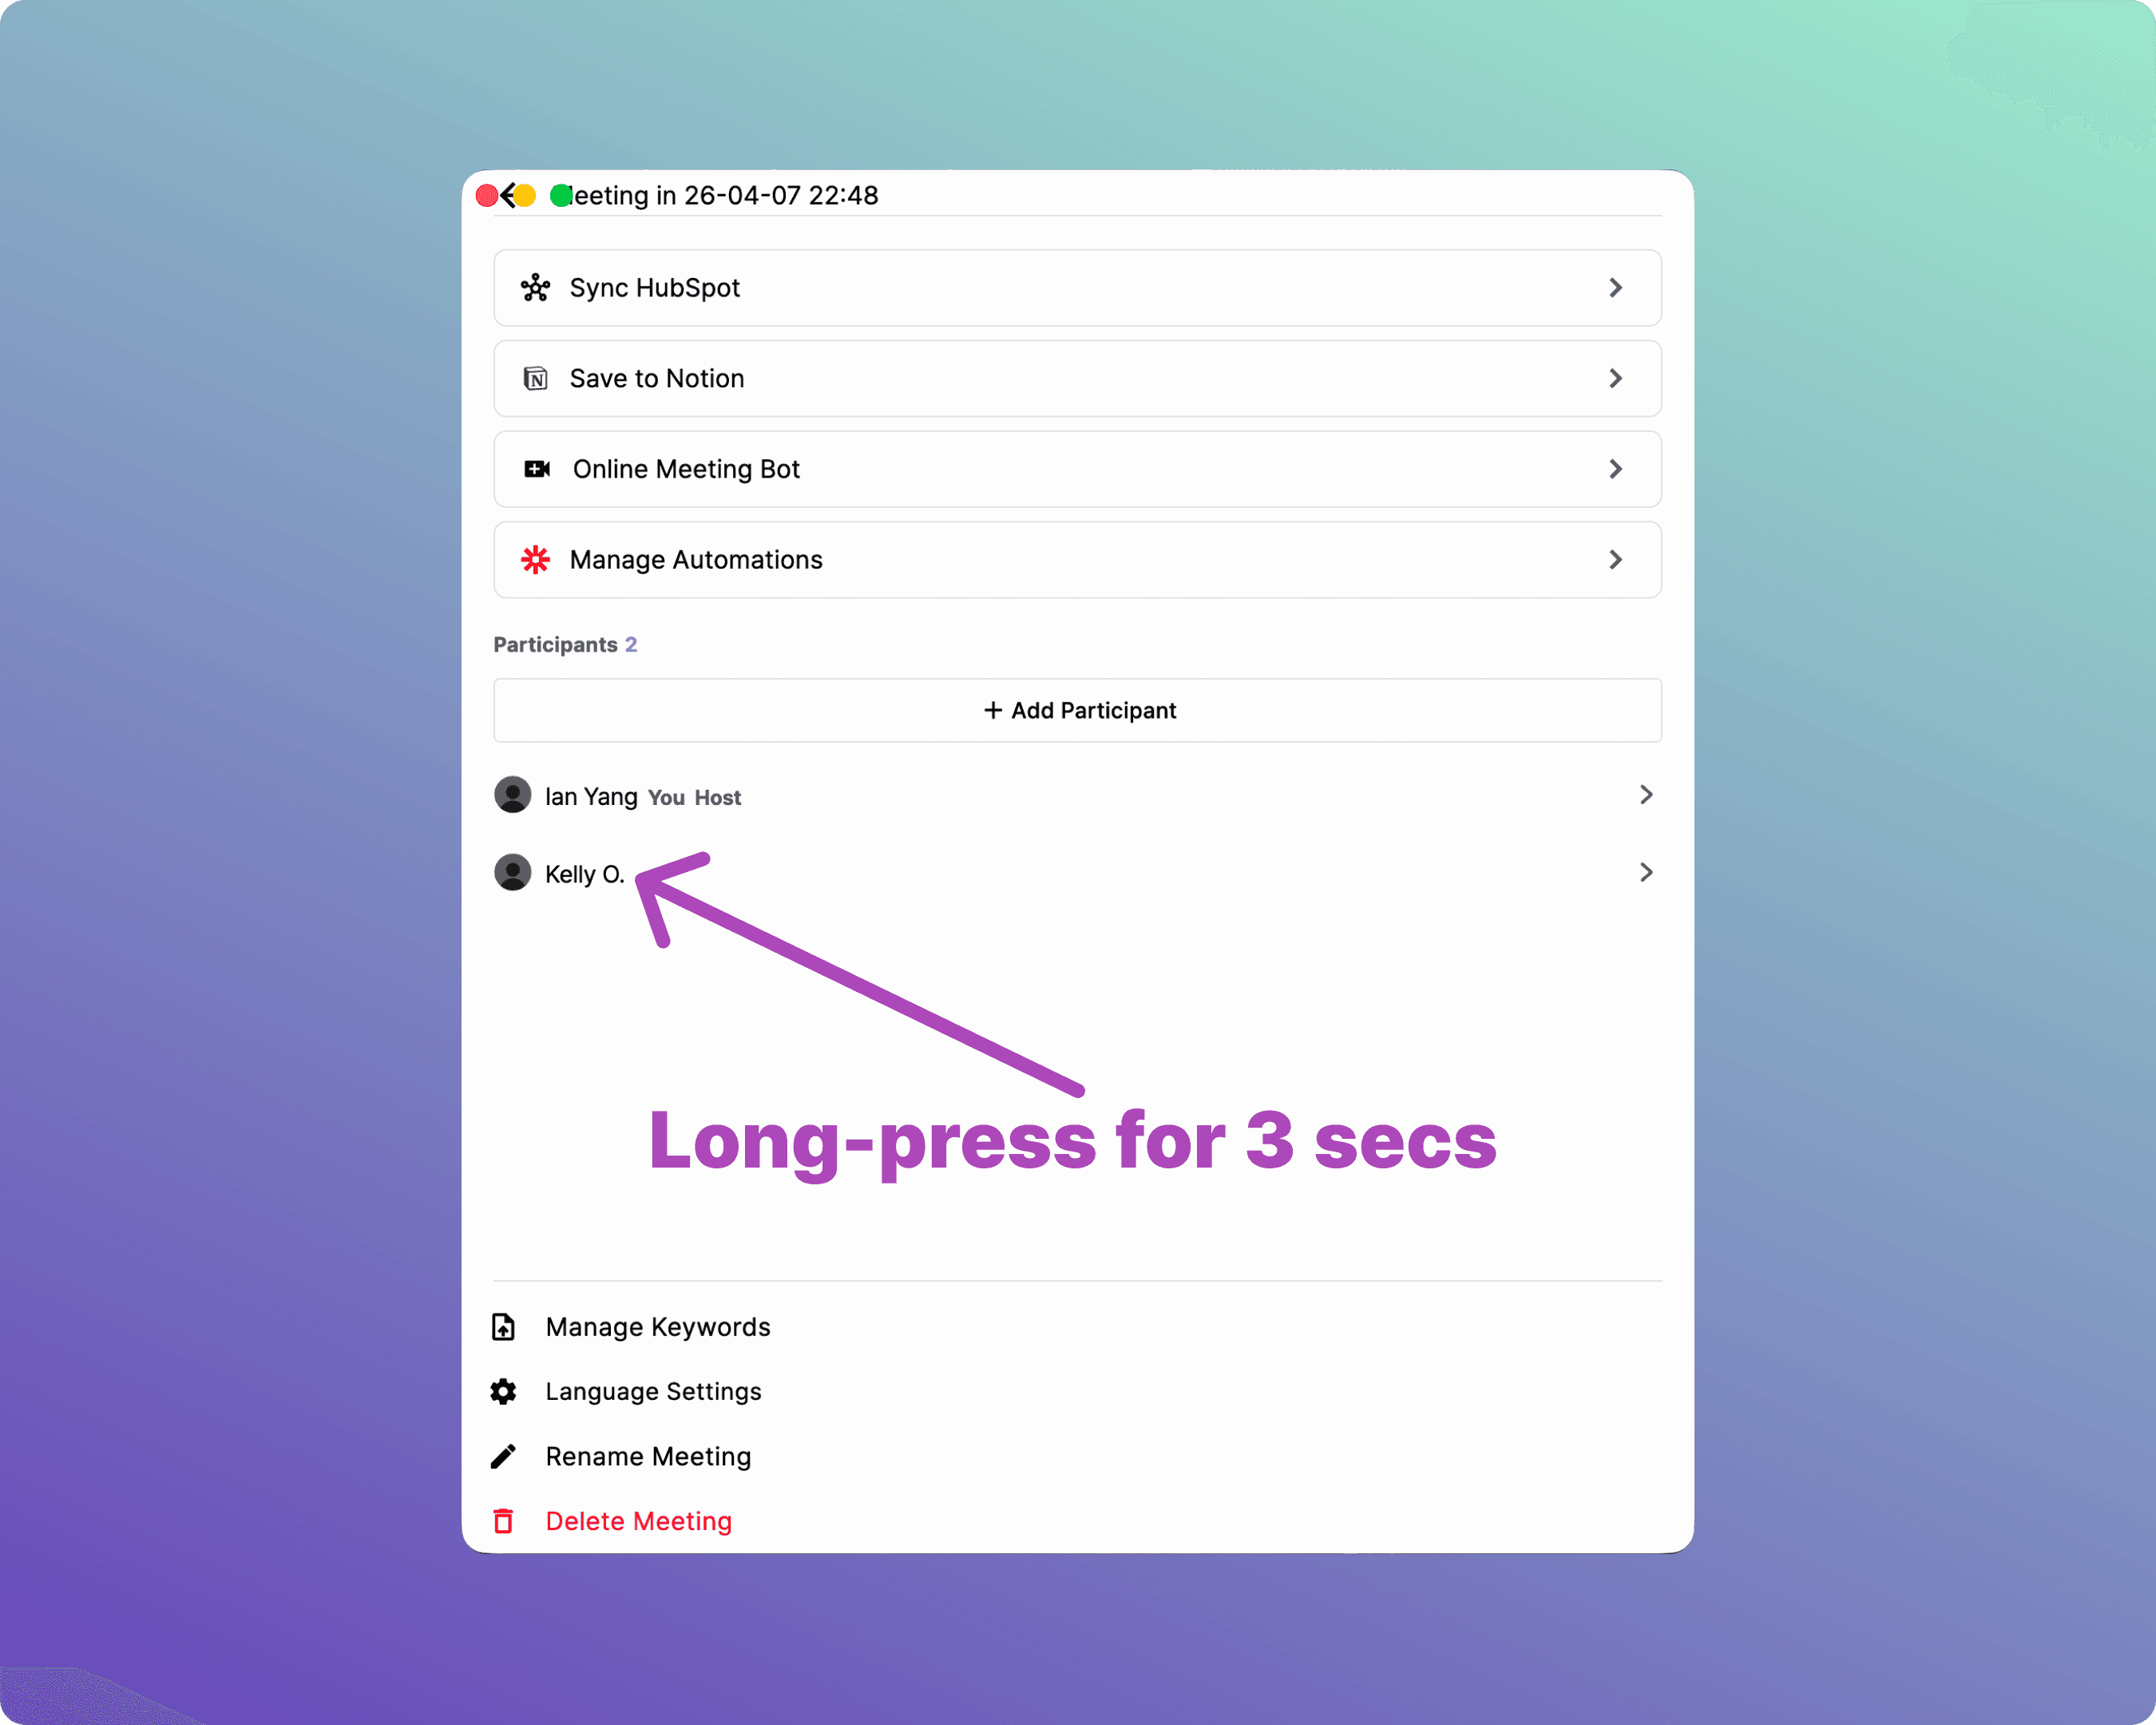
Select [Add to Co-Hosts].
5. Registering Custom Keywords
Pre-registering industry jargon, proper nouns, or acronyms dramatically improves speech recognition and AI summary quality.
How to Register Keywords
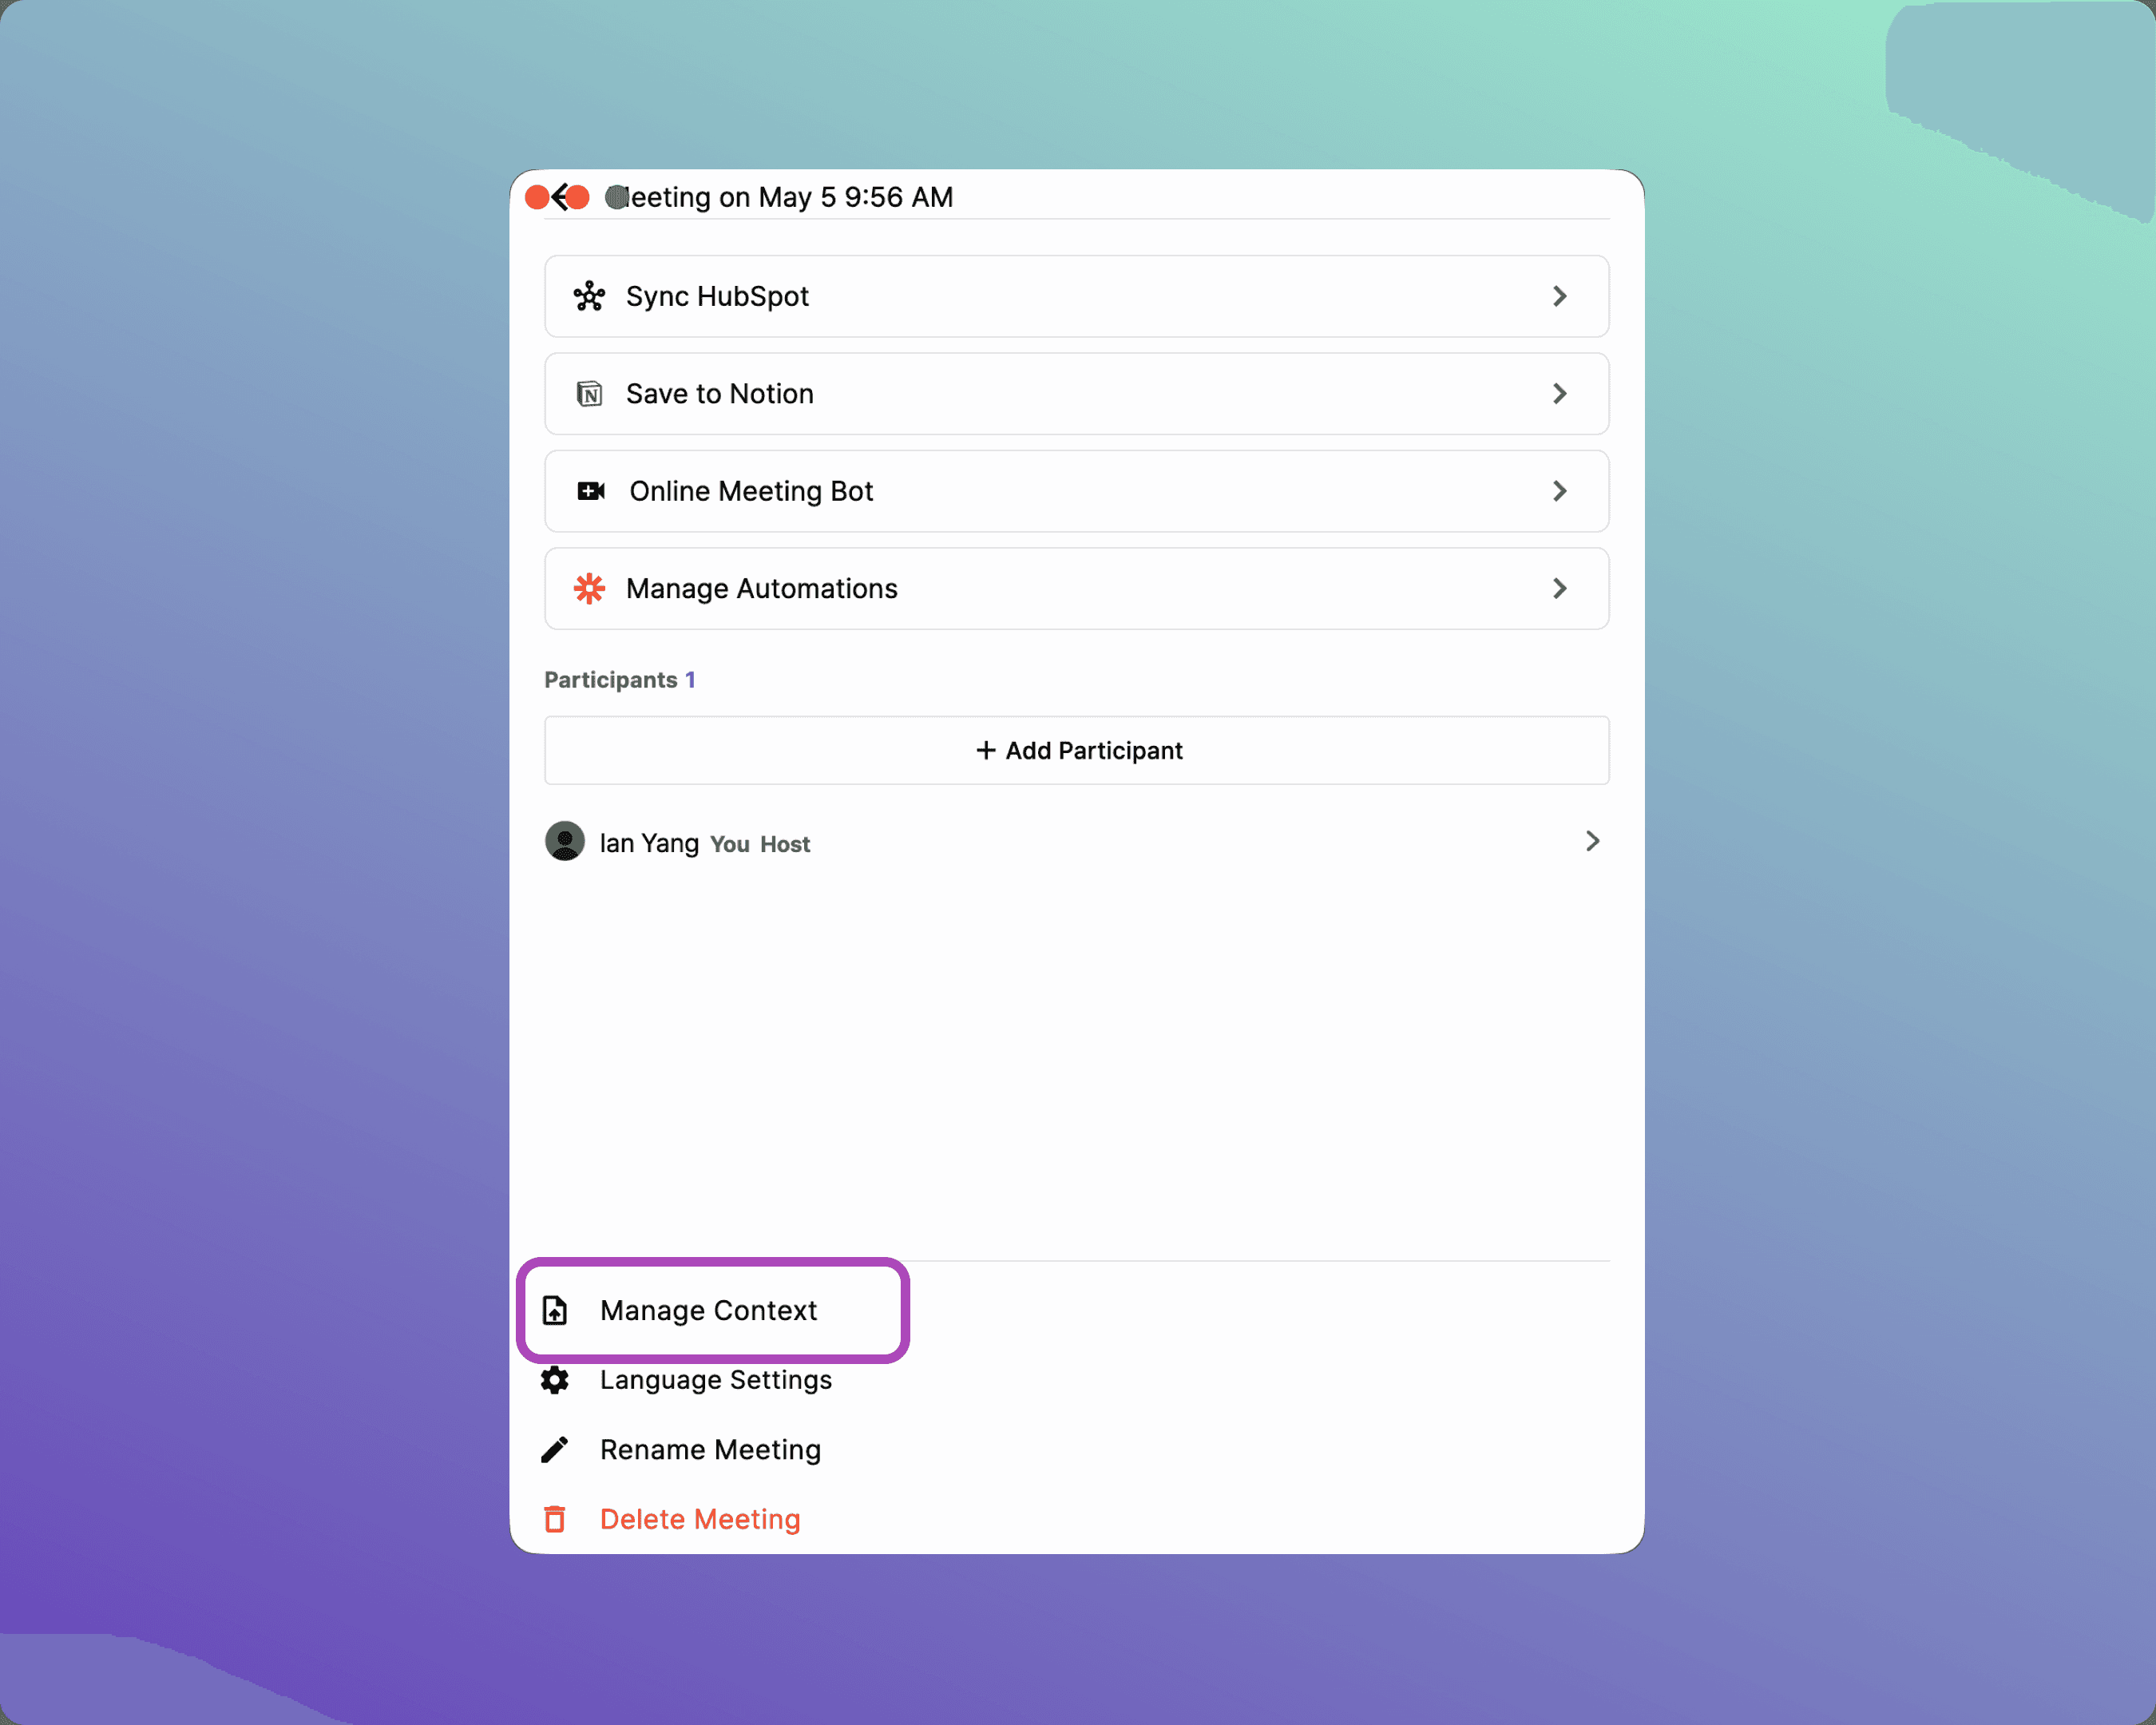
Open the [☰ Side Menu] in the meeting room.
Click [Manage Context] at the bottom.
Choose your preferred method:
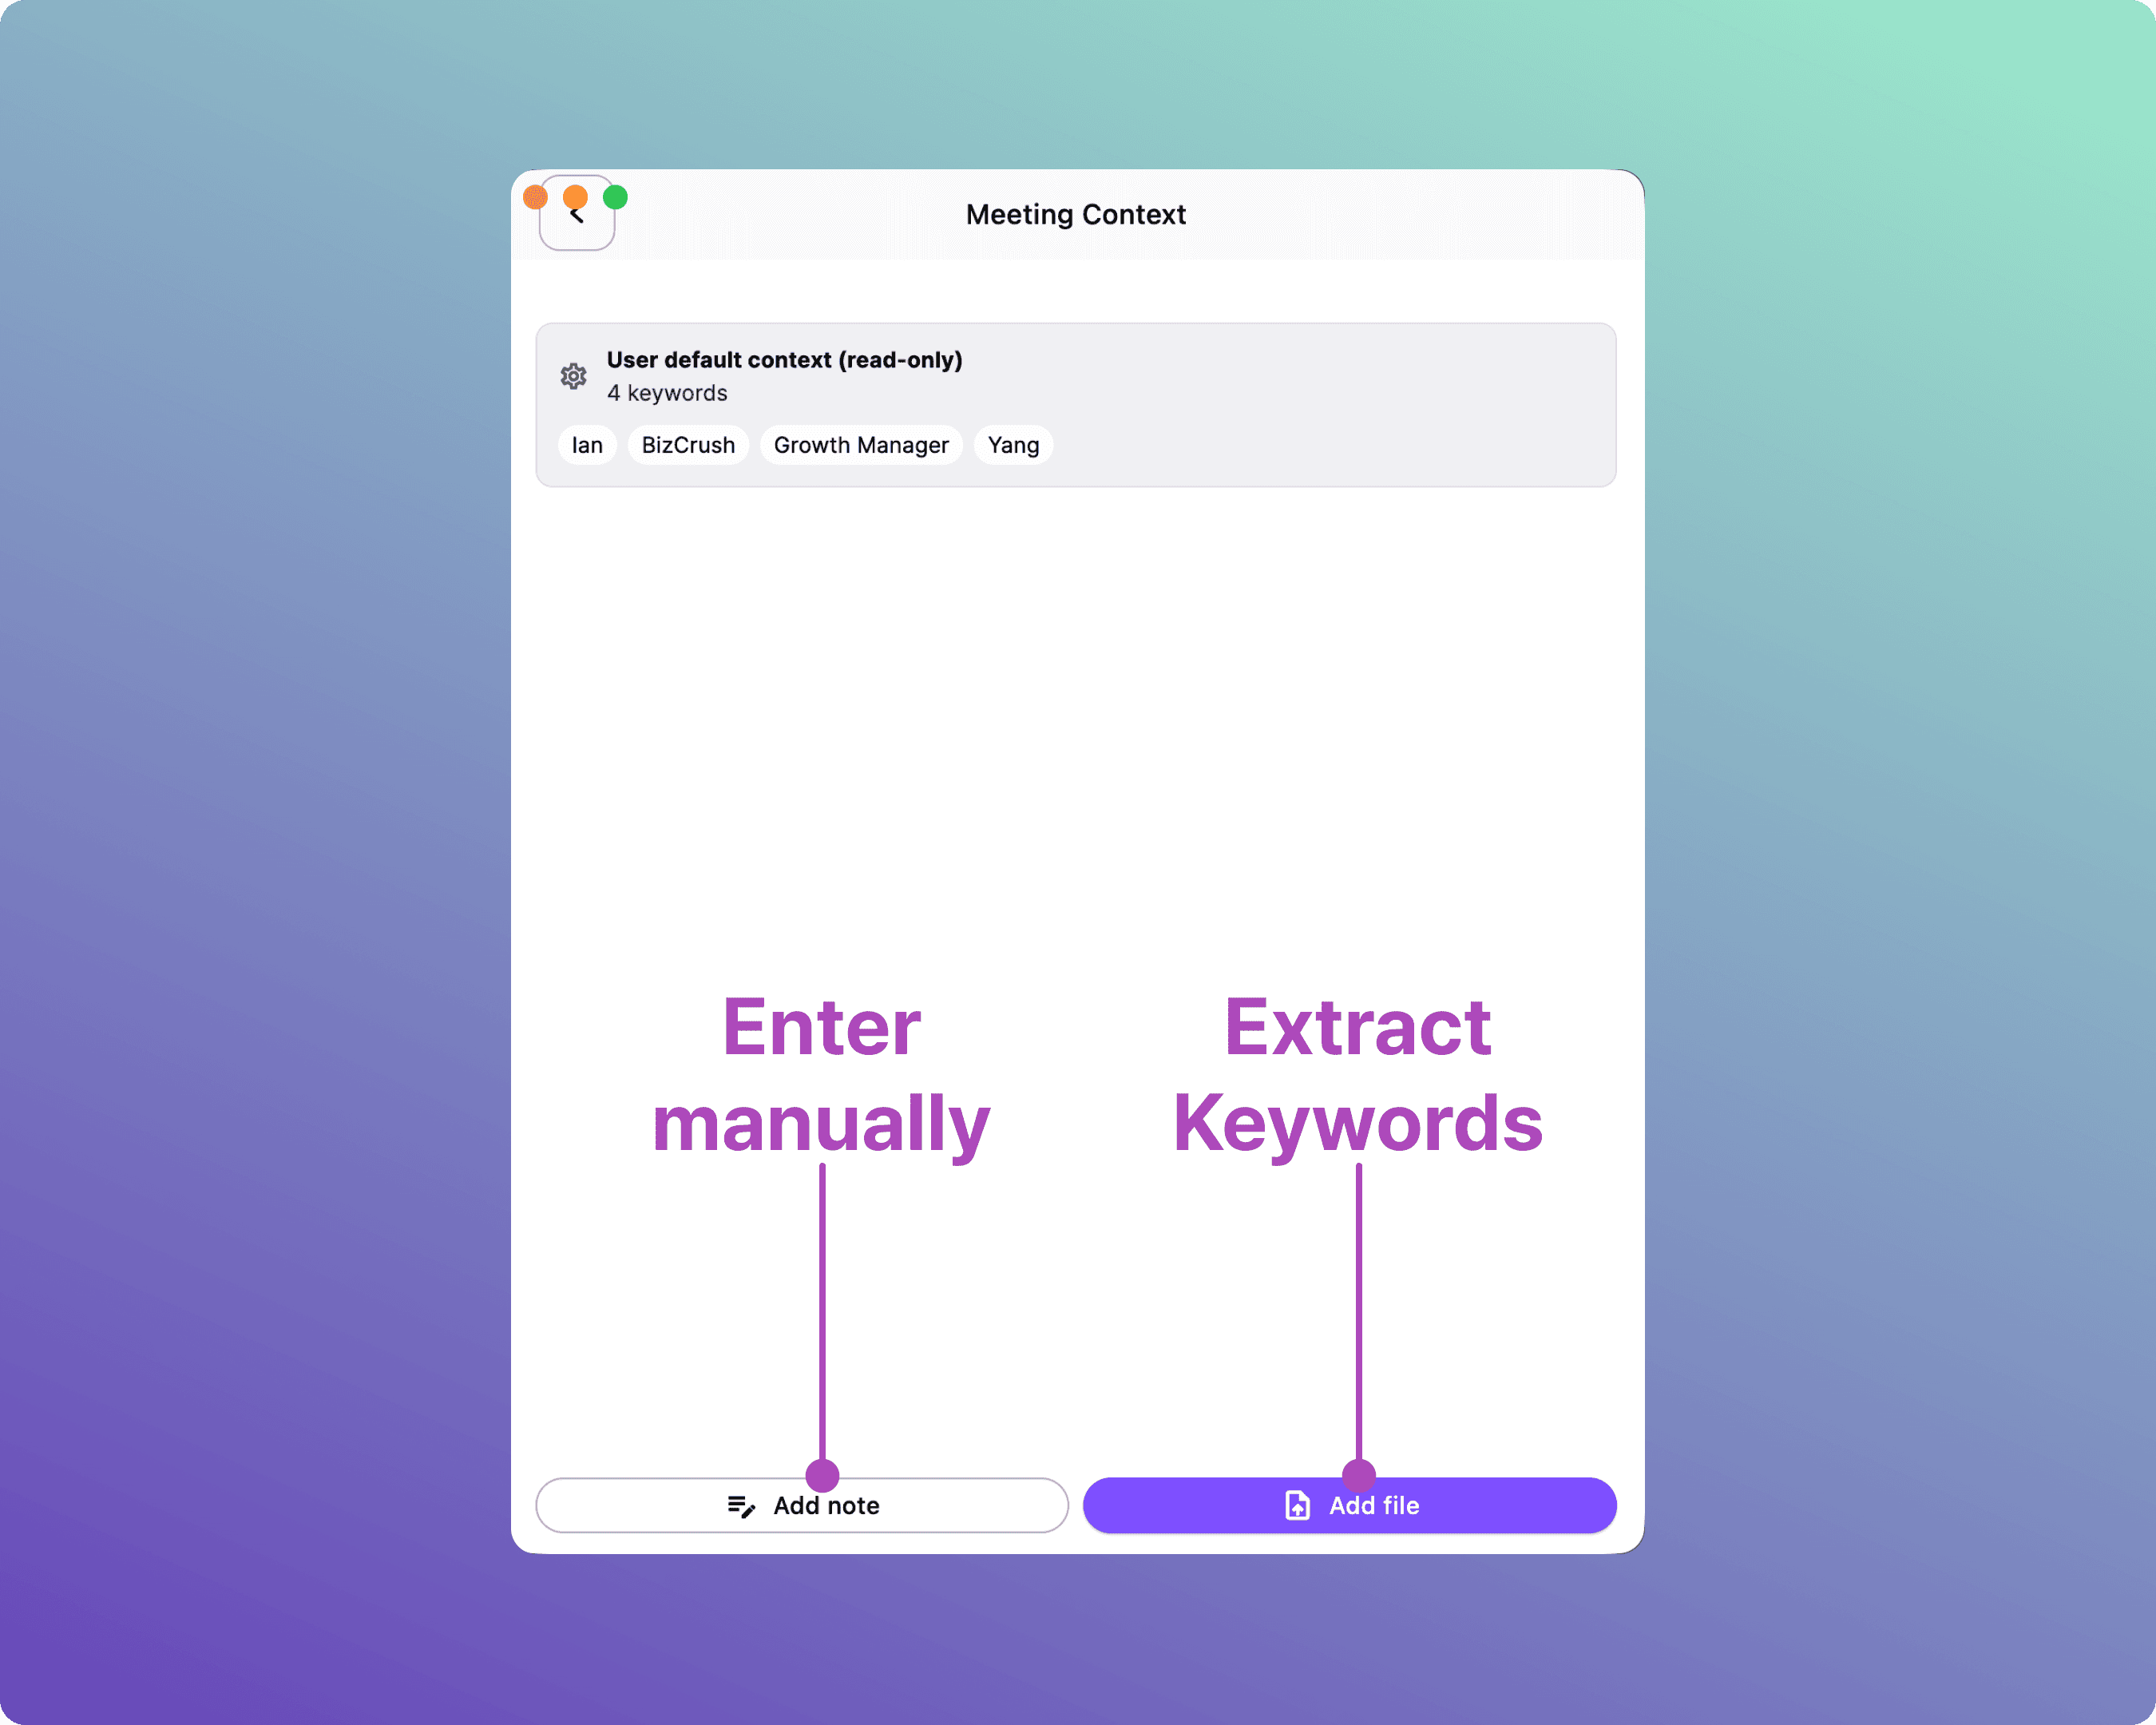
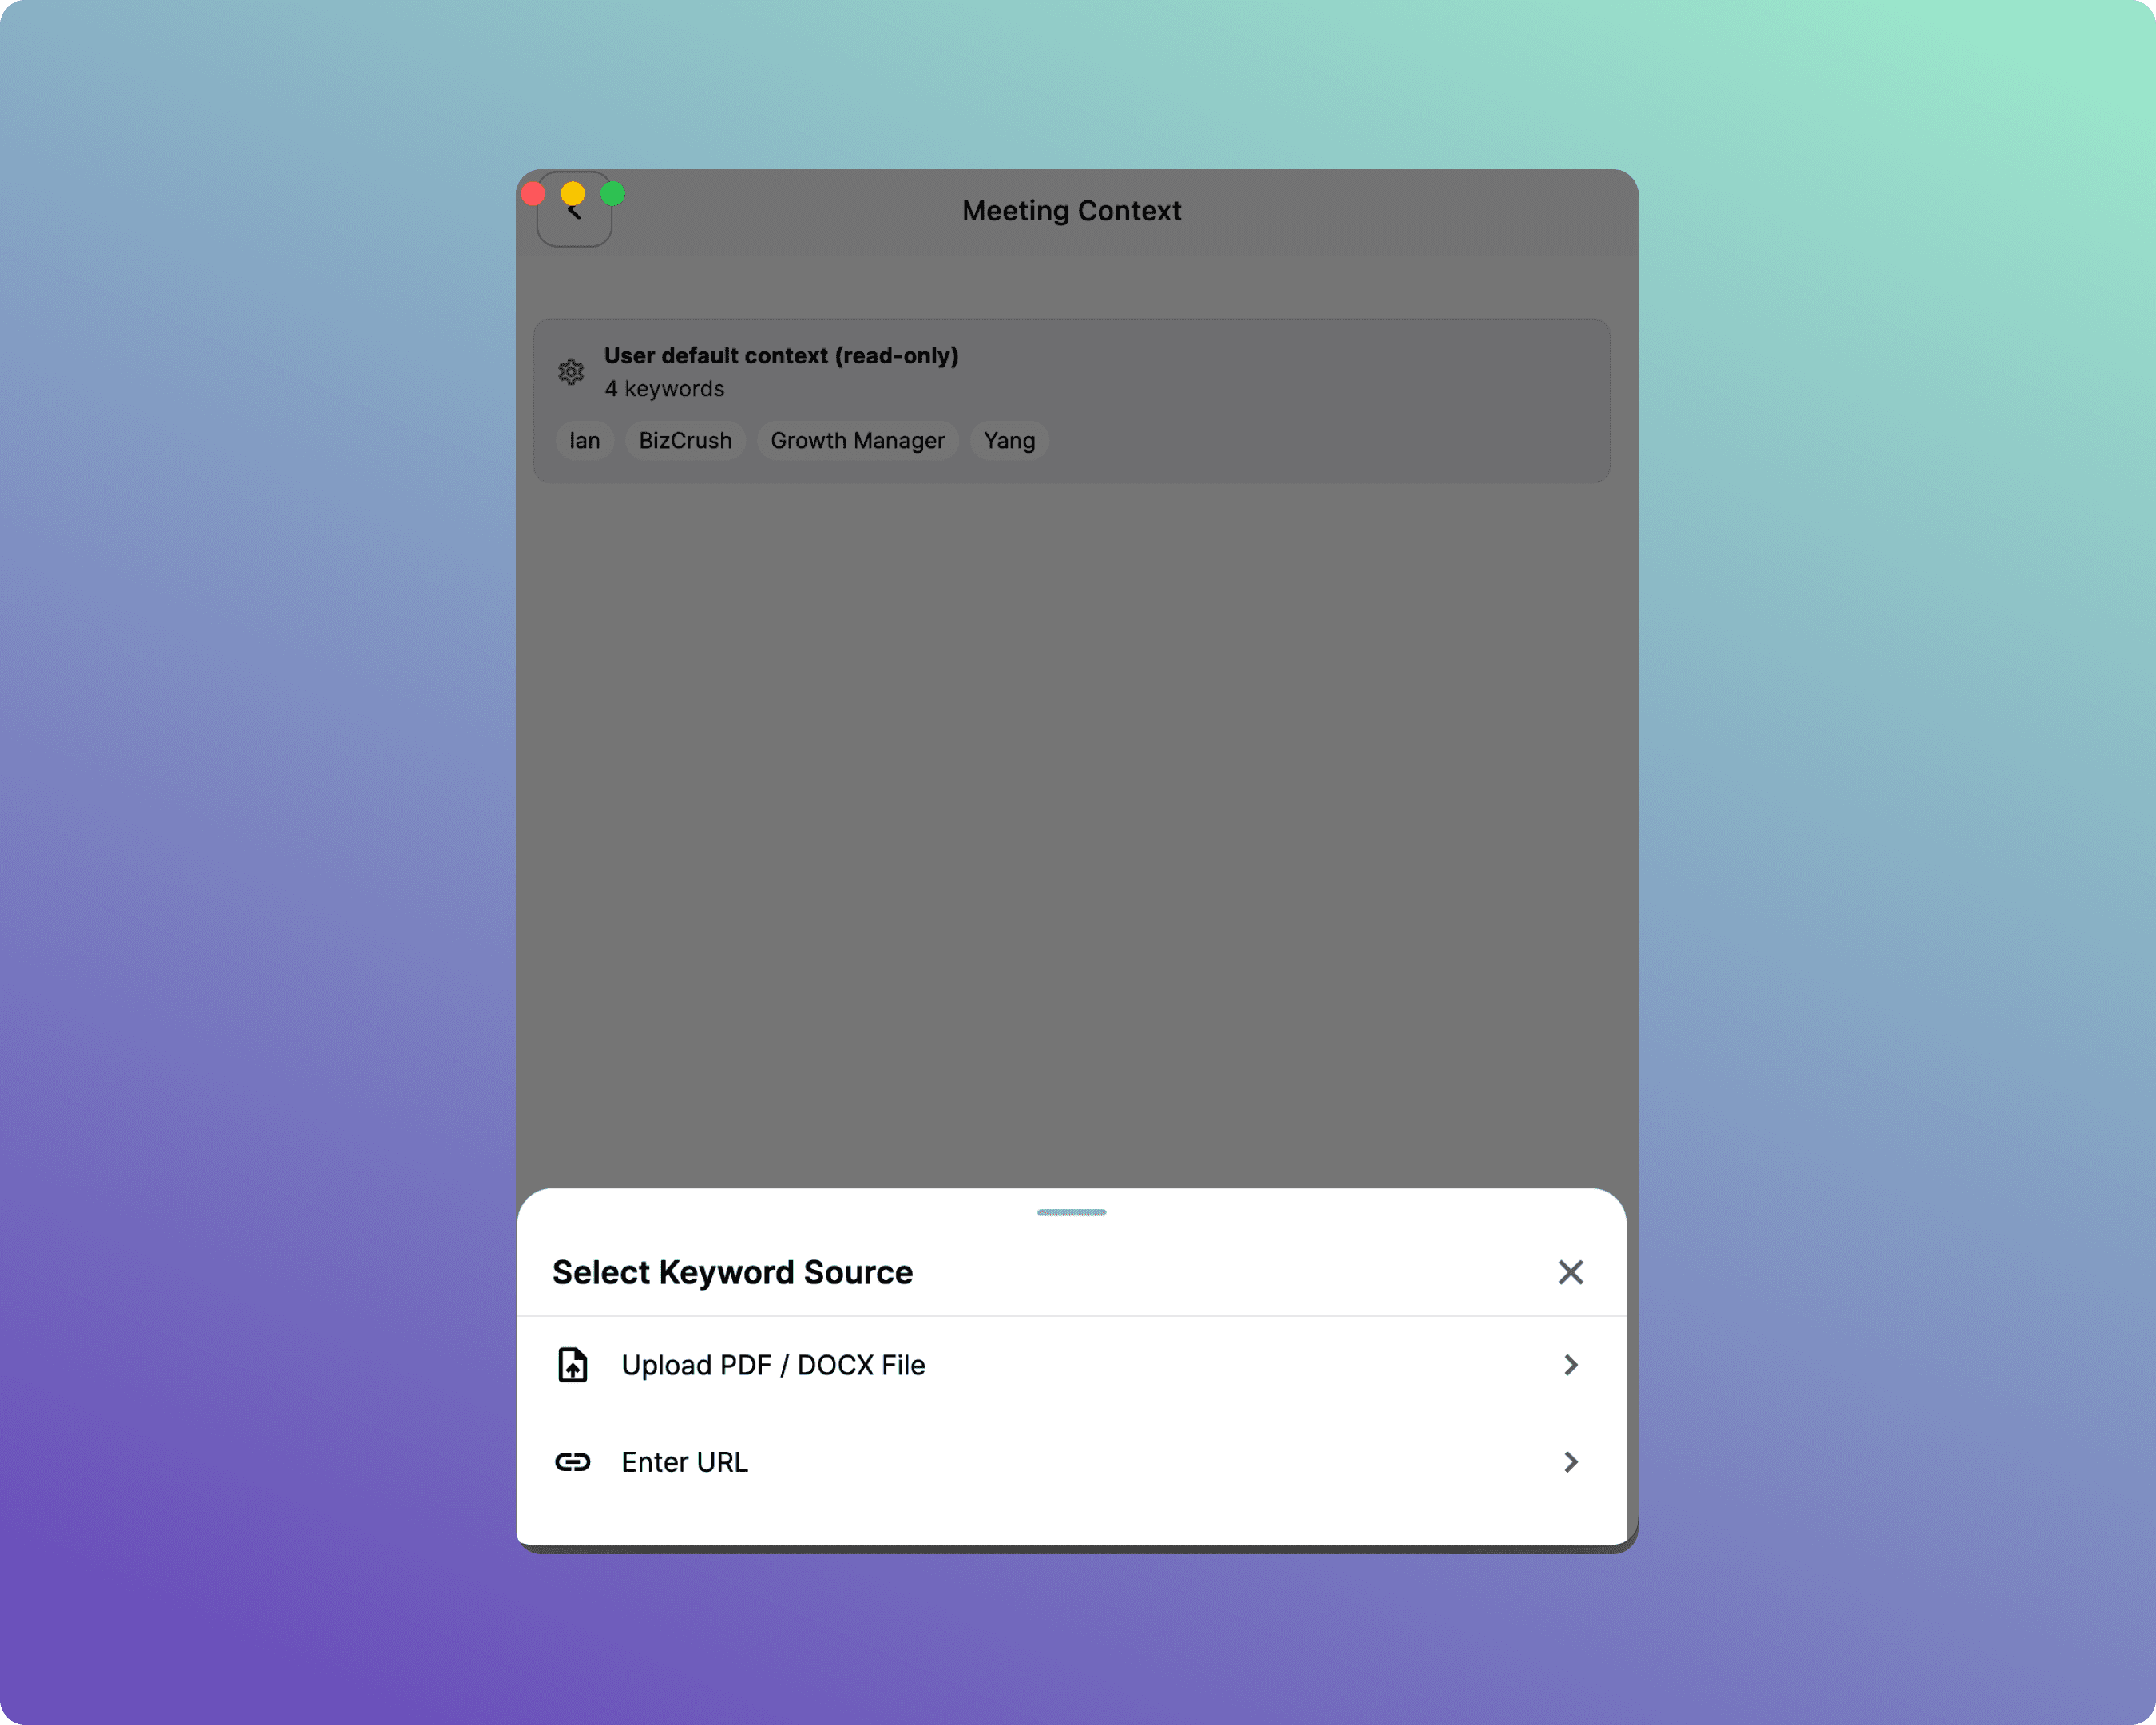
Upload PDF File: Upload your presentation deck, event agenda, or briefing doc. Key terms are extracted automatically.
Add Note: Type specific words directly into the Enter keyword field and click [Confirm].
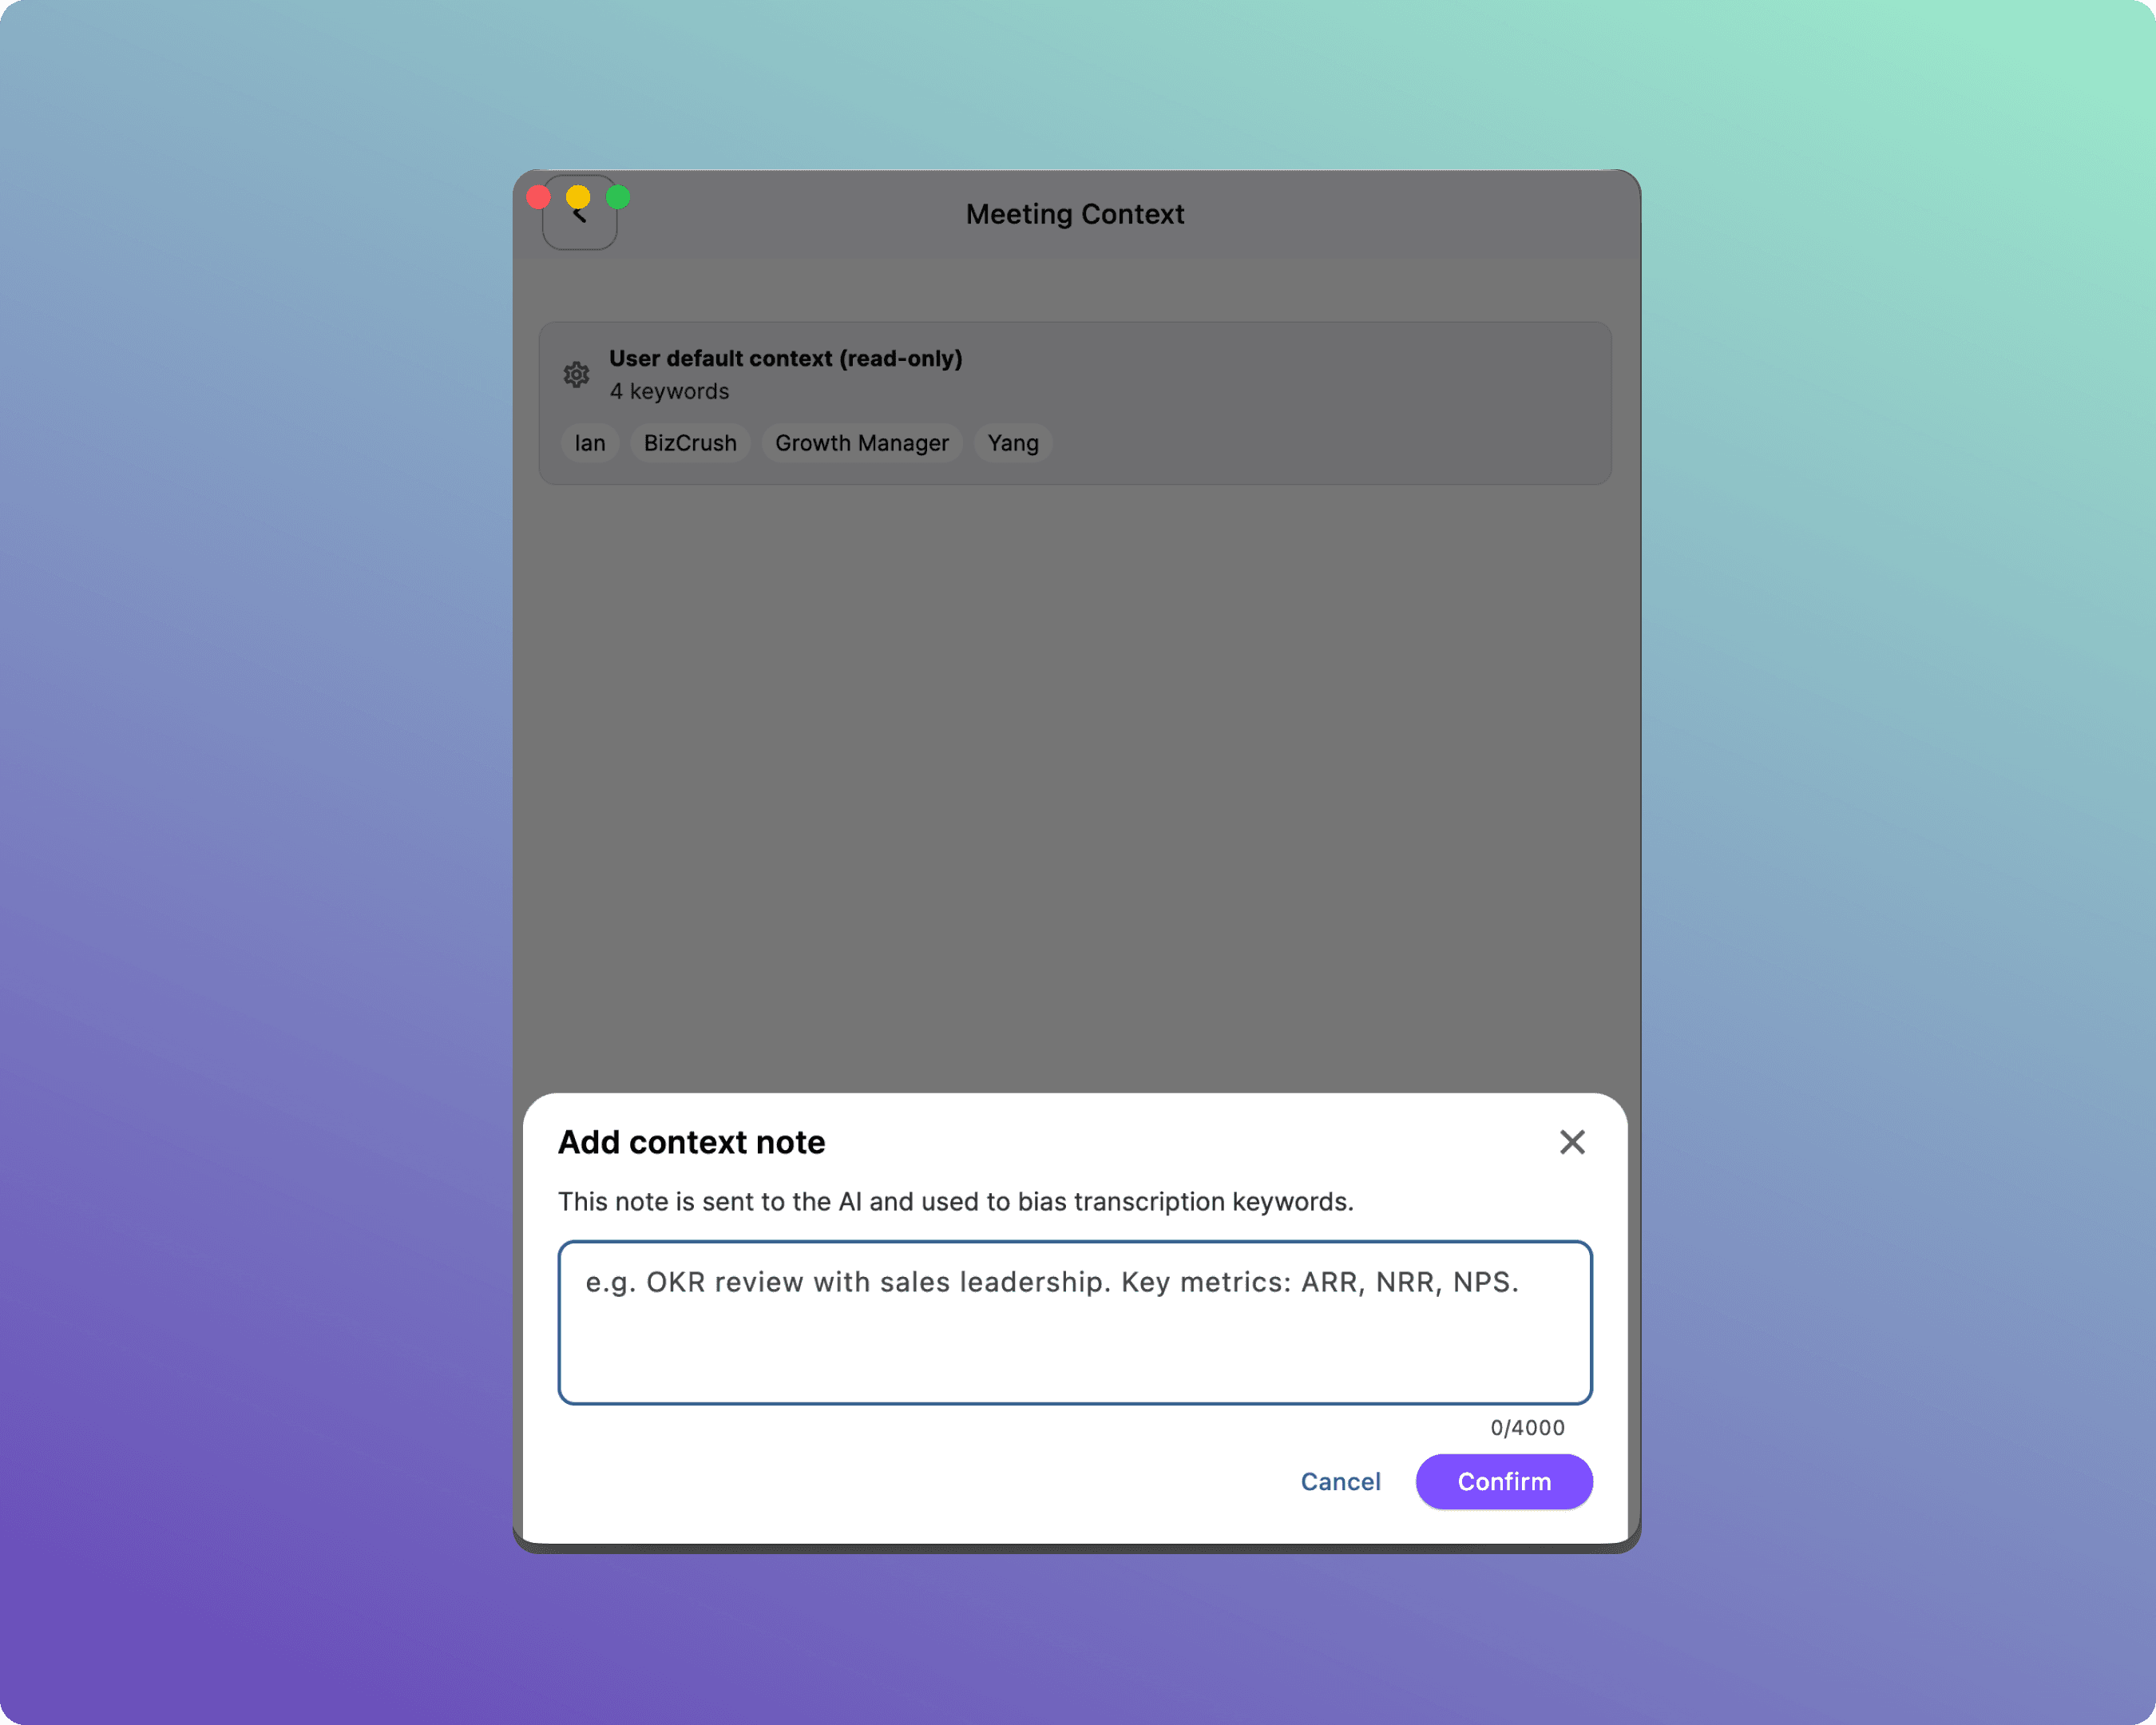
Tip: Focus on unique proper nouns — event names, speaker names, and specific acronyms (e.g., GSKA, K-Fest).
6. Sharing Subtitles with Attendees
BizCrush allows attendees to view subtitles directly on their own smartphones or laptops without downloading any app.
Note: There are two QR codes depending on the experience you want to provide.
Feature | Meeting Room QR | Presentation Mode QR |
|---|---|---|
Where to find it | Bottom toolbar → Share options | Presentation Settings → Show QR |
What attendees can do | Change translation languages themselves, view summaries, access full transcript history, use Live Audio Translation. | Only view the exact subtitles being shown on the main projector (read-only). |
Best used when… | Attendees want to choose their own translation language and follow translated audio. | Audience members in the back of the room need a mirrored view of the main screen on their own devices. |
How to Share the Meeting Room
Click the [Sharing Menu].
Either copy the link to send via email or chat, or display the generated QR code on your screen for attendees to scan.
Tip: Put this QR code on your opening presentation slide or print it on flyers at the venue entrance.
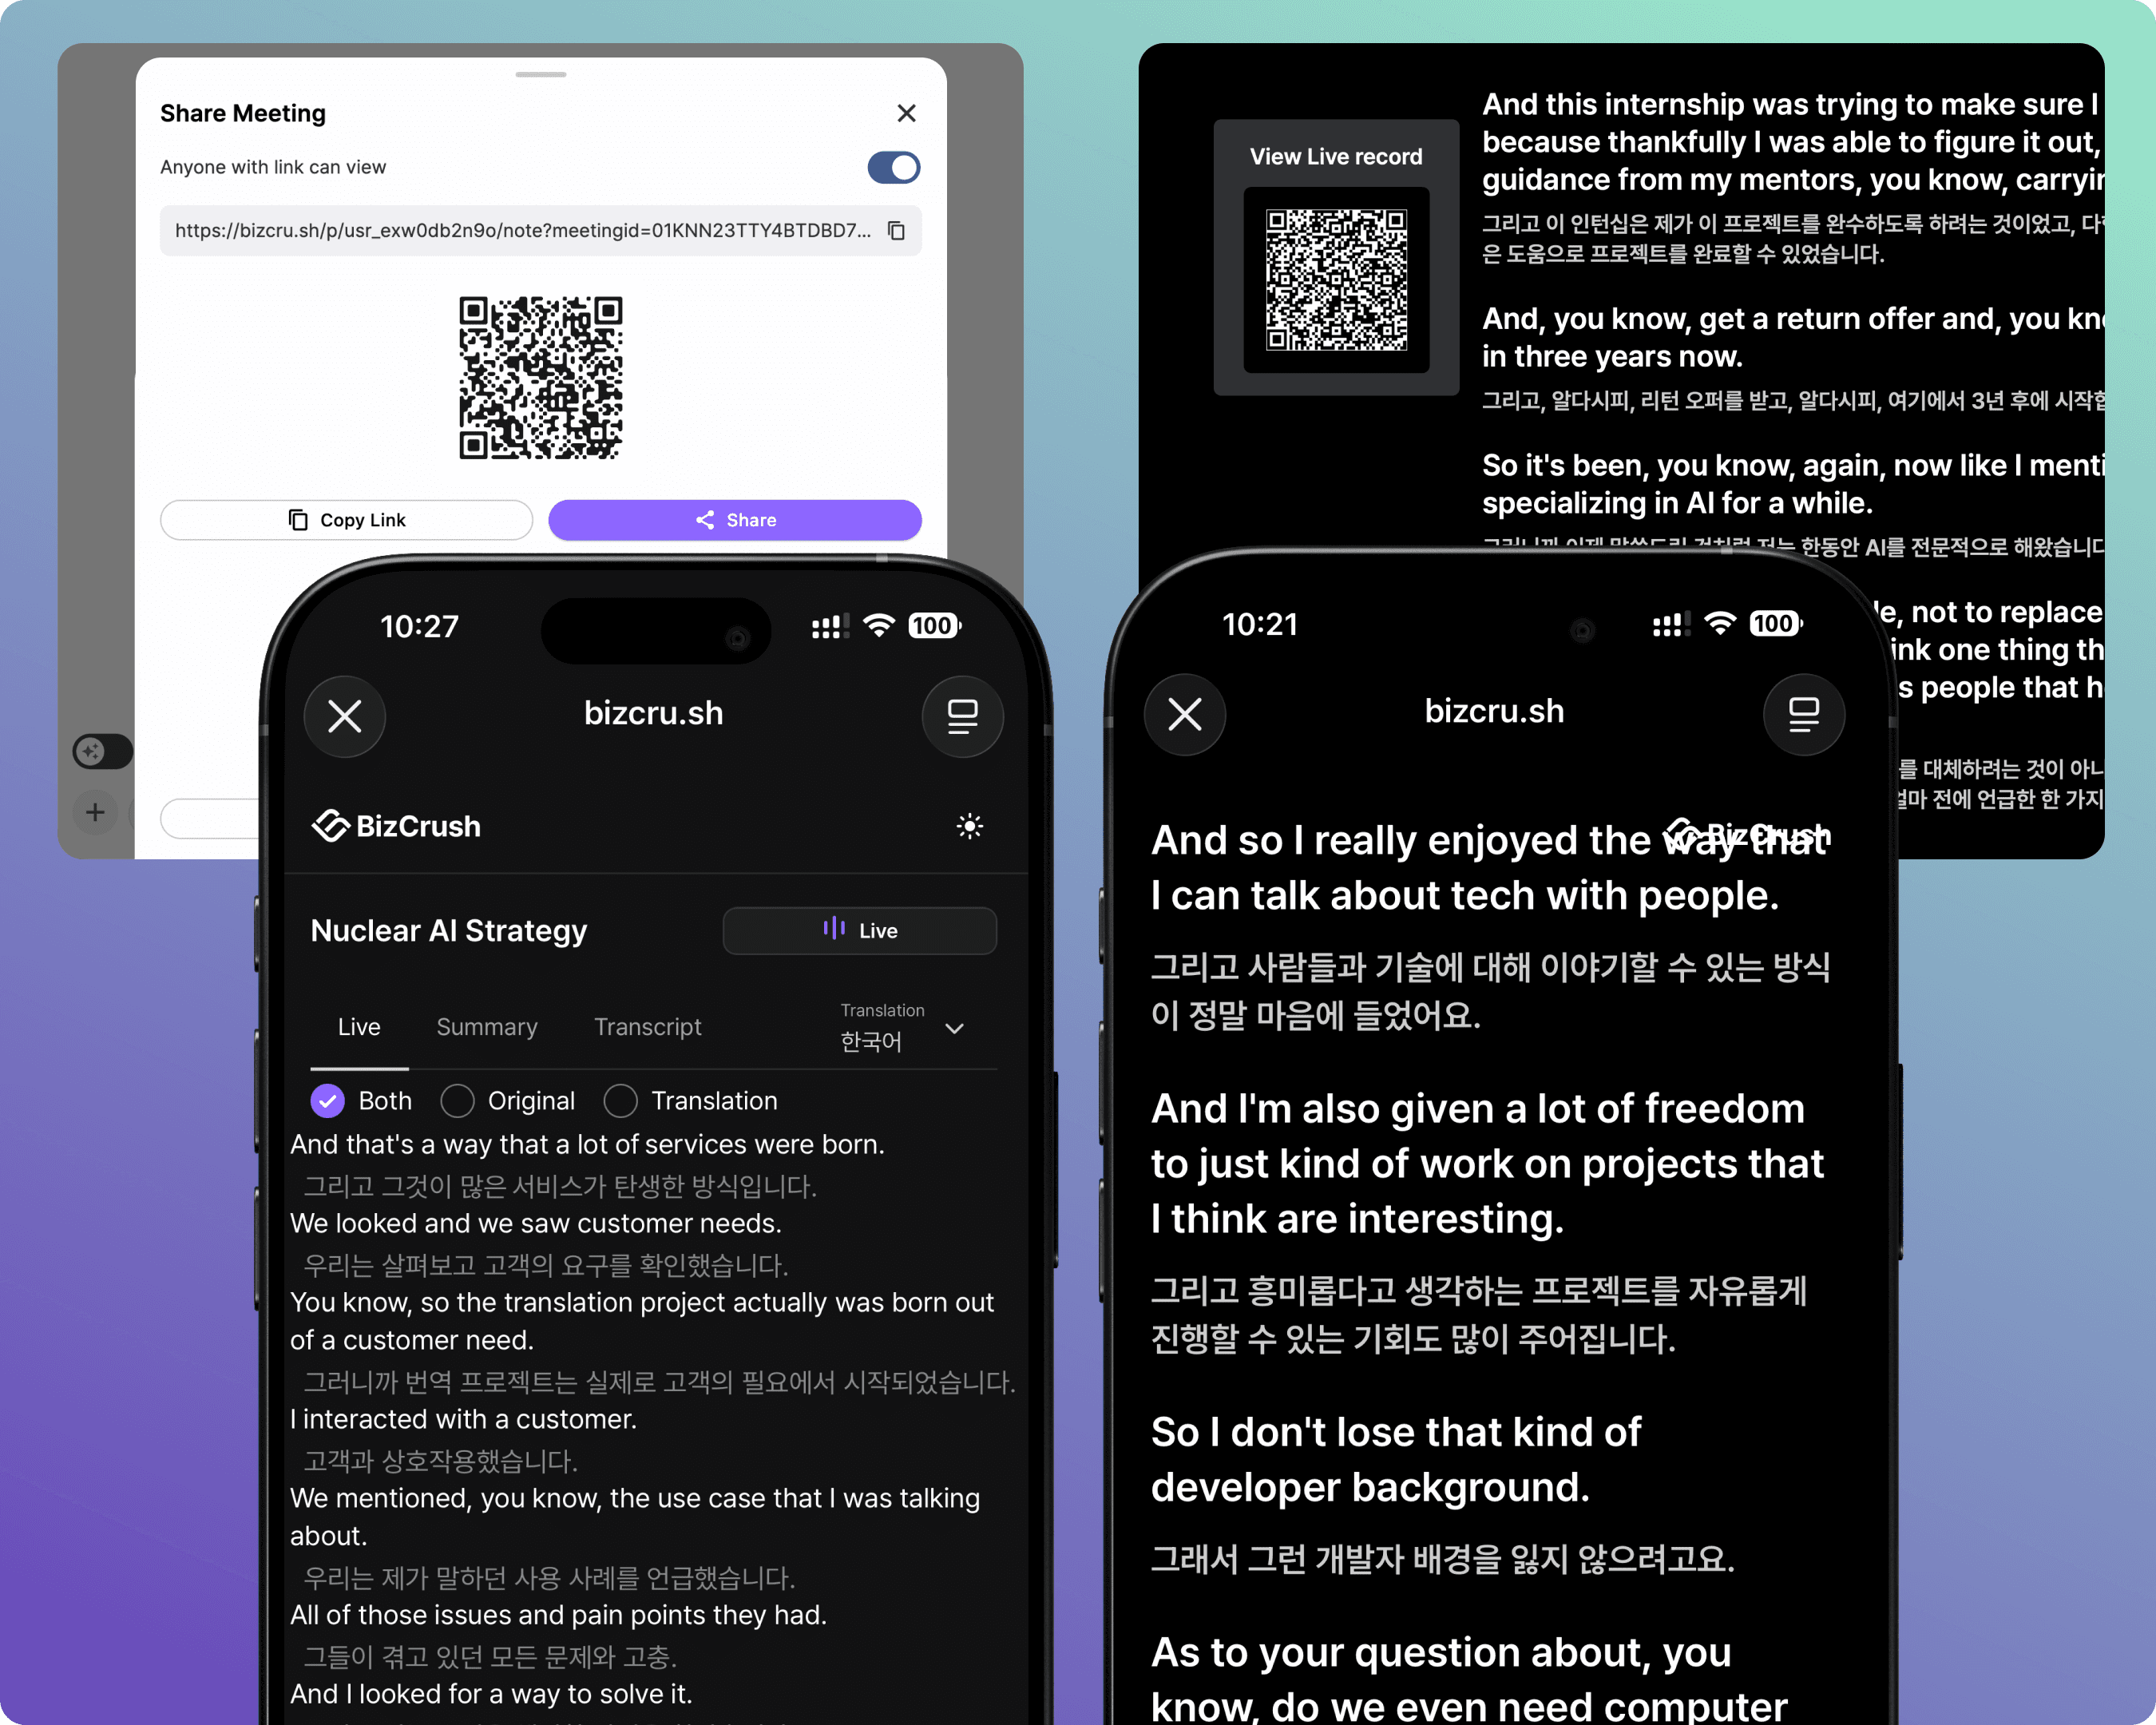
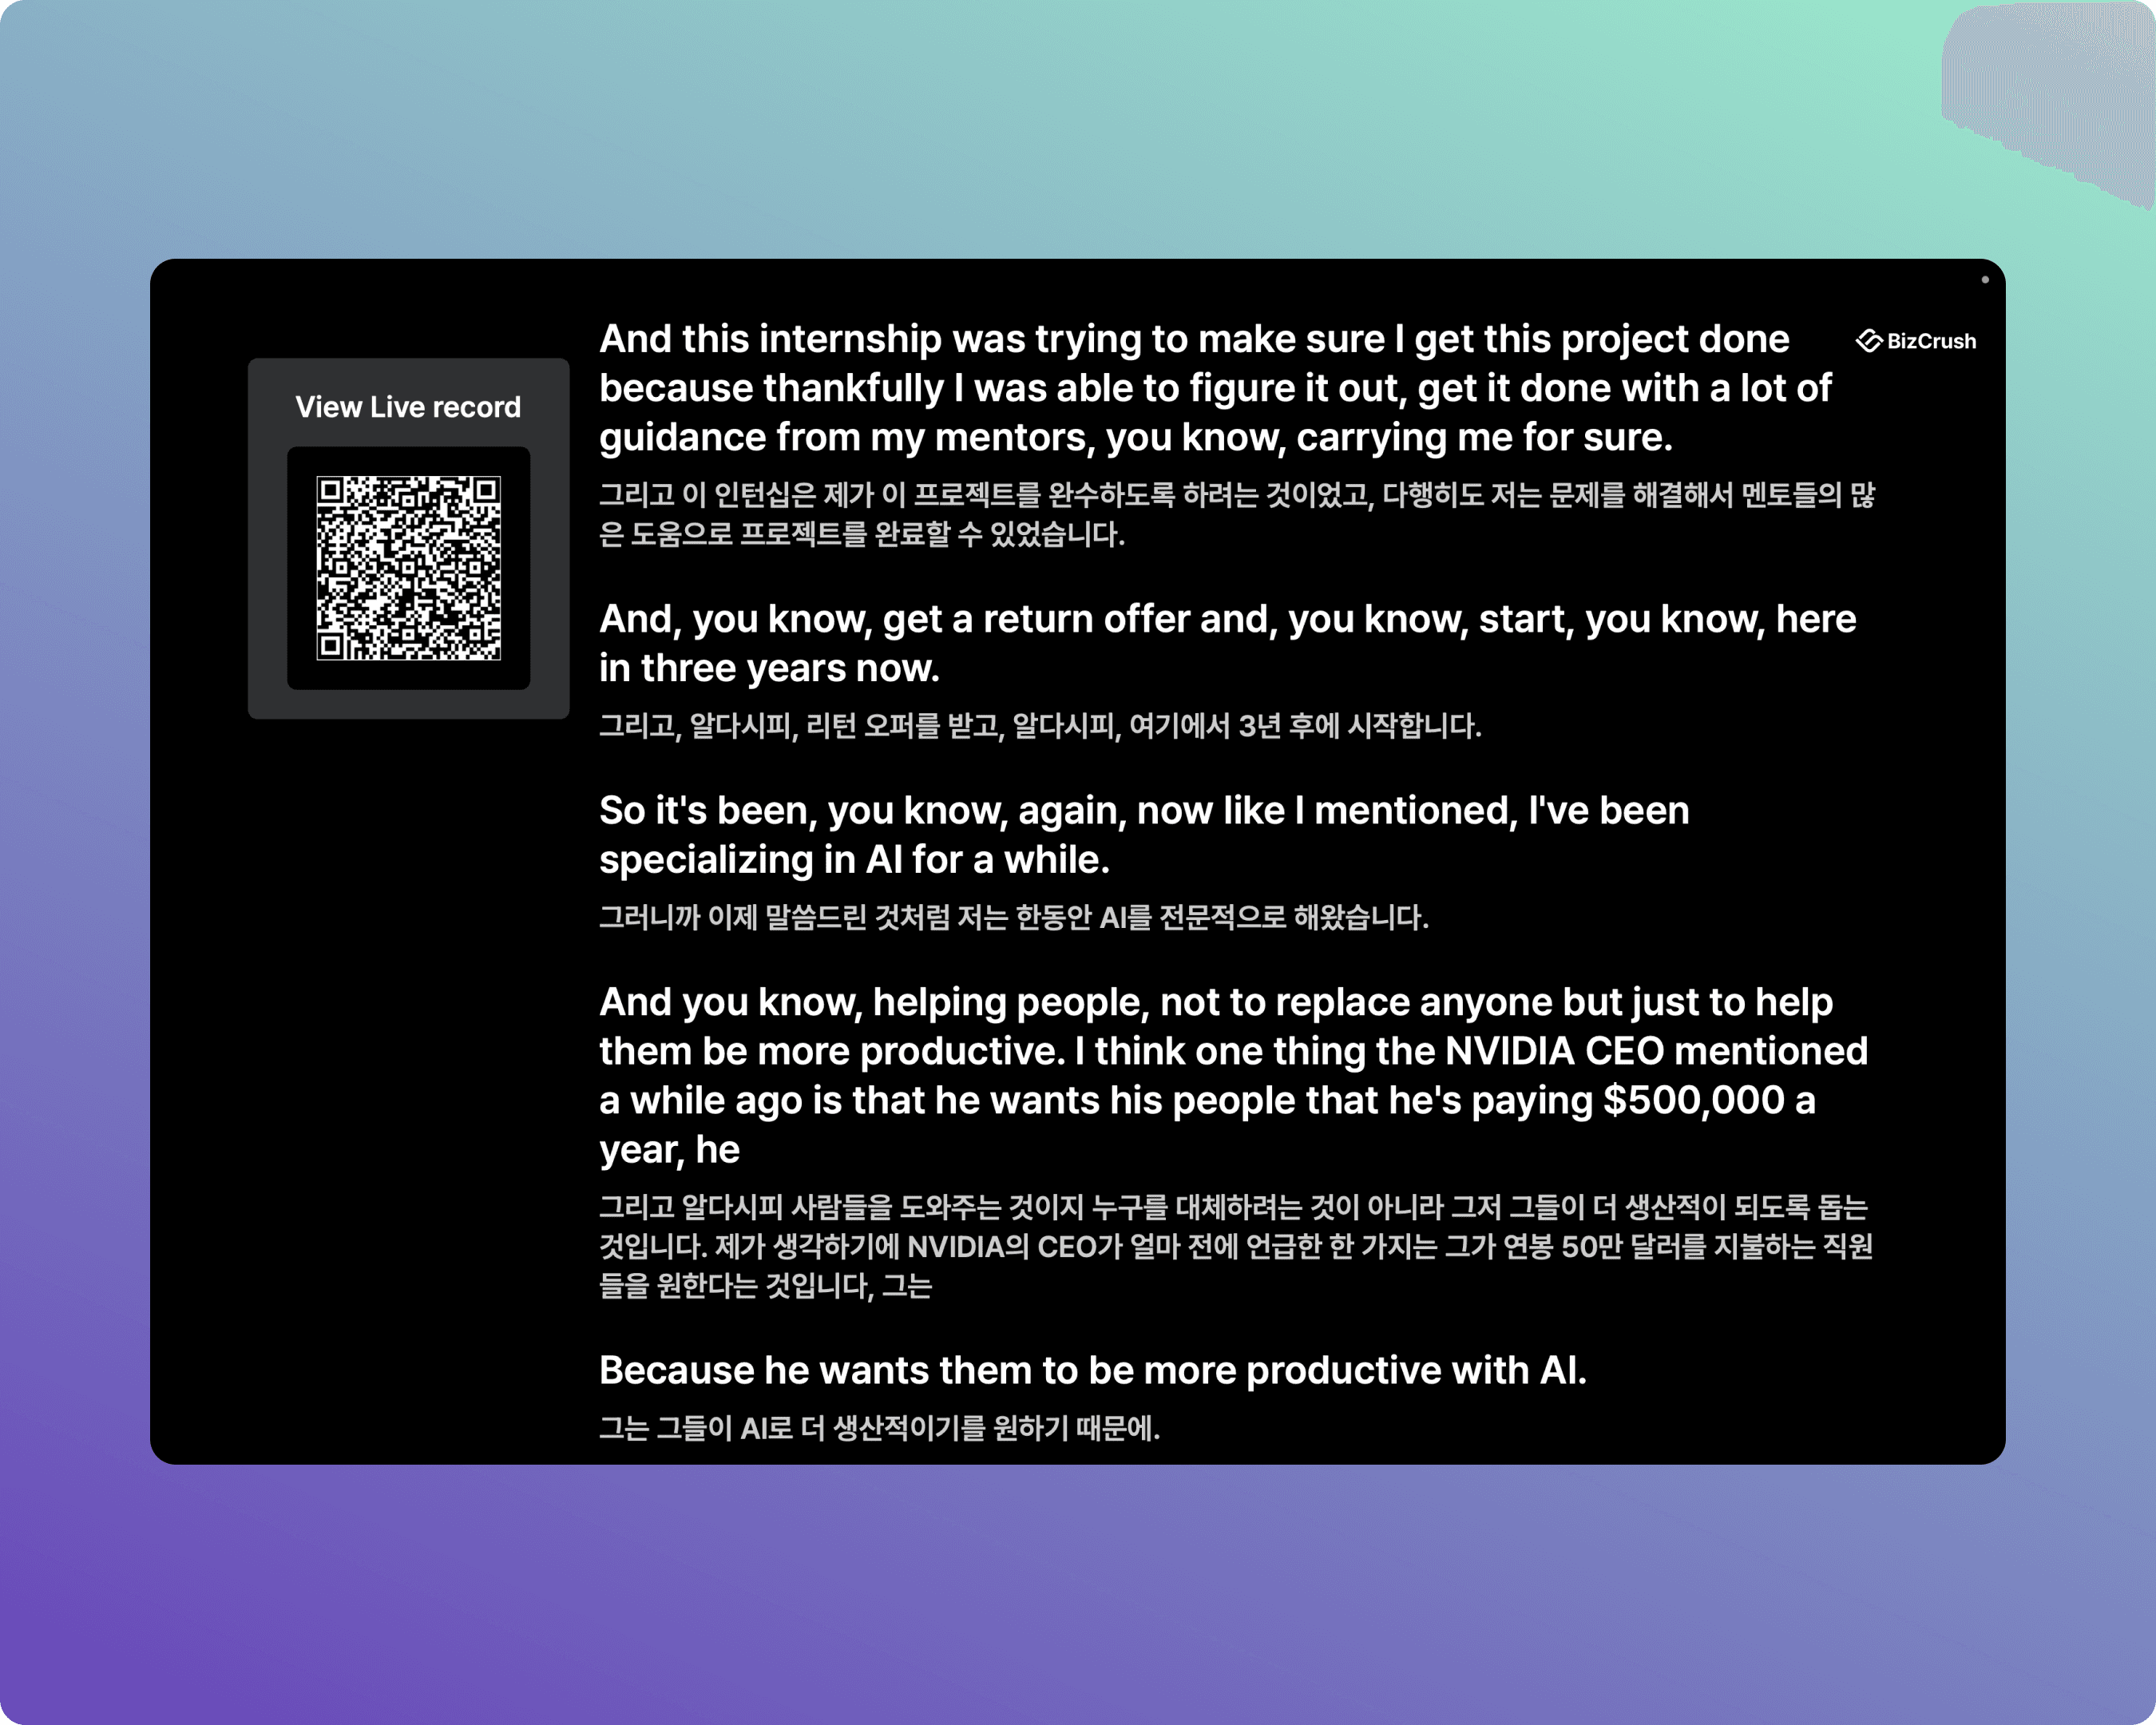
Attendee Screen — Meeting Room
When an attendee scans the meeting room QR code or joins via a shared link, the screen below appears.
They can switch between the Live, Summary, and Transcript tabs in their browser to view the content.
They can choose the original transcript, translation, and display format in their preferred language.
When they select a language using the Live Audio Translation feature, the translated audio plays in real time.
They can stay connected for up to one hour after the meeting ends.
How to Share Presentation Mode
When attendees scan the Presentation Mode QR code, they are directed to a dedicated viewer for the subtitles.
To enable access, turn on the [Show QR] option in the settings panel.
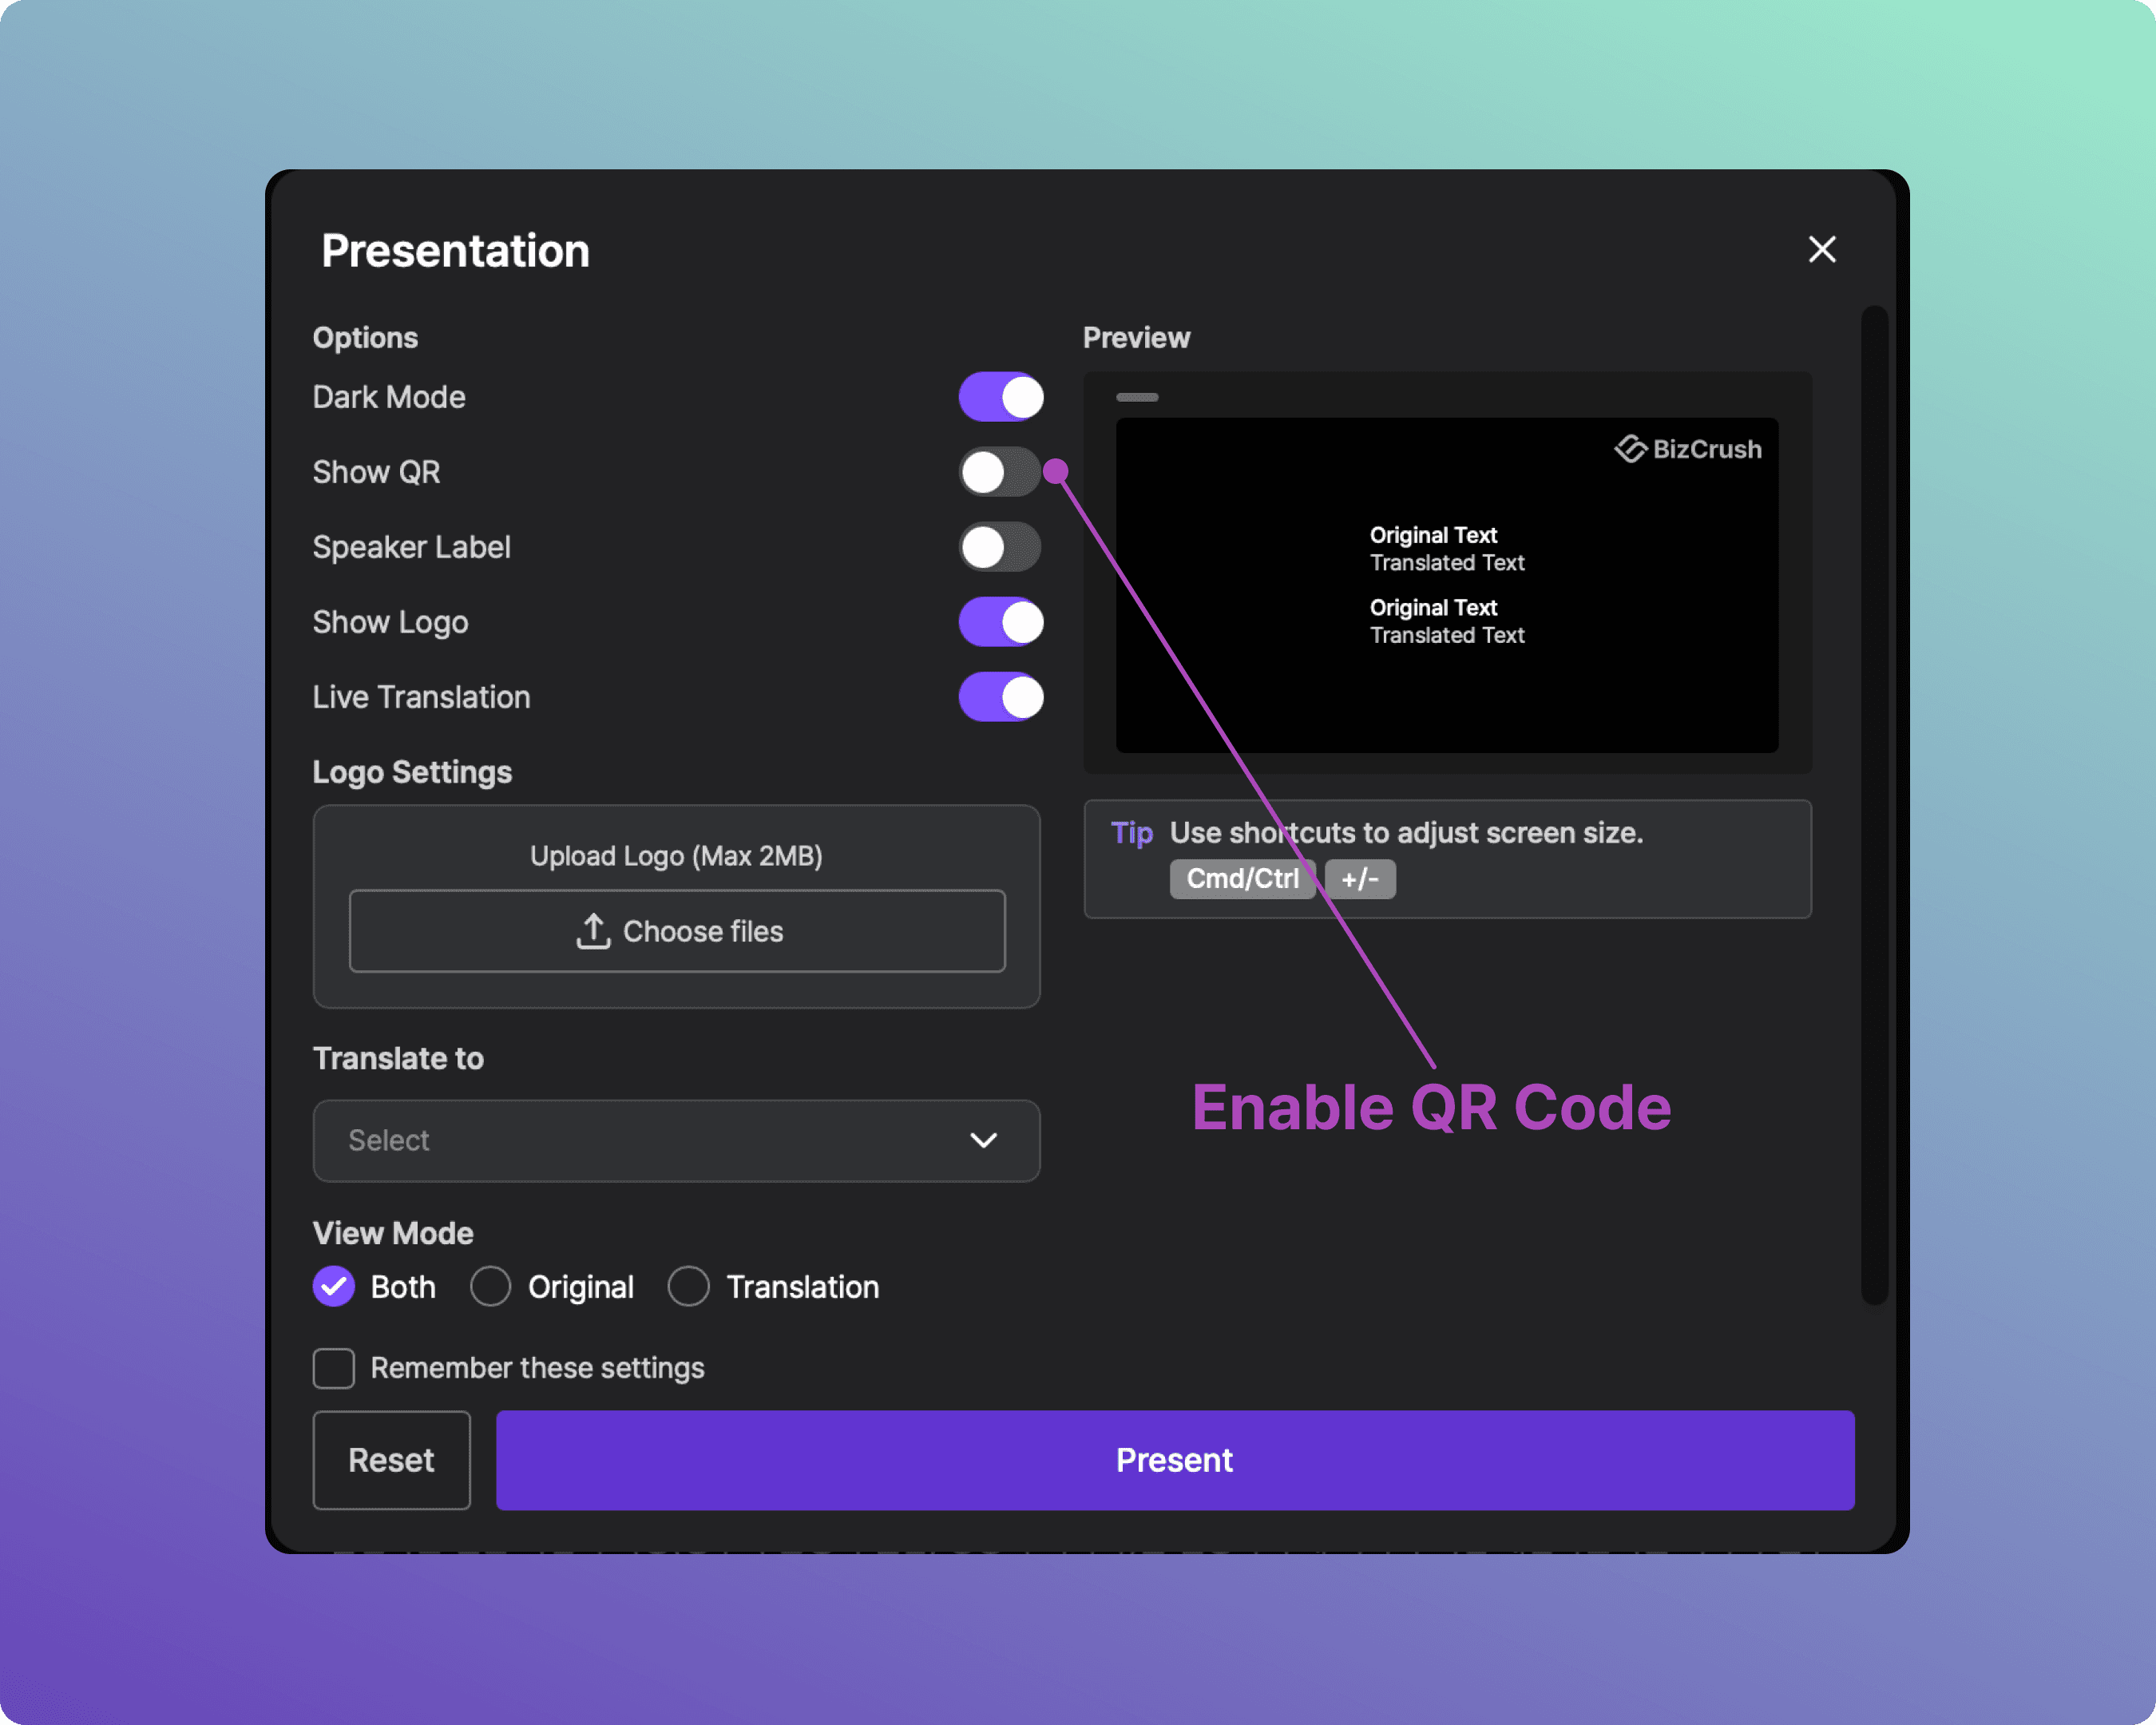
Attendees can then scan the QR code to view the subtitles via a browser on their preferred device.
Attendee Screen — Presentation Mode
When an attendee scans the Presentation Mode QR code, the screen below appears.
They are redirected to the dedicated subtitle viewer in their browser.
They cannot adjust settings such as language.
They see the same subtitles as the main screen, mirrored on their own device.

7. Event Day Checklist & Troubleshooting
Pre-Session Checklist
Desktop App launched and logged in
Meeting created, and recording started
Spoken Language and Translation Language confirmed
Custom keywords registered
Overlay turned on and positioned (if using Overlay mode)
Share link / QR code tested and displayed for attendees
Microphone audio check (speak into the venue mic and confirm text appears)
Common Issues & Solutions
Q. The microphone is blocked / no text is appearing.
A.Go to your computer's OS settings → Privacy/Security → Microphone and ensure BizCrush has permission to access your microphone. Also, move the laptop or phone closer to the venue's PA speakers or the presenter.
Q. The Overlay subtitles aren't showing up.
A.Make sure you are using the Desktop App — Overlay does not work on the mobile app or web browser version. Then check that the Overlay toggle is turned ON in the settings.
Q. Presentation Mode isn't working.
A.Ensure that the meeting is actively recording on the host device. If the link was opened before recording started, refresh the browser page.
Q. Accuracy drops because the venue is too noisy.
A.BizCrush uses AI noise cancellation, but in highly reverberant rooms, physical placement matters. Place the recording device as close to the PA speaker output or the presenter as possible.
Q. I have privacy concerns about recording.
A.Click the Padlock icon in the bottom toolbar to turn on Privacy Mode. When enabled, no voice data or transcripts are saved to your device or our servers — only real-time translation will function.
Need Help?
If you have any questions or require technical support for your event, please contact us anytime at business@bizcrush.ai.

